If you’re planning to install new RAM in your PC or build a new system, there’s one small mistake that can drastically affect your computer’s performance—or worse, leave your PC non-functional.
This article will walk you through the correct way to install RAM, highlight common mistakes people make, and explain why using matching memory modules is crucial.
Why RAM Installation Matters
Installing RAM may seem like a simple task, but if done incorrectly, it can lead to:
- Poor system performance
- Boot issues
- Stability problems during heavy tasks like gaming or video editing
Even tech-savvy users sometimes install RAM incorrectly or mix incompatible modules, which can bottleneck performance.
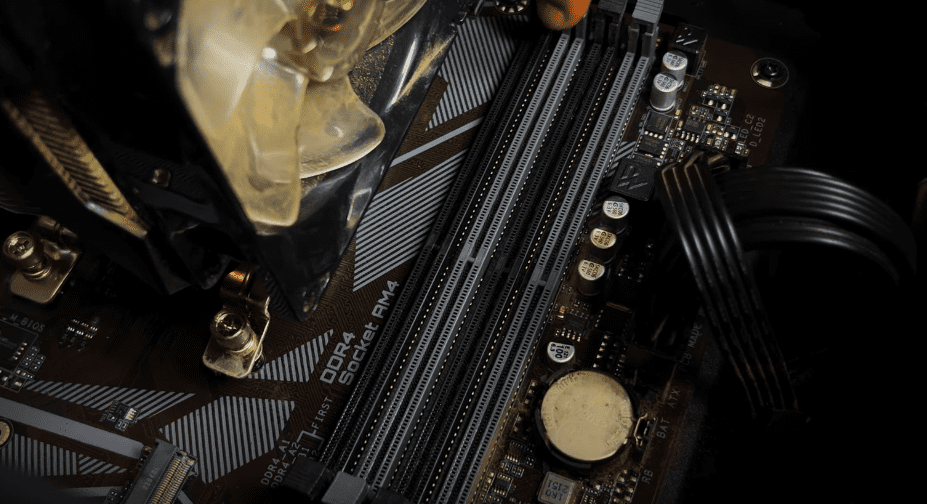
Understanding RAM Slots on the Motherboard
Most modern motherboards come with four RAM slots, typically labeled as:
- DDR4_A1
- DDR4_A2
- DDR4_B1
- DDR4_B2
Installation Rules Based on Number of RAM Sticks:
| Number of RAM Sticks | Install In Slot(s) |
|---|---|
| 1 | DDR4_A2 |
| 2 | DDR4_A2 and DDR4_B2 |
| 3 | A1, A2, and B2 (not ideal) |
| 4 | All four slots: A1, A2, B1, B2 |
Using the correct pairing ensures that dual-channel memory mode is activated, which improves memory bandwidth and performance.
Choosing the Right RAM
When buying a new RAM stick, always match the existing one in the following aspects:
- Brand (if possible)
- Memory Type (e.g., DDR4)
- Capacity (e.g., 16GB)
- Speed (e.g., 3600MHz)
- Latency and Voltage
Mixing brands or speeds can cause compatibility issues, which may lead to system instability or reduced performance.
Important Tip:
Never remove the warranty sticker from your RAM. Doing so will void the warranty from the manufacturer.
Installing RAM: Step-by-Step
- Power Off your PC completely and unplug it.
- Open the side panel of your cabinet.
- Locate the RAM slots on your motherboard.
- Unlock the RAM slot latches:
- Upper latch flips up
- Lower latch may remain fixed depending on the motherboard
- Align the RAM stick with the notch, ensuring the shorter and longer ends match the slot.
- Press down gently but firmly until both latches click into place.
- Close your case and reboot the system.
If properly installed, your PC should boot and recognize the new memory.
Performance Boost After Installation
In this case, a Corsair Vengeance LPX DDR4 16GB 3600MHz stick was added to an existing system with the same configuration. After the upgrade:


- RAM usage during high-performance games like GTA V was more optimized.
- System performance became smoother and more responsive.
- There was no lag or delay during startup.
Note on PC Maintenance:
Even with high-end RAM and processors, PCs can slow down over time if not maintained properly. Regular cleaning and software maintenance are essential. A separate guide on PC maintenance will be published soon.
Final Thoughts
If you’re upgrading your RAM:
- Make sure to install in the right slots.
- Use identical RAM sticks if possible.
- Avoid mixing brands or speeds.
- Handle components carefully to avoid damage.
These small but important tips can help prevent performance drops and ensure your system runs at its best.
Tags
PC RAM installation, how to install RAM, RAM upgrade, dual channel memory, PC performance tips, gaming PC RAM guide, Corsair Vengeance RAM, RAM slot guide, motherboard RAM slots
Hashtags
#RAMUpgrade #PCBuildTips #CorsairVengeance #InstallRAM #GamingPC #TechGuide #PCPerformance #DIYPC #PCMaintenance
Disclaimer
This article is for educational and informational purposes only. Always follow the manufacturer’s guidelines and handle electronic components with care. If unsure, consult a certified technician to avoid damage or voiding warranties.


