Migrating a WordPress website from localhost to a live paid hosting environment may sound daunting to beginners, but it’s a smooth process when done step-by-step. This article explains how to successfully migrate your locally hosted website to Hostinger, a popular web hosting provider, using the UpdraftPlus plugin for backup and restore.

🟢 Why Migrate from Localhost to Paid Hosting?
Developing on localhost is ideal for building and testing your website. However, to make it accessible to the world, you need to host it on a live server. Paid hosting providers like Hostinger offer domain registration, better speed, security, and customer support, all in one place.
✅ Step-by-Step Guide to Migrate Localhost WordPress Website to Hostinger
Step 1: Purchase Hosting and Domain on Hostinger
- Open your browser and search for Hostinger.
- Choose a hosting plan:
- Premium Plan (₹149/month): Allows up to 25 websites and includes a free domain for one year.
- Business Plan (₹249/month): Ideal for business users.
- Select 12 months instead of 48 months if you’re a beginner.
- Use a referral link or coupon to get 20% off (optional).
- Make the payment using UPI, PayPal, credit/debit card, etc.
✅ Note: If you already purchased a plan, you can skip this step and log in to your Hostinger dashboard.
Step 2: Claim Your Free Domain
- Go to the Domains section in Hostinger’s dashboard.
- Click on Get New Domain.
- Search for your desired domain (e.g.,
shop.com). If it’s taken, try alternative suggestions. - Finalize and claim the free domain.
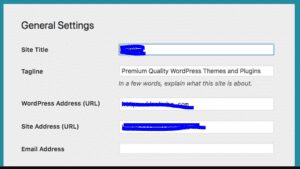
Step 3: Create Your WordPress Website on Hostinger
- Navigate to the Websites tab.
- Click on Add Website and select WordPress.
- Set up your admin email and strong password (preferably something you’ll remember).
- Select your newly purchased free domain or choose a free subdomain temporarily.
- Install WordPress. It will take a few seconds.
Step 4: Backup Your Localhost WordPress Site Using UpdraftPlus
- On your localhost WordPress site, go to:
- Plugins → Add New → Search for UpdraftPlus.
- Click Install, then Activate the plugin.
- Go to:
- Settings → UpdraftPlus Backups.
- Click Backup Now.
- Ensure you check the box to include the database and files.
- Once the backup completes, you’ll see five components:
- Database
- Plugins
- Themes
- Uploads
- Others
- Click each file → Download to your computer. Make sure not to download duplicates.
Step 5: Restore Backup on Live Hosting WordPress
- On your Hostinger WordPress site, install and activate UpdraftPlus again.
- Go to:
- Settings → UpdraftPlus Backups.
- Click on Upload Backup Files.
- Upload all five
.zipfiles you downloaded earlier. - If a file was uploaded twice, delete one to avoid confusion.
- Upload all five
- After upload, you’ll see all components listed as Complete (themes, plugins, uploads, etc.).
- Click Restore, check all boxes, and proceed with restoration.
- Let the restoration process complete.
Step 6: Finalize and Login to Your New Site
- After restoration, return to the UpdraftPlus dashboard.
- Use your localhost login credentials to log in to your new live WordPress site.
- Visit your live website (e.g.,
www.yourdomain.com) and confirm that:- All pages, themes, plugins, and settings are intact.
- The design and functionality match your localhost site.
✅ Frequently Asked Questions (FAQs)
Q1: Do I need to buy a domain and hosting separately?
No. Hostinger’s Premium and Business plans offer free domain registration for one year.
Q2: Why use UpdraftPlus instead of other plugins?
UpdraftPlus is beginner-friendly, allows full site backups, and makes the restore process seamless.
Q3: Will my localhost password work after migration?
Yes. The entire user database, including admin credentials, is restored.
Q4: Can I migrate to a subdomain first, then switch to a custom domain?
Yes. Hostinger allows you to test on a subdomain and later point your domain once ready.
✅ Final Words
Migrating from localhost to a live server using Hostinger and UpdraftPlus is an efficient, secure, and beginner-friendly process. This method ensures that your full website — content, themes, plugins, and settings — is accurately mirrored onto your new hosting environment.
💡 Pro Tip: Always keep a local and cloud backup before making major changes.
🔗 Useful Links
🔒 Disclaimer
This guide is for educational purposes. Please double-check domain availability and pricing directly on the official Hostinger website. Backup plugins may have limitations in their free versions.
🏷️ Tags
wordpress migration, localhost to live hosting, hostinger tutorial, updraftplus backup, wordpress backup plugin, migrate wordpress site


🔖 Hashtags
#WordPressMigration #HostingerGuide #UpdraftPlus #LocalhostToHosting #WordPressTips #WebsiteLaunch #BeginnerWebHosting #HostingerIndia