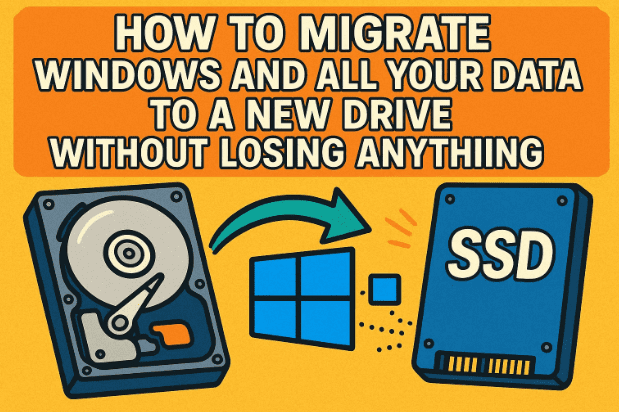
Upgrading or replacing your hard drive is one of the best ways to give your computer a new life — especially if you’re moving from a traditional hard drive (HDD) to a faster solid-state drive (SSD). However, reinstalling Windows, drivers, and all your data from scratch can be time-consuming and risky if you’re not familiar with system setup.
The good news is that there’s a way to migrate your entire Windows system — including all applications, settings, and files — to a new drive without losing your license or data. This detailed guide walks you through every step of the process using MiniTool Partition Wizard, a trusted free tool for disk cloning and partition management.
By the end of this guide, you’ll have a complete copy of your old drive safely running on your new SSD or HDD — fully bootable, activated, and identical to your original setup.
What Is Disk Migration and Why You Might Need It
Disk migration (or OS migration) means cloning your operating system and data from one drive to another. It’s different from reinstalling Windows because instead of setting up everything again, it transfers your exact configuration — apps, licenses, and files — to a new drive.
You might want to migrate your system when:
- You’ve upgraded to a larger capacity drive.
- You’re moving from an HDD to SSD for speed improvements.
- You need to replace a failing hard drive.
- You want to duplicate your setup on another machine.
Regardless of your goal, the key is to clone everything safely — and that’s where MiniTool Partition Wizard comes in.
Step 1: Download and Install MiniTool Partition Wizard
Let’s start by downloading the required software.
MiniTool Partition Wizard is a free, powerful disk management utility that helps users manage partitions, format drives, and migrate operating systems effortlessly.
- Open your web browser and visit the official website:
👉 https://www.minitool.com/partition-manager/ - Download the Free Edition.
- Once downloaded, open the setup file and follow the on-screen instructions to install it on your PC.
When installation is done, you’ll see a desktop shortcut — we’ll use it in the next step.
Step 2: Connect Your New Drive to the Computer
Before starting the migration, you need to connect the target drive (the one you’re migrating to) to your computer.
You can connect it in different ways depending on your setup:


- Desktop PC: Simply connect the new SSD/HDD to a free SATA port and power cable inside your case.
- Laptop: Use a SATA-to-USB adapter or an external drive enclosure to connect the new drive externally via USB.
💡 Tip: If your laptop has a USB 3.0 port, use it. It offers significantly faster transfer speeds than USB 2.0.
Once connected, Windows will automatically detect the new drive. You don’t need to format it — MiniTool will handle everything.
Step 3: Launch MiniTool Partition Wizard
Now that both drives are connected, it’s time to open the software.
- Double-click on the MiniTool Partition Wizard icon on your desktop.
- When prompted by Windows, click Yes to allow it to make system changes.
- Choose Launch Application when the window opens.
You’ll now see all your drives listed — usually Disk 1 (your current system drive) and Disk 2 (the new drive).
Step 4: Start the OS Migration Process
So far, we’ve prepared the tools and confirmed both drives are detected. Now let’s move to the most important part — cloning your Windows system.
- In MiniTool’s main window, click on Migrate OS to SSD/HD from the left sidebar.
- You’ll now be presented with two options:
- Option A: Migrate the entire system disk — this includes Windows, all partitions, programs, and user data.
- Option B: Migrate only the system partition — this copies just Windows and essential files.
For most users, Option A is recommended since it preserves all your data and applications exactly as they are. Select it and click Next.
Step 5: Choose the Destination Drive
Next, select your target drive (the new SSD or HDD).
A warning will appear saying that all data on the destination drive will be deleted. If there’s any important data on that drive, back it up first.
Click Yes to confirm and proceed.
Step 6: Select Copy Options
Here, MiniTool Partition Wizard gives you two options on how to copy the partitions:
- Fit partitions to entire disk — this automatically resizes partitions to fill the new drive’s space proportionally. (Recommended if your new drive is larger.)
- Copy partitions without resize — keeps partition sizes identical to the original drive.
For most users, it’s best to choose “Fit partitions to entire disk.”
Click Next once you’ve made your choice.
Step 7: Review Boot Configuration Instructions
Before finalizing, the software displays a note reminding you to change your boot drive in BIOS after the migration.
This means that once the cloning is complete, you’ll need to instruct your computer to start from the new drive.
Click Finish to continue.
Step 8: Apply the Changes
Now that everything’s set up, click the Apply button (located in the top-left corner).
A confirmation window will appear, asking if you want to proceed. Click Yes to start the migration.
MiniTool will now begin cloning your Windows system, including all files, programs, and configurations. This may take anywhere from a few minutes to an hour depending on your drive size and transfer speed.
During this process:
- Avoid using your PC heavily.
- Don’t disconnect or power off the system.
- If prompted, allow the software to restart your PC to complete the process.
Step 9: Configure Boot Settings in BIOS
Once migration is complete, your computer might still try to boot from the old drive. To fix that, you’ll need to change the boot priority in your system BIOS.
Here’s how to do that:
- Restart your computer.
- Press the BIOS key repeatedly during startup (commonly F2, F10, DEL, or ESC depending on your brand).
- Go to the Boot Order or Boot Priority section.
- Set your new drive (the SSD or HDD where you migrated Windows) as the first boot device.
- Save and exit (usually F10).
Your PC will now start directly from the new drive.
Step 10: Verify the Migration
Once Windows boots up, take a moment to confirm everything transferred correctly.
- Open File Explorer and check that all your folders, documents, and applications are still there.
- Right-click on This PC → Properties to confirm that Windows is activated.
- Open Disk Management (type it in the Start menu) to confirm your new drive shows up as “Disk 0” or “Boot (C:)”.
If everything looks good, congratulations — your migration was a success!
Optional: Replace Your Old Drive
If you performed the migration using an external USB connection (like on a laptop), you’ll now want to physically replace the old drive.
- Power off your laptop and unplug it.
- Remove the back panel carefully using a screwdriver.
- Locate the old hard drive, unscrew it, and gently disconnect it.
- Replace it with the new SSD you just cloned Windows onto.
- Secure it with screws and close the panel.
Power on your laptop — it should boot instantly from the SSD.
Troubleshooting Tips
If you encounter issues like Windows not booting or files missing, here are some quick fixes:
- Windows doesn’t boot from the new drive:
Go back into BIOS and ensure the new drive is set as the first boot option. - Cloning fails midway:
Make sure both drives have stable connections and enough space. Disable antivirus software temporarily. - Drive not detected:
Check cables or adapters. For laptops, ensure the enclosure supports the correct interface (SATA or NVMe). - Windows activation lost:
Don’t worry — digital licenses are tied to your motherboard, not the drive. Simply connect to the internet, and Windows will reactivate automatically.
Frequently Asked Questions (FAQ)
Q1: Will I lose my Windows license after migrating to a new SSD?
No. Your Windows license is linked to your motherboard. Once you boot from the new drive, it will automatically activate.
Q2: Can I use this process to move from HDD to SSD?
Yes, absolutely. In fact, that’s one of the most common and effective upgrades you can perform.
Q3: Does MiniTool Partition Wizard work for both MBR and GPT drives?
Yes, it supports both partition styles. It even prompts you if your new drive uses a different format.
Q4: Can I delete the old drive after migration?
Yes, once you’ve confirmed that the new drive boots properly, you can format the old one and use it as storage.
Q5: What’s the difference between cloning and imaging?
Cloning makes an exact, bootable copy of your drive. Imaging compresses the data into a backup file that must be restored later.
Final Thoughts
Migrating your Windows system might sound intimidating at first, but with the right tool and careful steps, it’s a straightforward process that saves hours of reinstallation work.
Using MiniTool Partition Wizard, you can effortlessly transfer your OS, data, and applications to a new drive — ensuring your system feels brand new while keeping all your personal settings intact.
So, whether you’re upgrading to an SSD or simply replacing an old hard drive, this method guarantees a smooth, lossless transition. Once done, you’ll notice your computer boots faster, runs quieter, and feels more responsive than ever before.
Official Software Link:
👉 https://www.minitool.com/partition-manager/
Disclaimer:
This article is for educational purposes only. Always back up your data before performing any disk migration or cloning operation. MiniTool Partition Wizard is a trusted utility, but system-level changes should be done carefully to prevent data loss.
#WindowsMigration #SSDUpgrade #MiniTool #CloneDrive #DataBackup #Windows10 #SystemCloning #TechGuide


