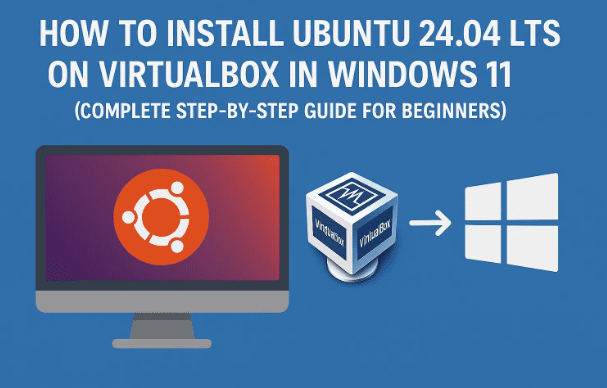
Running Linux inside Windows is a fantastic way to learn, experiment, and build safe sandboxes—without touching your main system. In this in-depth guide, we’ll install Ubuntu 24.04 LTS on Oracle VM VirtualBox (on Windows 11 or any modern Windows). We’ll cover the “why,” the prerequisites, the exact installation steps, common pitfalls, post-install optimizations, and a handy troubleshooting + FAQ section at the end.
This article is written with beginners in mind—but it doesn’t skip details. We’ll start gently, set expectations, and then move into the steps one by one so you always know why you’re doing something, not just what to click.
1. What Is a Virtual Machine (and Why Use One)?
Before jumping into installs, it helps to understand what a virtual machine (VM) is. A VM is a software-based computer that runs inside your main operating system (Windows). Think of it like a computer within a computer: it has virtual CPU, RAM, storage, and its own operating system—completely isolated from your main Windows setup.
That isolation is incredibly useful. You can test Linux, try developer tools, learn server administration, practice ethical hacking labs, or break things on purpose—without risking your files on Windows. If something goes wrong? Delete the VM and start fresh. Simple.
Let’s move to the tool that makes this possible on Windows—VirtualBox.
2. What Is VirtualBox?
Oracle VM VirtualBox is a popular, free and open-source virtualization platform that lets you create VMs easily. You can run Linux, BSD, even other Windows versions, all inside Windows 11. VirtualBox offers:
- A friendly UI for creating and managing VMs
- Support for USB devices, shared folders, and clipboard
- Snapshots (save and restore VM states instantly)
- Extensions for extra features (USB 2.0/3.0, NVMe, etc.)
We’ll use VirtualBox because it’s beginner-friendly and well-documented.
3. A Quick Primer on Linux and Why Ubuntu 24.04 LTS
Linux is a family of open-source operating systems known for stability, security, and flexibility. Among dozens of “distros” (distributions), Ubuntu stands out for beginners thanks to:


- User-friendly desktop with a modern interface
- Huge community and extensive documentation
- LTS (Long-Term Support) releases that receive updates for 5 years
For this guide we’ll use Ubuntu 24.04 LTS. You can also experiment with non-LTS releases (like 24.10), but LTS is the best choice for predictable stability.
4. System Requirements & Pre-Checks (Important)
Before we start, a couple of checks will save you time later. Think of this as laying a strong foundation; it prevents most of the “why isn’t it booting?” headaches.
- Hardware Virtualization: Ensure Intel VT-x or AMD-V is enabled in your PC’s BIOS/UEFI. Most modern PCs have this enabled by default, but if not, you’ll need to switch it on.
- Windows Features Conflicts: Hypervisors can conflict. If VirtualBox performance is poor or VMs won’t start:
- Disable Hyper-V, Windows Hypervisor Platform, and Virtual Machine Platform from “Turn Windows features on or off” (reboot after changes).
- Recommended VM Resources (for Ubuntu Desktop):
- CPU: 2 cores (4+ if you plan to use heavy apps)
- RAM: 4–8 GB (Ubuntu works with 2 GB, but 4+ is smooth)
- Disk: 30–40 GB virtual disk (dynamically allocated is fine)
- Graphics: Enable 3D acceleration (optional but helpful)
- Admin Access: Installation of VirtualBox requires administrator privileges on Windows.
If those items look good, we’re ready to download the software we need.
5. Download Ubuntu and VirtualBox (Official Links)
It’s always best to download from the official sites to avoid tampered installers. While the process is simple, picking the right files is important—let’s do that now.
- Ubuntu 24.04 LTS (Desktop ISO):
https://ubuntu.com/download - Oracle VM VirtualBox (Windows hosts):
https://www.virtualbox.org/
Optional (recommended later in the guide):
- VirtualBox Extension Pack (matches your VirtualBox version):
Available on the same VirtualBox downloads page.
Go ahead and start both downloads. The Ubuntu ISO is around 6–7 GB, so it may take a while.
6. Install VirtualBox on Windows (With Smart Defaults)
With the VirtualBox installer downloaded, it’s time to set up the virtualization platform. The installation wizard is straightforward, but a little context helps you make better choices.
- Run the installer as Administrator
Right-click the installer → Run as administrator. - Setup Wizard
Accept defaults for features (VirtualBox USB, networking, etc.). These are safe and commonly needed. - Network Interfaces Warning
VirtualBox installs a virtual network adapter. Your internet may briefly reset—this is normal. - Install → Wait for files to copy.
- Launch VirtualBox at the end of setup.
After installation, consider downloading the Extension Pack (for USB 2.0/3.0, NVMe, encryption). We’ll install it after creating the VM.
7. Create a New Ubuntu Virtual Machine (All Settings Explained)
This is where we define the “virtual hardware” of your Linux machine. Don’t worry, you can edit most settings later—so we’ll choose good defaults that balance performance and stability.
Before we touch buttons, a quick mental model: your Windows PC (the “host”) lends slices of CPU, memory, and storage to the VM (the “guest”). You want to be generous enough for Ubuntu to feel responsive—but not so generous that Windows struggles.
Step-by-Step: Create the VM
- Open VirtualBox → click New (top-left).
- Name & ISO
- Name:
Ubuntu 24.04 LTS(or anything you like) - Type: Linux
- Version: Ubuntu (64-bit)
- ISO Image: click the dropdown → Other… → choose the Ubuntu ISO you downloaded.
- Optionally tick Skip Unattended Installation if you prefer to do account setup yourself in the Ubuntu installer. (We’ll assume manual setup for clarity.)
- Name:
- Memory & CPU
- Base Memory: 4096 MB (4 GB) or more if you have 16+ GB on Windows
- Processors: 2 CPUs (4 if your PC has 8+ logical cores)
Stay within the green zone to avoid starving Windows.
- Virtual Hard Disk
- Create a virtual hard disk now → VDI (VirtualBox Disk Image)
- Dynamically allocated (grows as needed)
- Size: 30–40 GB (you can resize later if needed)
- Create the VM.
Fine-Tuning VM Settings (recommended)
Select your VM → Settings:
- System → Motherboard
- Boot Order: Optical, Hard Disk (fine by default)
- Chipset: ICH9 or PIIX3 (defaults are fine)
- System → Processor
- CPUs: keep what you chose (2–4). Tick Enable PAE/NX.
- Display → Screen
- Video Memory: max it out (e.g., 128 MB)
- Enable 3D Acceleration (helps with desktop effects and smoothness)
- Shared Clipboard & Drag’n’Drop
- General → Advanced → set both to Bidirectional (lets you copy/paste and drag files between Windows and Ubuntu—super handy)
- Storage
- Ensure your ISO is attached under Controller: IDE/SATA → Optical Drive → your Ubuntu ISO file.
- Network
- NAT is fine for most users (VM has internet, protected behind host).
- Use Bridged Adapter if you need the VM to appear as a separate device on your local network (for web server testing, etc.).
Click OK to save settings.
8. Boot from the Ubuntu ISO & Install Ubuntu (Step by Step)
This is the moment of truth—let’s power on the VM and install Ubuntu. We’ll take it slow and add context so each screen makes sense.
- Start the VM
Select your VM → Start. VirtualBox will boot from the ISO. - Ubuntu Welcome Screen
- Choose your language (e.g., English).
- Click Try or Install Ubuntu → choose Install Ubuntu.
- Keyboard Layout
- Pick your layout (e.g., English (US) or your regional variant).
- Use the text field to test keys like
@,£,\, etc.
- Updates & Other Software
- Choose Normal installation (includes browser, utilities, office apps) or Minimal installation (lighter).
- Tick Download updates while installing Ubuntu for convenience.
- You don’t need third-party drivers in a VM.
- Installation Type (Disk Partitioning)
- Erase disk and install Ubuntu (safe within the VM; it only affects the virtual disk).
- Confirm the 30–40 GB VDI you created is selected.
- Time Zone
- Select your region/city for correct time.
- User Account
- Enter your name, computer name, username, and password.
- Choose whether to require password to log in (recommended).
- Install
- Click Install Now → confirm changes.
- Installation usually takes 10–20 minutes depending on your PC.
- Restart
When prompted, click Restart Now. If asked to remove the installation media, just press Enter; VirtualBox will virtually “eject” the ISO.
After restart, you’ll land on the Ubuntu login screen. Log in with the username/password you created. Welcome to your new Linux desktop—running inside Windows!
9. Post-Installation: Drivers, Clipboard, Display & Shared Folders
You’ve got Ubuntu running—nice work. Let’s polish the experience so it feels smooth and integrated with Windows. A few enhancements go a long way.
A. Update Ubuntu (first thing)
Open Terminal in Ubuntu and run:
sudo apt update
sudo apt upgrade -y
This ensures you have the latest security patches and package updates.
B. Install VirtualBox Guest Additions (for better graphics & integrations)
Guest Additions give you:
- Auto-resize display
- Better graphics performance
- Shared clipboard & drag-and-drop (if not already working)
- Shared folders support
Steps:
- In the VirtualBox menu of the running VM: Devices → Insert Guest Additions CD image…
- Ubuntu mounts a virtual CD. When prompted, click Run.
If nothing prompts, open the mounted drive and run:sudo sh /media/$USER/VBox_GAs_*/VBoxLinuxAdditions.run - Reboot the VM after installation:
sudo reboot
C. Enable Bidirectional Clipboard & Drag-and-Drop
If you didn’t earlier: Machine → Settings → General → Advanced → set both to Bidirectional (VM powered off while changing).
D. Auto-Resize & Scaling
After Guest Additions, try View → Auto-resize Guest Display.
You can also set View → Virtual Screen 1 → Scale to 150% (or as needed) for HiDPI screens.
E. Shared Folders (exchange files easily)
- VM Settings → Shared Folders → +
- Folder Path: choose a Windows folder
- Check Auto-mount and Make Permanent
- In Ubuntu, your shared folder will appear under
/media/sf_<foldername>.
If you get a permissions error, add your user to the vboxsf group and log out/in:
sudo usermod -aG vboxsf $USER
F. Optional: Install the VirtualBox Extension Pack (host-side)
Install it on Windows (host) from the VirtualBox downloads page. It unlocks USB 2.0/3.0 support for devices you want to pass through to Ubuntu (e.g., Arduino boards, USB drives).
10. Useful VirtualBox Features: Snapshots, Clones & Export
Once your Ubuntu VM is configured beautifully, protect your work with these features. They save time when you experiment or something breaks.
- Snapshots: Save the VM’s exact state. If an update breaks something, roll back instantly.
VirtualBox → Select VM → Snapshots → Take. - Clones: Make an identical copy (useful to branch experiments).
Right-click VM → Clone. - Export Appliance (.ova): Package the VM to move it to another PC or share with teammates.
File → Export Appliance.
These tools turn your VM into a safe lab you can always restore.
11. Troubleshooting (Hyper-V, Black Screen, No Network, Etc.)
Even with careful steps, hiccups happen. Here are common issues and fixes:
| Symptom | Likely Cause | Fix |
|---|---|---|
| VM won’t start or is very slow | Hyper-V or Windows hypervisor features interfering | Disable Hyper-V, Virtual Machine Platform, Windows Hypervisor Platform; reboot |
| “VT-x/AMD-V not available” | Hardware virtualization disabled | Enable Intel VT-x / AMD-V in BIOS/UEFI |
| Black screen after boot | 3D acceleration glitch | Power off VM → Settings → Display → toggle Enable 3D Acceleration off/on; increase Video Memory |
| No internet in VM | Network mode misconfigured | Set Adapter 1 to NAT; if corporate network required, try Bridged Adapter |
| Mouse stuck in VM | Guest Additions missing | Install Guest Additions; press Right Ctrl to release mouse |
| Shared folders not visible | Permissions needed | Add user to vboxsf: sudo usermod -aG vboxsf $USER then log out/in |
| ISO not booting | Not attached or wrong boot order | VM Settings → Storage → attach ISO; System → Boot Order: Optical first |
| Screen scaling is tiny | HiDPI host, default scale | View → Virtual Screen 1 → Scale 150–200% or set Settings → Display → Scale Factor |
12. Frequently Asked Questions (FAQ)
Q1. Will installing Ubuntu in VirtualBox affect my Windows files?
No. The VM lives inside a virtual disk file. It’s isolated from Windows unless you explicitly share folders or devices.
Q2. How much RAM/CPU should I allocate to Ubuntu?
For casual use: 4 GB RAM and 2 CPUs is a sweet spot. If you have plenty of RAM/cores on Windows, you can allocate more—but keep it in the green zone.
Q3. Should I choose dynamically allocated or fixed-size disk?
Dynamically allocated is fine for most users (saves host disk space). Fixed offers slightly faster performance but uses the full size immediately.
Q4. NAT vs Bridged networking—what’s the difference?
- NAT: VM can access the internet through the host, but devices on your network can’t see the VM directly.
- Bridged: VM appears as a separate device on your LAN (useful for hosting local servers for testing).
Q5. Do I need the VirtualBox Extension Pack?
It’s optional but useful for USB 2.0/3.0, NVMe, and some advanced features. Make sure the Extension Pack version matches your VirtualBox version.
Q6. Can I install other Linux distros the same way?
Absolutely. The process is nearly identical—download their ISO, create a VM, and install.
Q7. My VM is sluggish. What can I do?
Increase video memory, enable 3D acceleration, allocate a bit more RAM/CPU, ensure Guest Additions are installed, and close heavy apps on Windows while using the VM.
Q8. How do I resize the virtual disk later?
Shut down the VM → File → Virtual Media Manager → select disk → Properties → Resize. Then inside Ubuntu, use GParted to expand the partition.
13. Closing Thoughts & Next Steps
You’ve now installed Ubuntu 24.04 LTS on VirtualBox in Windows—nicely done. Take a moment to explore the Ubuntu Software app, customize your desktop, and try out the Terminal. If you’re learning development, set up Git, VS Code, Docker (in a VM, Docker Desktop alternatives may require tweaks), or spin up a local web server to practice.
As you get comfortable, consider snapshots before big changes and shared folders to move projects easily between Windows and Ubuntu. With this workflow, you can experiment freely and rebuild your environment quickly when needed.
Happy exploring—Linux is a fantastic skill to have, and a VM makes the journey safe and fun.
Disclaimer
This article is for educational purposes. Always download software from official sources, verify checksums when provided, and ensure you have permission to modify system settings on your machine. Disabling or changing Windows features (like Hyper-V) may impact other virtualization tools; proceed thoughtfully and document your changes.
Official Links
- Ubuntu 24.04 LTS (Desktop ISO) — https://ubuntu.com/download
- Oracle VM VirtualBox (Windows hosts) — https://www.virtualbox.org/
#Ubuntu #VirtualBox #Windows11 #Linux #Ubuntu2404 #Virtualization #HowTo #DevSetup #BeginnerFriendly #OpenSource


