Designing a book in Adobe InDesign can be time-consuming, especially when formatting multiple chapters. However, using InDesign’s Book function and automating paragraph styles can significantly speed up the process. In this guide, we’ll walk through the steps to efficiently format a book, ensuring consistency and saving time.

1. Start-Up Settings
Before diving in, ensure you’re working in the Essentials Classic workspace for easier navigation.
2. Why Use the Book Function?
The Book function in InDesign is ideal for:
- Complex books with multiple chapters.
- Manuscripts already divided into Word documents (e.g., separate files per chapter).
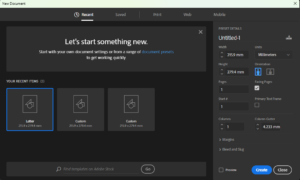
To create a new book:
- Go to File > New > Book.
- Add InDesign documents using the + button at the bottom.
3. General Styles Setup
Before applying styles:
- Familiarize yourself with the manuscript to retain the author’s formatting (e.g., bold, italics).
- Clear overrides (
Ctrl+A > Right-click > Clear All Overrides) to remove Word formatting.
4. How to Make a Book Document
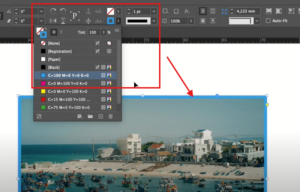
- Place the manuscript (
File > Place) into a text frame. - Apply character styles to preserve bold/italic formatting:
- Use Find/Change (
Ctrl+F) to replace Word’s italic formatting with an InDesign character style.
5. Applying Paragraph Styles
- Use Body First Paragraph, Chapter Title, Centered Quote, etc.
- Apply styles quickly using the Eyedropper Tool.
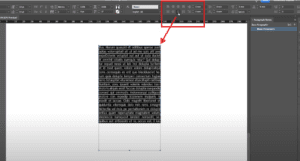
6. Reflowing Overset Text
- Add pages as needed (
Pages Panel > +). - Ensure each chapter starts on a right-hand (recto) page (odd-numbered).
7. Fixing Orphans & Widows
- Orphans (single words at the bottom of a paragraph):
- Use Grep Styles (
No Breakcharacter style) with code:.{12}$ - Widows (single lines at the top of a page):
- In Paragraph Style Options > Keep Options, set “Keep at least 2 lines together.”
8. Justification Settings for Better Spacing
To prevent awkward spacing in justified text:
- Word Spacing: 95% – 102%
- Letter Spacing: -2% – 2%
- Glyph Scaling: 99% – 101%
9. Cleaning Up Extra Spaces with a Script
Manually removing double spaces and tabs is tedious. Instead, use the CleanSpace script:
- Download the script (available on Peter Kahrel’s website).
- Save as a
.jsxfile (e.g.,CleanSpace.jsx). - Install it in:
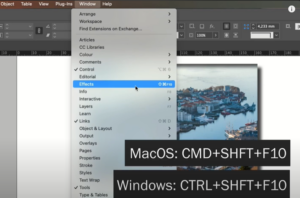
C:\Program Files\Adobe\Adobe InDesign\Scripts\Scripts Panel\Samples\JavaScript - Run the script (
Window > Utilities > Scripts > CleanSpace).
10. Creating Running Headers & Dynamic Text Variables
- Set up a running header in the Parent Page.
- Create a text variable (
Type > Text Variables > Define):
- Name: Running Header
- Type: Running Header (Paragraph Style)
- Source: Chapter Title (first instance).
This ensures headers update automatically per chapter.
11. Automating Chapter Title Pages
To hide running headers on chapter title pages:
- Use Paragraph Rules (
Rule Above&Rule Below) with: - Offset to push text down.
- Paper color to mask headers.
12. Synchronizing Styles Across All Documents
- Set a style source (e.g., Chapter 2).
- Synchronize (
Book Panel > Synchronize Options).
- Include: Paragraph Styles, Parent Pages, Text Variables.
13. Final Export
- Save all documents (
Ctrl+Shift+Alt+S). - Export to PDF (
Book Panel > Export). - Ensure each chapter ends on an even (verso) page.
Conclusion
By leveraging InDesign’s Book function, paragraph styles, and automation tools, you can format an entire book efficiently—saving hours of manual work. Whether you’re handling orphans, widows, running headers, or script automation, these techniques ensure a polished, professional result.
Tags:


InDesign, Book Design, Typography, Publishing, Graphic Design
Hashtags:
#InDesignTips #BookFormatting #DesignAutomation #PublishingWorkflow #EfficientDesign
Disclaimer:
This guide assumes familiarity with Adobe InDesign. Scripts should be used with caution—always back up files before running automation tools.
For more InDesign resources, visit Adobe’s official site.