Grouping objects in Adobe InDesign is an essential skill for designers, allowing for more organized layouts and efficient workflows. This article will provide a detailed step-by-step guide on how to group and ungroup objects in InDesign, making your design process more streamlined and flexible.

Why Group Objects in Adobe InDesign?
Grouping objects in InDesign offers several benefits:
- Simplifies Movement: Grouping allows you to move multiple objects as a single unit.
- Preserves Alignment: Ensures the relative positions of objects remain intact.
- Eases Editing: Speeds up layout adjustments by letting you handle grouped elements collectively.
- Improves Workflow: Keeps your workspace organized, particularly for complex designs with many layers.
Step-by-Step Guide to Grouping Objects in Adobe InDesign
Step 1: Create or Identify Objects to Group
- Open Adobe InDesign and create a new document.
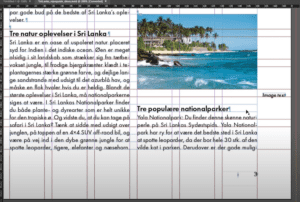
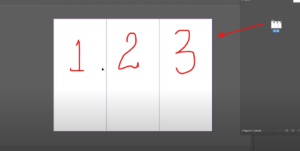
- Add or identify the objects you wish to group. These could be shapes, text boxes, or images. Example: Imagine you have three rectangles you want to group together for easy manipulation.
Step 2: Select the Objects
- Using the Selection Tool:
- Click and drag over the objects to select them.
- Alternatively, hold down the Shift key and click each object individually to include it in your selection.
- Verify Selection in Layers Panel:
- Open the Layers Panel by navigating to Window > Layers or pressing F7.
- Ensure all the intended objects are highlighted in the panel.
Step 3: Group the Selected Objects
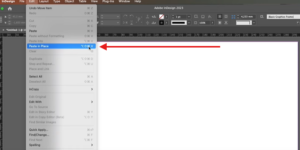
- Group via Menu:
- Go to the Object menu in the top bar.
- Select Group from the dropdown menu.
- Use Keyboard Shortcut:
- Press Ctrl + G (Windows) or Cmd + G (Mac) to group the objects quickly.
- Confirm Grouping:
- Check the Layers Panel. The objects will now appear grouped as a single entity.
- Move the grouped objects. You’ll notice they move together as a unit.
Step 4: Ungroup the Objects (Optional)
If you need to separate the objects again:
- Select the Group:
- Click on any part of the grouped objects to select the entire group.
- Ungroup via Menu:
- Go to the Object menu and select Ungroup.
- Use Keyboard Shortcut:
- Press Ctrl + Shift + G (Windows) or Cmd + Shift + G (Mac).
- Verify in Layers Panel:
- Check the Layers Panel to see the objects listed separately.
Tips for Working with Groups in InDesign
- Nested Groups: You can group already grouped objects with other elements.
- Access Individual Elements: Use the Direct Selection Tool (A) to edit objects within a group without ungrouping them.
- Lock Group: To prevent accidental changes, you can lock the grouped objects by selecting them and pressing Ctrl + L (Windows) or Cmd + L (Mac).
Common Issues and Solutions
- Objects Won’t Group: Ensure the objects are on the same layer or unlock them if they’re locked.
- Accidental Ungrouping: Use Ctrl + Z (Windows) or Cmd + Z (Mac) to undo an ungrouping action.
- Difficulty Selecting Groups: Use the Layers Panel to directly select grouped elements.
Conclusion
Grouping objects in Adobe InDesign is a simple yet powerful tool that enhances your design workflow. By following the steps outlined above, you can easily group and ungroup objects, ensuring a more efficient and organized workspace. Start incorporating this technique in your projects today for better design management.
Hashtags: #AdobeInDesign #DesignTips #GraphicDesign #InDesignTutorial #LayoutDesign
Visited 79 times, 1 visit(s) today