Many users have been eagerly waiting for the Windows 11 24H2 update, but not everyone is receiving it. In this article, I’ll explain why some users may not see the update yet and show you a simple method to enable it on your system. By following these steps, you can ensure you get the 24H2 update and enjoy the latest features of Windows 11.
Why You Might Not See the Update Yet
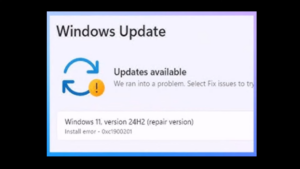
Every new Windows version, such as 22H2 or 24H2, often comes with minor bugs or issues. These bugs are why Microsoft sometimes staggers the release of updates. They prioritize rolling out updates to systems that are fully compatible with the latest version. As a result, some users experience delays in receiving these updates.
But if you’re eager to get the new 24H2 update, don’t worry—there’s a workaround that will allow you to download and install the update today.
Step-by-Step Guide to Get the Update
- Check Your Current Windows Version
First, let’s confirm the current version of Windows on your system.
- Open the search bar and type
winver. - Press Enter to see the current version. If it shows 23H2, you’ll want to upgrade to 24H2 using the method described below.
- Install Any Pending Updates
Sometimes, pending updates prevent new updates from showing up. To ensure everything runs smoothly, follow these steps:
- Open Settings by right-clicking on the Windows icon and selecting Settings.
- On the left-hand side, select Windows Update.
- Under More Options, ensure the Get the latest updates as soon as they’re available option is enabled.
- Click Check for updates to see if any pending updates appear. If they do, install them before proceeding.
- Enable the 24H2 Update with Group Policy Editor
If the update still isn’t showing, here’s the trick. We’ll enable it using the Group Policy Editor:
- Open the search bar and type
gpedit.msc(Group Policy Editor). Click on it to open. - In the Group Policy Editor, navigate to Administrative Templates under Computer Configuration.
- From there, select Windows Components and scroll down to Windows Update.
- Double-click on Select the target Feature Update version.
- Set the option to Enabled.
- In the box that says “Which product version would you like to receive feature updates for?”, type
Windows 11. - In the “Target version for feature updates” box, type
24H2. - Click Apply and OK.
- Restart Your Computer
After applying these settings, restart your system. Once rebooted, open Settings again and check for updates. You should now see the 24H2 update ready to download!
For Windows 11 Home Edition Users
If you are using the Home edition of Windows 11, you may not have access to the Group Policy Editor. In that case, there’s an alternate method to enable the editor in the Home edition. Follow those steps, then proceed with the instructions above.
Rolling Back to Previous Version (Optional)
If after updating you experience any issues or bugs, you still have the option to roll back to the previous version within 10 days. To do this:
- Go to Settings > Windows Update > Advanced Options > Recovery.
- Under Go back, click the option to roll back to the previous version. This will return your system to 23H2 (or whichever version you were on).
Conclusion
That’s it! With these simple steps, you can quickly and easily update your system to Windows 11 24H2. Enjoy all the new features, enhanced security, and optimizations in this latest version. If you have any issues or need further assistance, feel free to leave a comment.
Hashtags: #Windows11 #24H2Update #WindowsUpdate #TechTips #UpdateWindows #GroupPolicy #Troubleshooting #MicrosoftWindows