Encountering Windows update error code 0x80070308 can be frustrating, but don’t worry—this step-by-step guide will show you how to fix it quickly and easily. Whether you’re using Windows 10 or Windows 11, these simple troubleshooting steps will help resolve the issue and get your system running smoothly.
Error Code 0x80070308: What It Means
The error code 0x80070308 usually appears with the message:
“Windows couldn’t complete the requested changes. The client of a component requested an operation which is not valid given the state of the component instance.”
This can occur when Windows Update fails to complete due to underlying issues in the system files or update components. Let’s dive into the step-by-step guide to fix it.
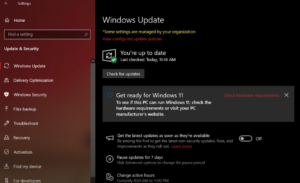
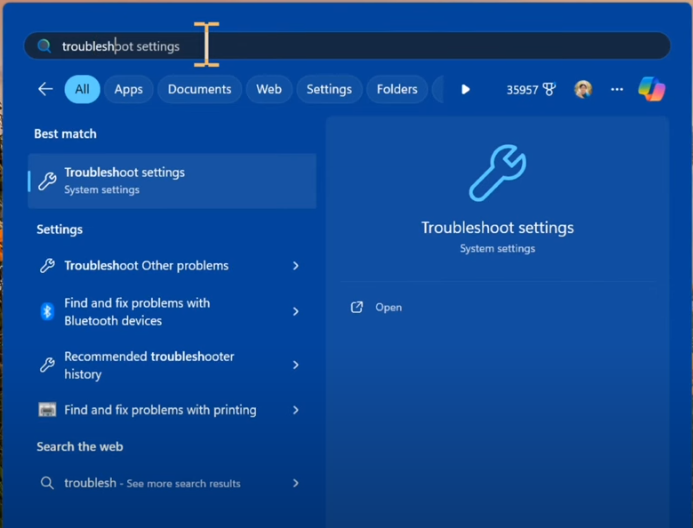
Step 1: Open Troubleshoot Settings
- Click on the Search Icon on your taskbar or press the Windows Key and type Troubleshoot Settings.
- Click on “Troubleshoot Settings” from the search results.
Step 2: Use the Windows Update Troubleshooter
- In the Troubleshoot settings window, scroll down and click “Other troubleshooters” or “Additional troubleshooters” (depending on your Windows version).
- Under the section labeled “Most Frequent”, find “Windows Update” and click the “Run” button next to it.
- The system will begin detecting and diagnosing any problems related to Windows Update. Wait for it to complete the diagnostic process.
- If any issues are found, Windows will suggest possible solutions. Apply any recommended fixes.
- Once the troubleshooting process is done, close the troubleshooter.
Step 3: Run System File Checker (SFC)
After troubleshooting, it’s a good idea to check for corrupted or missing system files that could be causing the error.
- Open the Search Menu and type CMD or Command Prompt.
- Right-click on “Command Prompt” and select “Run as Administrator”. If prompted by the User Account Control, click “Yes”.
- In the Command Prompt window, type the following command and press Enter:
sfc /scannow - The System File Checker (SFC) will begin scanning for any corrupted system files and attempt to repair them automatically. This may take some time.
- Once the process completes, you should see a message indicating whether any issues were found and repaired.
- Close the Command Prompt after the scan is finished.
Step 4: Restart Your Computer
- Open the Start Menu, and click on the Power Button.
- Select Restart from the options.
Conclusion
That’s it! You’ve successfully fixed Windows Update error code 0x80070308 on your Windows 10 or Windows 11 computer. By using the built-in Windows Update troubleshooter and running the SFC command, you can resolve most issues related to update failures.
If this guide helped you, please don’t forget to like this post and share it with anyone else who might benefit from it. Make sure to subscribe to stay updated with more quality content.
#WindowsErrorFix #WindowsUpdate #ErrorCode0x80070308 #Windows10 #Windows11 #PCFix #Troubleshooting #SystemFileChecker #SFC #TechTutorial #PCMaintenance #TechTips