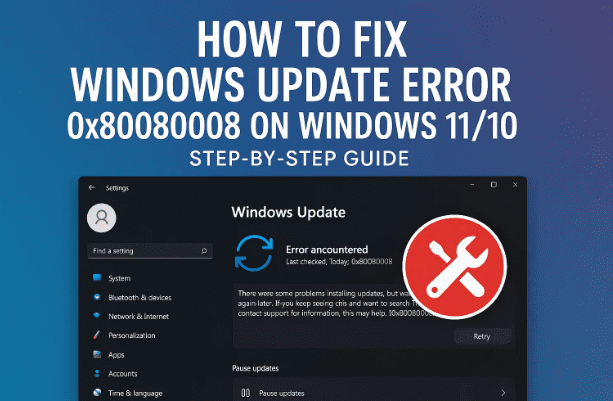
We’ve all been there: you sit down to install the latest Windows update and—bam—an error pops up with a cryptic code like 0x80080008. The update stalls, your device nags you to “try again,” and you’re left wondering what broke and how to fix it.
Take a breath. This error is common and solvable. In this article, we’ll walk through every practical method—from the simplest checks to deeper system repairs—to resolve Windows Update error 0x80080008 on Windows 11 and Windows 10. We won’t just list steps; we’ll explain why you’re doing each one, what to expect, and what to do if something doesn’t go as planned. Along the way, we’ll add a few useful alternatives where the original script left things vague.
Quick gist of the error: 0x80080008 often points to the Windows Update service failing to start or respond properly (sometimes related to the Windows Update Agent or background services). Fixes typically involve troubleshooting Windows Update, clearing temporary/cache files, running system scans, and sometimes resetting update components.
Let’s move to the first step—understanding the problem—so we fix the right thing the first time.
1) What Error 0x80080008 Usually Means
It helps to know what you’re up against. Error 0x80080008 commonly appears when:
Windows Update components are stuck or corrupted.
Background Intelligent Transfer Service (BITS), Windows Update, or Cryptographic Services aren’t starting or are misconfigured.
Temporary files or SoftwareDistribution cache corrupts the update payload.
System files are damaged (SFC/DISM territory).
Low disk space, wrong date/time, or network hiccups interfere with update downloads and verification.
So we’ll start with light-touch steps and ramp up only if needed. So far, so good—now let’s begin.
2) First Aid: Quick Checks and a Proper Restart
It’s easy to underestimate how much a clean restart fixes. A proper reboot clears stale services and unlocks files.
Restart your PC (not just shut down).
After reboot, try Settings → Windows Update → Check for updates again.
If the error returns, we keep going—step by step.
3) Use the Built-In Windows Update Troubleshooter
Let’s let Windows try to fix itself first. The troubleshooter can automatically restart services, fix registry keys, and reset components relevant to Windows Update.
Windows 11
Open Settings (Win + I).
Go to System → Troubleshoot → Other troubleshooters.
Why this matters: Windows knows its own update plumbing best. If a stuck service or known misconfiguration is the cause, this step alone can end your day’s troubles.
net start appidsvc
net start cryptsvc
net start bits
net start wuauserv
Reboot your PC and try Settings → Windows Update → Check for updates.
Why this matters: SoftwareDistribution and Catroot2 store update payloads and catalogs. Corruption here directly causes errors like 0x80080008. Renaming forces Windows to recreate clean folders.
Nice progress—you’ve now reset the update pipeline. If things are still stubborn, let’s verify the essential services are actually starting correctly.
9) Verify Essential Update Services Are Running
Windows Update relies on a trio of services. If any are disabled, updates fail.
Open Services (press Win + R, type services.msc, press Enter) and make sure:
Windows Update (wuauserv)
Startup type: Manual (Trigger Start) or Automatic
Status: Running (if not, start it)
Background Intelligent Transfer Service (BITS)
Startup type: Manual
Status: Running when updates are downloading
Cryptographic Services (CryptSvc)
Startup type: Automatic
Status: Running
If any are disabled, set an appropriate Startup type, Apply, then Start the service.
Why this matters: If Windows Update or BITS never starts, updates won’t download or install.
If services look good, let’s make sure the environment around them isn’t sabotaging the process.
These are small things that cause big headaches. Let’s tick them off:
Free space: Keep at least 10–20 GB free on C:. Updates need room for downloads + staging.
Date & time: Wrong clock = failed certificate checks. Set to Automatic time and Automatic time zone (Settings → Time & language).
Network stability: Avoid captive portals or flaky Wi-Fi while updating. Try a wired connection if possible.
VPN/Proxy: Temporarily disable if updates won’t download.
Third-party AV/firewall: Some aggressively block update components. Try temporarily disabling (then re-enable after the update).
Device Manager warnings: Outdated storage or network drivers can interfere. Update any flagged devices.
If all of this checks out and you’re still stuck, there’s a reliable, non-destructive method next.
11) Optional but Powerful: In-Place Repair/Upgrade (Keeps Files & Apps)
If your system files or update stack are deeply tangled, an in-place repair (a.k.a. repair install) refreshes Windows while keeping your files and applications.
High-level steps:
Download the Windows 11/10 ISO (via the Media Creation Tool or Windows 11 Installation Assistant on Microsoft’s site).
Mount the ISO (right-click → Mount) and run setup.exe.
Choose Keep personal files and apps.
Let Windows reinstall core components.
After the process (and a couple of restarts), run Windows Update again.
This approach replaces the OS core while preserving your environment—very effective for persistent update failures.
12) Frequently Asked Questions (FAQs)
Q1: Will deleting %temp% or running Disk Cleanup remove my personal files? No. %temp% and Disk Cleanup target temporary and cache files. They don’t touch your documents, pictures, or desktop. Always read what you tick, though.
Q2: SFC said it fixed files, but the update still fails. What now? Run the DISM steps (/ScanHealth then /RestoreHealth) and then run sfc /scannow again. DISM repairs the source that SFC uses.
Q3: Is it safe to rename SoftwareDistribution and Catroot2? Yes. You’re not deleting them—just renaming. Windows recreates fresh copies automatically. If needed, you can delete the “.old” backups later.
Q4: I’m low on space. What’s the fastest way to free up room for updates? Run Disk Cleanup → Clean up system files and tick Windows Update Cleanup and Delivery Optimization Files. Also empty the Recycle Bin and uninstall large unused apps.
Q5: Does this error mean I have malware? Not necessarily. It usually indicates a service/cache problem. Still, running a Windows Security full scan is smart if you suspect issues.
Q6: Can a flaky internet connection cause 0x80080008? Yes. If downloads fail or payloads corrupt, you can get various update errors. Try a stable connection (wired if possible).
Q7: Can I use the Windows Update Assistant instead? Yes. On some systems, running the Windows 11 Installation Assistant (or the Windows 10 Update Assistant) to upgrade in place can bypass update stack errors.
Q8: After everything, updates still fail. Is a reset my only option? Not necessarily. Try the in-place repair first (keeps apps/files). If that fails, a Reset this PC (Keep my files) may be needed—but try other routes first.
13) Final Checklist (Run in Order)
To keep things tidy, here’s your condensed action list:
Restart your PC.
Run Windows Update Troubleshooter (Settings → Troubleshoot).
Clear temp files (%temp%, C:\Windows\Temp).
Disk Cleanup → Clean up system files (include Windows Update Cleanup if shown).
Follow this path and you’ll resolve 0x80080008 in the vast majority of cases.
14) Disclaimer
This guide is for educational purposes and assumes you have basic administrative access to your Windows device. While the steps here are standard and safe when followed carefully, always back up important data before making significant system changes. If your device belongs to an organization, consult your IT department before applying these fixes.
Tags
windows update error 0x80080008, fix windows update, windows 11 update problem, windows 10 update error, sfc dism repair, reset softwaredistribution, windows update troubleshooter, bits service, cryptographic services, in place repair install
Sneha is a hardware reviewer and technology journalist. She has reviewed laptops and desktops for over 6 years, focusing on performance, design, and user experience. Previously working with a consumer tech magazine, she now brings her expertise to in-depth product reviews and comparisons.