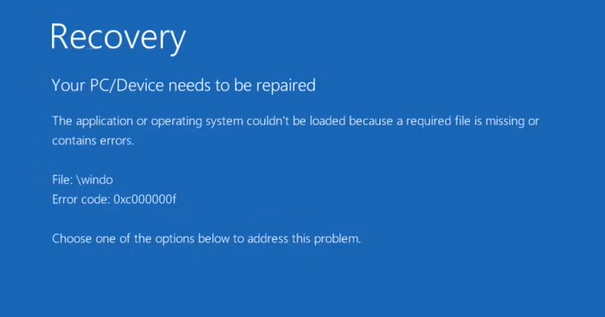
If you’ve encountered a frustrating blue screen with an error code, file missing, or a corrupt file message when trying to boot your Windows 10 or 11 PC, you’re not alone. This is a common issue that many users face. Luckily, there is a straightforward way to fix the UEFI (Unified Extensible Firmware Interface) partition and get your system back up and running. In this guide, I’ll walk you through the detailed steps to solve this issue.
Step 1: Prepare a Bootable Windows USB Drive
One of the most important tools you’ll need is a bootable USB flash drive with Windows 10 or 11 on it. Here’s how you can create one:
- Download Windows Media Creation Tool: Head over to Microsoft’s website and download the Media Creation Tool for either Windows 10 or Windows 11.
- Create Bootable USB: Follow the prompts in the tool to create a bootable USB drive. This step is crucial because you’ll need this USB to fix your UEFI partition. Always keep a bootable USB handy in case of emergencies.
Why is This Step Important?
Many people run into issues because they don’t have a bootable USB or recovery disk ready when their PC stops booting. Without a second working PC, it becomes almost impossible to create a bootable drive later on.
Step 2: Back Up Your Boot Record
Before making any changes, it’s a good idea to back up your current boot record. This will come in handy if anything goes wrong and you need to revert back.
- Open Command Prompt as Administrator:
- Press the
Windowskey and type “cmd.” - Right-click on Command Prompt and select “Run as administrator.”
- Press the
- Backup Command:
- Type the following command and press Enter:
bcdedit /export C:\BCD_Backup - This will create a backup of your current boot configuration on the C: drive, which you can import later if needed.
- Type the following command and press Enter:
Step 3: Fix the UEFI Partition
Now, let’s dive into fixing the UEFI partition to get your system back up and running.
- Boot from the USB Drive:
- Insert your bootable USB drive and restart your PC.
- Enter your BIOS/UEFI settings (usually by pressing
F2,F12, orDELduring boot) and select the USB drive as the boot option.
- Select ‘Repair Your Computer’:
- Once the Windows setup starts, don’t click “Install Now.” Instead, select “Repair your computer.”
- Enter Troubleshooting Mode:
- Choose Troubleshoot > Advanced Options > Command Prompt.
- Run Diskpart:
- In the command prompt, type
diskpartand press Enter. - Type
list diskto see a list of your disks. - Type
select disk 0(replace ‘0’ with the correct number for your disk) to select the main drive.
- In the command prompt, type
- List Volumes:
- Now type
list volto list all volumes. - Identify the FAT32 partition (typically around 100 MB) that holds your UEFI. This is usually Volume 2 or 3.
- Now type
- Assign a Drive Letter:
- Type
select vol X(replace ‘X’ with the correct volume number). - Assign it a drive letter by typing:
assign letter=Z.
- Type
- Navigate to the Boot Folder:
- Once the partition is assigned a drive letter, type
cd /d Z:\EFI\Microsoft\Bootto change directories to the boot folder.
- Once the partition is assigned a drive letter, type
- Format the Partition:
- Type
format Z: /FS:FAT32to format the partition. - Confirm by pressing
Ywhen prompted.
- Type
- Rebuild Boot Configuration:
- Finally, type the following command to rebuild your boot configuration:
bcdboot C:\Windows /s Z: /f UEFI
- Finally, type the following command to rebuild your boot configuration:
- Exit and Reboot:
- Once the boot configuration is rebuilt, exit the command prompt by typing
exitand restart your PC.
Step 4: Test and Verify the Fix
If everything goes well, your system should now boot into Windows without any issues. If you still experience problems, double-check that you selected the correct volume during the UEFI partition steps and try again.
Optional: Restore Backup Boot Record
If the problem persists or if you want to restore your original boot record, you can do so by following these steps:
- Boot back into the recovery USB.
- Open Command Prompt as you did earlier.
- Run the command:
bcdedit /import C:\BCD_BackupThis will import the boot configuration backup that you created earlier.
Conclusion
Fixing a corrupt or missing UEFI partition can seem daunting, but by following these steps, you can get your Windows 10 or 11 PC back up and running. Remember to always keep a bootable USB drive handy for emergencies, and consider making regular backups of your boot configuration.
If you found this guide helpful, drop a comment below or share any additional tips you might have for troubleshooting boot issues. I’m here to help!
#UEFIFix #Windows10 #Windows11 #PCBootIssue #Diskpart #PCRepair #TechGuide #BCDBackup #BootableUSB #WindowsTroubleshooting