If you’re encountering the “Program Compatibility Assistant – A driver cannot load on this device” error on Windows 11 or Windows 10, don’t worry — you’re not alone. This error is often triggered by memory integrity (Core Isolation) settings that block certain drivers from loading. It typically occurs after installing older or unsigned drivers.
In this detailed guide, we will walk you through step-by-step instructions to resolve this issue using built-in Windows security settings.
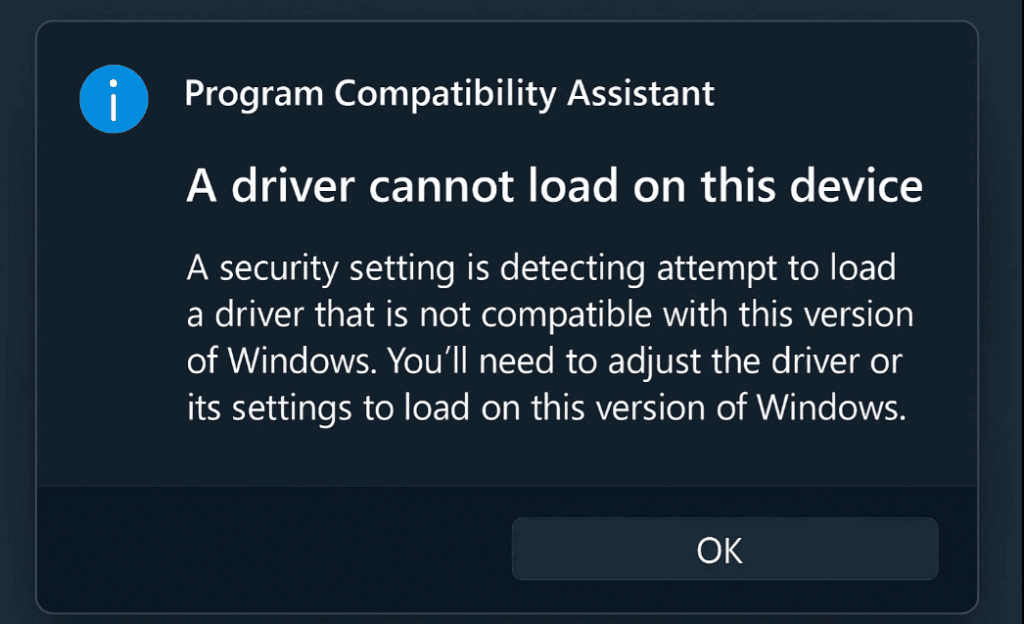
🛠️ What Causes This Error?
The Program Compatibility Assistant error generally appears when:
- An incompatible driver tries to load.
- A driver is outdated or not digitally signed.
- Windows’ Memory Integrity (a part of Core Isolation) is blocking the driver for security reasons.
✅ Step-by-Step Fix for the “A Driver Cannot Load on This Device” Error
Follow the instructions below carefully:
Step 1: Open Windows Settings
- Click on the Start Menu or press the Windows key on your keyboard.
- Click on Settings from the menu options.
You can also press Win + I as a shortcut to open Settings directly.
Step 2: Navigate to Privacy & Security
- In the Settings window, look for Privacy & Security in the left-hand pane.
- Click on it to expand its settings.
Step 3: Open Windows Security
- Under the Privacy & Security section, click on Windows Security.
- A new set of options will appear. Click on the Open Windows Security button to launch the Windows Security dashboard.
Step 4: Go to Device Security
- Once inside Windows Security, select Device Security from the sidebar.
- Under Core Isolation, click on Core Isolation Details.
Step 5: Disable Memory Integrity
- You’ll see an option called Memory Integrity — if it’s turned on, toggle it off.
- A warning may appear, explaining that turning this feature off may lower the device’s security. Confirm to proceed.
Note: Memory Integrity helps protect your device from malicious code, so only disable it if necessary and ensure you trust the software you’re running.
Step 6: Restart Your System
After disabling Memory Integrity:
- Close all open windows.
- Restart your computer for changes to take effect.
Once the system reboots, the driver that was previously blocked should now load correctly, and the error should be resolved.
⚠️ Disclaimer:
Disabling Memory Integrity may lower the security posture of your device. Only proceed with this solution if you trust the driver causing the issue. It’s also recommended to keep your drivers updated via Windows Update or the manufacturer’s official site.
🔚 Conclusion
You’ve now learned how to resolve the “A Driver Cannot Load on This Device” error caused by memory integrity settings in Windows. While turning off this setting can help load certain drivers, always consider updating the drivers to their latest, signed versions for maximum compatibility and security.
🔗 Related Links
🏷️ Tags:
windows 11, windows 10, driver error fix, memory integrity, core isolation, windows settings, windows security


📌 Hashtags:
#Windows11 #Windows10 #DriverError #MemoryIntegrity #FixWindowsError #CoreIsolation #WindowsSecurity #Troubleshooting #TechGuide #PCFix


