If you’re trying to connect your Google Pixel phone to your Windows PC and it isn’t being recognized, you’re not alone. This is a common issue across various Google Pixel models—from older devices to the latest Pixel 6 Pro, Pixel 7, and beyond. Fortunately, there’s a reliable solution that works for both Windows 10 and Windows 11.
In this article, we’ll walk you through all the necessary steps to fix this issue and establish a successful connection between your Google Pixel and your computer.
Step-by-Step Guide to Connect Google Pixel to Windows PC
Step 1: Connect the Google Pixel to Your PC
Use a USB cable (preferably USB-C to USB-C if supported) to connect your Google Pixel to your Windows computer.
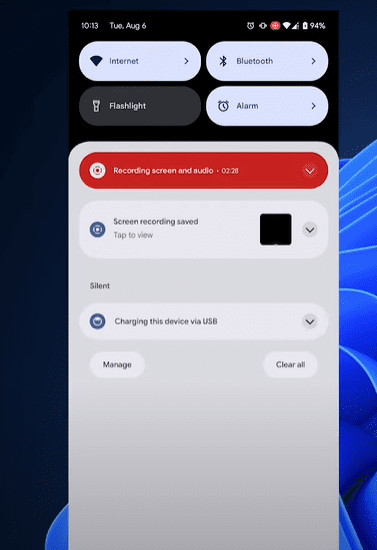
Once connected, swipe down on your phone to view the USB connection options. Select “File Transfer” or “Media Transfer Protocol (MTP)” from the list. However, despite selecting this option, your PC might still not detect the device.
Step 2: Download Google USB Drivers
To ensure your Windows computer recognizes your Pixel device, you need the official Google USB Drivers. Follow the steps below:
- Search for Google USB Drivers or visit the Android Studio’s USB Driver download page.
- Download the ZIP file named usb_driver.zip.
- Extract the contents to a known location on your PC.
Step 3: Install Google USB Drivers via Device Manager
- On your PC, right-click on “This PC” (or “My Computer”) and choose “Manage”.
- Go to Device Manager on the left panel.
- Locate “Portable Devices” or anything related to “MTP”, “Unknown Device”, or your Pixel model.
- Right-click on it and select “Update Driver”.
- Choose “Browse my computer for drivers”.
- Select the folder where you extracted the Google USB Drivers.
- Click Next and install the driver.
Once installed, your Pixel may still not appear immediately. That brings us to the next step.
Step 4: Restart Your Google Pixel
Keep the phone connected to your PC and restart the device. After the restart:
- You may see “MTP USB Device” appear in Device Manager.
- If prompted to choose a driver, select “Let me pick from a list of available drivers”.
- Choose “MTP USB Device” or “Google Android Device” (whichever appears) and click Next.
- If one option doesn’t work, try the other.
Step 5: Verify Connection
After installation:
- Unplug the phone and plug it back in.
- Again, swipe down on the phone and select “File Transfer”.
- Your phone should now appear in File Explorer under Devices and Drives.
From here, you can transfer files between your PC and Google Pixel without any issues.
Troubleshooting Tips
- Make sure you’re using a high-quality USB cable that supports data transfer.
- If using a USB hub, try connecting directly to your PC.
- If the issue persists, repeat the driver installation and restart the device.
- Ensure Windows is updated to the latest version.
By following the steps above, your Windows computer should now successfully detect your Google Pixel phone. This guide provides a lasting solution for a common issue that often frustrates users.
If you continue facing issues, feel free to comment below. We’re here to help!


Tags: Google Pixel not recognized, Pixel driver installation, connect Pixel to Windows, USB MTP driver, file transfer Pixel to PC, Google USB drivers, fix Pixel USB issue, Pixel 6 Pro connection error, Windows 11 Pixel driver, Android USB driver fix
Hashtags:
#GooglePixel #USBDriverFix #Windows11 #AndroidToPC #TechSupport #FileTransfer #Pixel6Pro #MTPConnection #AndroidDrivers #WindowsFix


