When you clone a smaller hard drive or SSD to a larger one, you might expect the new drive to show the full available space immediately. However, this is not always the case. Many users find that after cloning, their new 1TB SSD still appears as 500GB or the size of the original smaller drive. This happens because the extra space is left unallocated and unused.
In this article, we’ll walk you through how to recover and extend the full partition on your new larger SSD or hard drive using MiniTool Partition Wizard, a free disk management tool.
Why Your New Drive Shows the Wrong Size
If you cloned a 500GB drive to a 1TB SSD, the cloning process likely copied only the used partition size, leaving the remaining space unallocated. Windows does not automatically merge or allocate that extra space.
This means:
- Your drive functions as if it’s still 500GB.
- The rest of the space is visible in Disk Management but remains unusable until it’s merged into the main partition.
Step-by-Step Guide: Fixing the Partition Size Using MiniTool Partition Wizard
To regain full access to your disk’s space, follow these simple steps.
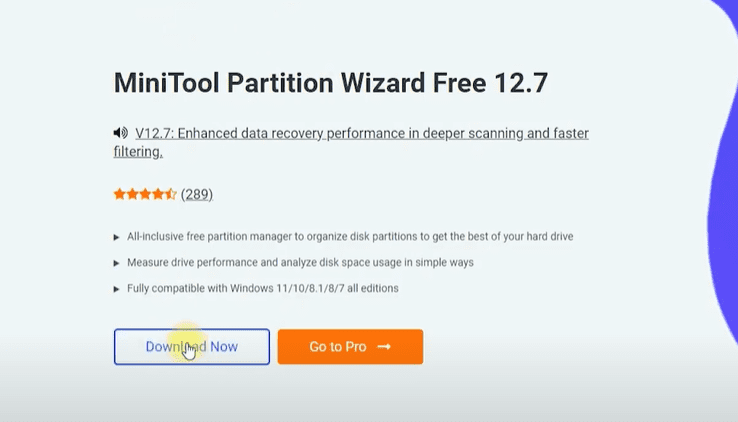
Step 1: Download and Install MiniTool Partition Wizard (Free Edition)
- Visit the official MiniTool Partition Wizard website.
- Click on the “Download Now” button.
- Once the installer is downloaded, run it.
⚠️ Important: During installation, make sure to choose the Free Edition instead of the Trial for Pro Edition. Many users mistakenly install the trial version and are limited by its restrictions.
Here’s what to do:
- Choose “Continue installation for Free Edition” when prompted.
- Deselect any additional bundled software (like MiniTool ShadowMaker) if you don’t need it.
- Click Next and then Finish once installation is complete.
Step 2: Launch the MiniTool Partition Wizard
After installation:
- Open the MiniTool Partition Wizard.
- It will display a list of your connected drives and partitions.
Step 3: Locate the Unallocated Space
Look for your new SSD or HDD. You’ll see:
- A primary system partition (usually C:) with your OS and data.
- A section marked as Unallocated (this is the leftover space from the larger drive).
Step 4: Resize and Extend the Main Partition
- Right-click on the main system partition (usually C:).
- Select “Move/Resize”.
- In the window that appears, drag the handle to include all the unallocated space.
- Click OK.
You should now see that the partition has expanded to take up the full disk size.
Step 5: Apply the Changes
- Click the “Apply” button (usually in the top-left or top-right corner).
- Confirm by clicking Yes when prompted.
The software will process the change and resize the partition to use the full capacity of your new SSD or HDD.


Step 6: Verify the New Disk Size
Open File Explorer or Disk Management and check your drive. You should now see that your drive reflects the full size (e.g., 1TB instead of 500GB).
Final Thoughts
Cloning a hard drive to a larger one is a great way to upgrade your storage without reinstalling everything. However, if you don’t take the extra step to extend your partition, you’re missing out on valuable space.
Using MiniTool Partition Wizard, you can quickly and easily resize your drive and unlock its full potential. Just make sure you select the correct edition during installation to avoid limitations.
Tags:
clone hard drive, cloned disk wrong size, resize partition, extend ssd partition, minitool partition wizard, disk management, unallocated disk space, ssd upgrade, hard drive cloning, partition fix, windows 10 disk resize, fix drive size
Hashtags:
#ClonedDrive #SSDUpgrade #DiskManagement #WindowsFix #PartitionResize #MiniTool #HardDriveTips #TechTutorial #StorageFix #UnallocatedSpace


