Welcome to another guide from DTPTIPS! In this post, we’ll walk you through detailed solutions to fix the common “Automatic Startup Repair Can’t Repair Your PC” error that occurs in Windows 10 or 11. Whether you’ve encountered a blue screen or are stuck in a loop of failed repairs, these methods should help you resolve the issue.

If you carefully follow the steps below, you should be able to fix your PC without any issues. Let’s get started!
Step 1: Open Command Prompt from Advanced Options
- Restart your PC and boot into the Advanced Startup options by repeatedly pressing the F8 or Shift + F8 key during startup.
- From the Choose an Option screen, select Troubleshoot > Advanced Options > Command Prompt.
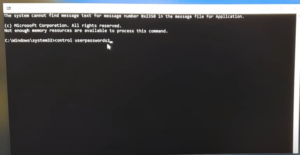
- A black window will appear. This is where you’ll enter a series of commands to repair your startup configuration.
Step 2: Enter Commands to Repair Boot Configuration
Now that you’re in the Command Prompt, we’ll begin entering commands to repair your system:
- Enter the following command to rebuild the boot configuration data (BCD): e
bootrec /rebuildbcd - Next, enter the following commands to fix the master boot record (MBR) and boot sector:
bootrec /fixmbr bootrec /fixboot - If you receive an “Access Denied” error, don’t worry; this is common. Continue with the next command.
- Enter the following command to repair the system image:
DISM /Online /Cleanup-Image /RestoreHealthThis process may take some time, so be patient. - Once completed, enter the following command to scan and repair system files:
sfc /scannowAgain, this might take a few minutes.
Step 3: Run Disk Check to Resolve Issues
- The final command will check for disk errors and attempt to fix them:
chkdsk C: /f /r - Ensure you replace “C:” with the drive letter where your Windows is installed if it’s on a different drive. This command will take some time to complete, depending on your system.
Step 4: Disable Early Launch Anti-Malware Protection
If the problem persists, you can try disabling early launch anti-malware protection:
- Go to Advanced Options > Startup Settings > Restart.
- When prompted, press the number 8 key to disable early launch anti-malware protection.
- Your system will restart. Check if the problem is resolved.
Step 5: Disable Automatic Restart After Failure
If the error keeps recurring, you might need to disable the automatic restart option to diagnose the issue:
- Return to Startup Settings.
- Choose the number 9 option, which disables automatic restart after failure.
Step 6: Boot Into Safe Mode
If none of the above methods work, try booting into Safe Mode:
- In the Startup Settings menu, press the number 4 key to enable Safe Mode.
- Once in Safe Mode, log in and open the Control Panel > Programs and Features.
- Look for any recently installed software that may be causing the issue. If you suspect a faulty application, uninstall it.
- Additionally, click View Installed Updates and uninstall any recent Windows updates that could be causing the problem.
Step 7: Perform a System Restore
If your system was working fine earlier and stopped after recent changes, performing a System Restore might resolve the issue:
- Go to Troubleshoot > Advanced Options > System Restore.
- Choose a restore point where your system was functioning correctly and restore it.
Step 8: Reset Your PC (Last Resort)
If all else fails, your last option is to reset your PC:
- Go to Troubleshoot > Reset this PC.
- Choose the option Keep My Files to ensure that your personal data remains safe. However, note that any third-party applications will be removed.
- Follow the on-screen instructions to complete the reset.
Conclusion
Hopefully, one of these solutions helped resolve your issue with “Automatic Startup Repair Can’t Repair Your PC.” If the problem persists, feel free to drop a comment below, and we’ll help you troubleshoot further. Don’t forget to visit again for more tech solutions!
#Windows10Fix #StartupRepair #TechHelp #PCError #SafeMode #SystemRestore #FixWindows #Troubleshooting #TechLeft #BlueScreen


