Are you encountering blue screen (BSOD) issues or boot-related errors in Windows 11 or Windows 10? These problems often stem from a corrupted Boot Configuration Data (BCD), especially when dealing with GPT/UEFI-based systems.

This step-by-step guide will help you fix all BCD, Bootrec, and boot errors using a bootable USB or CD and command-line tools available during recovery. Follow the instructions carefully to bring your system back to life.
Prerequisites
Before you begin, make sure you have the following:
- A bootable Windows 11 or Windows 10 USB or DVD.
- Access to the command prompt via the recovery environment.
Step-by-Step Instructions
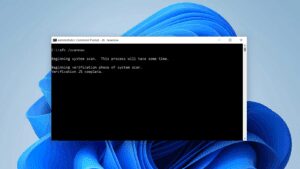
Step 1: Boot from a Bootable USB or CD
- Insert the bootable Windows USB or CD into your system.
- Boot into the recovery environment (usually by pressing F12, Esc, or Del during startup, depending on your device).
- Choose Repair your computer > Troubleshoot > Command Prompt.
Step 2: Check Partition Scheme and Identify System Volumes
- Type
diskpartand press Enter. - Type
list diskand press Enter. A star (*) under the GPT column confirms you’re using a UEFI/GPT system. - Type
select disk 0(assuming Disk 0 is your main drive) and press Enter. - Type
list volumeand press Enter. You’ll now see a list of partitions with their labels and volume numbers.
Step 3: Assign Drive Letters
Assign Letter to Windows Installed Partition
- Identify the volume where Windows is installed (look for a label like “OS” or based on the file system size).
- Type
select volume 1(replace 1 with the volume number for Windows). - Type
assign letter=Eand press Enter.
Assign Letter to System EFI Partition
- Identify the system volume (usually FAT32 and smaller in size).
- Type
select volume 3(replace 3 with your EFI partition volume). - Type
assign letter=Fand press Enter.
Now, Windows is assigned to E: and the system partition to F:.
Step 4: Repair BCD Configuration
Step A: Delete Existing BCD (Backup First)
- Type the following:
attrib -h -r -s F:\EFI\Microsoft\Boot\BCD ren F:\EFI\Microsoft\Boot\BCD BCD.bakThis command removes hidden/system/read-only attributes and renames the current BCD to BCD.bak for backup.
Step B: Rebuild BCD
- Run the following command to rebuild the BCD:
bcdboot E:\Windows /s F: /f UEFIE:\Windowsis your Windows installation./s F:specifies the system partition./f UEFIdefines the target firmware type.
This command creates new boot files and restores a working BCD.
Step 5: Reboot the System
After completing the above steps, type exit to leave DiskPart, then close the command prompt. Restart your computer. Your system should now boot into Windows without the blue screen or boot errors.
Final Notes
This method resolves a wide range of BCD and boot issues on UEFI-based systems, including:
- Blue Screen of Death (BSOD) related to boot failure
- Missing bootloader errors
- Bootrec or EFI boot errors
Use this guide carefully to avoid misassigning partitions. If unsure about any volume, double-check using list volume and volume labels.
Tags
bcd repair, bootrec fix, windows 11 blue screen, uefi boot error, bcdboot command, fix boot error, windows recovery, gpt partition, diskpart tutorial, command prompt recovery
Hashtags
#Windows11 #Windows10 #BCDRepair #BootErrorFix #UEFI #GPT #Diskpart #CommandPrompt #TechSupport #Troubleshooting
Disclaimer
This article is intended for educational purposes only. Proceed with caution when using disk management and boot repair tools, as incorrect steps may cause data loss or system inaccessibility. Always back up important data before attempting system repairs.