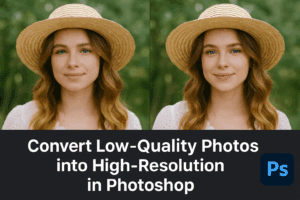
In today’s digital age, having a professional solo photo for platforms like Instagram or LinkedIn can make a world of difference. But what happens when your best group photo leaves you wishing for a solo shot with the same background? With Photoshop, you can not only crop out a person but also enhance the quality of the image to make it look sharp and polished.

Here’s a quick guide to extract and enhance a solo shot from a group photo using Photoshop.
Step 1: Crop Your Solo Photo
Start by opening the group photo in Photoshop. Select the Rectangular Marquee Tool (M) and hold the Shift key to create a perfect square around the face or the area you want to focus on. Once selected, press C for the Crop Tool and hit Enter twice to confirm the crop.
Step 2: Enhance the Resolution
At this point, you may notice that the cropped image is blurry due to low resolution. To fix this, go to Image > Image Size and increase the resolution to around 2000×2000 pixels. While doing this, choose Preserve Details 2.0 as the resampling method to minimize quality loss.
Step 3: Convert to a Smart Object
Before applying filters, always convert the layer to a smart object for non-destructive editing. Right-click on the layer and choose Convert to Smart Object. This will allow you to make changes later if needed.
Step 4: Apply Neural Filters
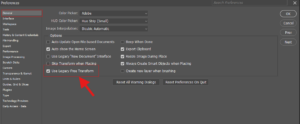
With the image resolution enhanced, go to Filter > Neural Filters. Scroll down to find the Photo Restoration option and turn it on. Although designed for old photos, this filter does wonders in reconstructing faces and smoothing out details. Max out the Enhance Face slider for the best results.
Step 5: Fix Remaining Imperfections
Sometimes, even after applying filters, you may notice harsh changes between the restored and non-restored areas. To smooth out these transitions, create a new merged layer by pressing Ctrl + Alt + Shift + E. Then, use the Remove Tool to clean up any remaining unwanted elements.
Step 6: Create a Depth of Field Effect
To give your solo photo a professional look, you can simulate a shallow depth of field by going to Filter > Blur Gallery > Iris Blur. Adjust the blur intensity and size to softly focus on the subject while blurring the background. This effect mimics the look of high-quality portrait photography.
Step 7: Final Touches
Once you’re satisfied with the adjustments, take a step back and review the before and after. You can use additional tools like High Pass to sharpen the edges or use Smart Sharpen for finer control.
Conclusion
Photoshop is a powerful tool that allows you to turn ordinary group photos into stunning solo shots with just a few tweaks. Whether you’re preparing a LinkedIn profile picture or creating content for social media, these steps will help you enhance image quality and give your photos a professional edge.
Happy editing, and keep creating!


#PhotoshopTutorial #PhotoEditing #ImageEnhancement #PhotoshopTips #PhotographyTips #NeuralFilters #ResolutionBoost #SmartObject #DepthOfField #SoloPhotoEditing #ProfessionalPhotography