Exporting your design from CorelDRAW to JPEG format is an essential task when preparing your work for clients or presentations. In this detailed guide, we’ll walk you through each step of the process to ensure you get the best results from your CorelDRAW project. Whether you are a beginner or an experienced designer, this guide will help you confidently export your designs.
Step 1: Select Your Design
After completing your design in CorelDRAW, the first thing you need to do is select the elements you want to export. There are two ways to do this:
- Manual Selection: Click and drag over the design to select all the elements you wish to export.
- Keyboard Shortcut: Press
Ctrl + Ato select all elements in your design.
Step 2: Open the Export Dialog Box
To export your design, follow these steps:
- Navigate to the File menu in the top left corner of CorelDRAW.
- From the dropdown menu, select Export. Alternatively, you can use the keyboard shortcut
Ctrl + E.
A dialog box will appear, prompting you to define where you want to save your file and the format in which it will be saved.
Step 3: Choose Export Location and File Name
In the Export dialog box:
- Select a Folder: Decide where you’d like to save your file. You can save it to your desktop, downloads folder, or a custom directory.
- Enter File Name: In the “File Name” field, type a suitable name for your file. For instance, if you’re exporting a magazine cover design, you can name it “Magazine.”
Step 4: Select JPEG Format
Now that you’ve chosen a file location and name, it’s time to select the correct file format:
- Save As Type: Click the dropdown box next to “Save as Type” and press the letter “J” on your keyboard to quickly navigate to JPEG Bitmap (JPG, JPEG). Avoid selecting JPEG 2000 Bitmap as it’s not commonly used for regular JPEG exports.
Step 5: Export Selected Design Only
If your document contains multiple designs or objects and you only want to export a specific part, follow this step:
- Selected Only: In the export dialog box, check the option Selected Only. This ensures only the elements you’ve selected will be exported, excluding any additional objects on the workspace.
Step 6: Configure Export Settings
After clicking the Export button, a new settings box will appear:
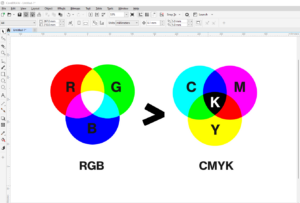
- Color Mode: Set the color mode to RGB for digital use (e.g., web or social media). Use CMYK only if you’re preparing the design for print.
- Quality: Select the image quality from the dropdown menu. You can choose between High, Medium, Low, or Lowest depending on your needs. For optimal results, especially when presenting to clients, choose High.
- Resolution: If you want to control the resolution, this is where you can set it. For standard screen resolutions, 72 DPI works fine, but for print or high-quality viewing, go for 300 DPI or higher.
Step 7: Complete the Export Process
Once you’ve adjusted the settings:
- Click OK to begin the export process.
- Wait for the file to process. This can take a few seconds depending on the size and complexity of your design.
Step 8: Locate Your Exported JPEG
After the export is complete, navigate to the folder where you saved your design. You should find your file ready to be used as a high-quality JPEG.
Summary
Exporting your design from CorelDRAW to JPEG is an easy and straightforward process. By following the steps outlined in this guide, you’ll be able to efficiently export any design for various uses, whether it’s for digital display or print. With the right export settings, you can ensure that your designs maintain their quality and appeal to clients or your audience.
