If you’re looking to enhance your PC’s security and ensure your system is fully compatible with Windows 11 features, enabling Secure Boot is a smart move. Secure Boot helps protect your computer from malware and unauthorized software during startup. In this article, we’ll walk you through the complete process of checking and enabling Secure Boot on your Windows 11 device.
Step 1: Check if Secure Boot is Enabled
Before enabling Secure Boot, let’s first check its current status.
- Click on the Search bar in your taskbar.
- Type System Information and press Enter.
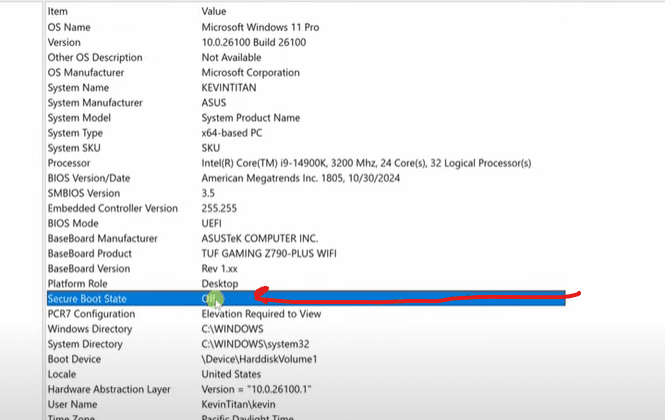
- In the System Information window, scroll down until you find the Secure Boot State entry.
If it says Off, don’t worry — we’ll guide you through the steps to turn it on. But before we do that, there’s one more thing to verify.
Step 2: Check Your BIOS Mode
For Secure Boot to work, your BIOS mode must be set to UEFI (Unified Extensible Firmware Interface) and not Legacy.
- Still in the System Information window, look for the entry titled BIOS Mode.
- If it says UEFI, you’re good to go.
- If it says Legacy, you’ll need to convert your system to UEFI first. This can be done using Microsoft’s MBR2GPT tool, but that’s a separate process not covered here.
Step 3: Boot into BIOS to Enable Secure Boot
To change Secure Boot settings, you’ll need to enter the BIOS setup utility. Here’s how:
- Click the Windows Start icon.
- Click the Power button, then hold down the Shift key on your keyboard and click Restart. This launches the Windows Recovery Environment (WinRE).
- In the recovery menu, select Troubleshoot.
- Next, choose Advanced Options.
- Select UEFI Firmware Settings.
- Click Restart to enter your BIOS.
Step 4: Enable Secure Boot in BIOS
Your BIOS interface might look different depending on your computer’s manufacturer, but the general steps are similar:
- Look for a tab or menu labeled Boot or Security.
- Under one of these menus, find the Secure Boot setting.
- Select Secure Boot, then change its state to Enabled.
- You may receive a warning or confirmation message. Click Yes to proceed.
Note: If you don’t see the Secure Boot option or can’t enable it, check if CSM (Compatibility Support Module) is enabled. If it is, you may need to disable CSM first before enabling Secure Boot.
Step 5: Save and Exit BIOS
Once you’ve enabled Secure Boot:
- Press the F10 key (this is commonly used to save and exit, but it may vary depending on your system).
- Choose Save changes and reset.
Your computer will reboot.
Step 6: Confirm Secure Boot is Enabled
After your system restarts:
- Open System Information again using the steps from earlier.
- Check the Secure Boot State.
It should now say On — great job! Your system is now more secure and better aligned with Windows 11’s security standards.


By following the steps in this article, you’ve successfully enabled Secure Boot on your Windows 11 PC. This feature plays a crucial role in protecting your system from low-level attacks and ensures only trusted software runs during boot time.
Tags: secure boot, windows 11, UEFI, BIOS, system information, pc security, enable secure boot, windows tips, advanced startup, windows recovery, troubleshoot, CSM, boot settings
Hashtags: #Windows11 #SecureBoot #UEFI #BIOS #PCTips #CyberSecurity #TechGuide #WindowsTips #EnableSecureBoot #ComputerSecurity #WindowsSettings


