In this article, we will guide you through the complete process of enabling and using Windows Sandbox on your PC. If you want a safe, isolated environment to test apps or files without affecting your main system, Windows Sandbox is the perfect tool. Let’s get started!
Step 1: Open the Programs and Features Settings
- First, go to your Windows Start Menu.
- Search for “Programs and Features” or simply open Control Panel and navigate there.
- On the left-hand side, click on “Turn Windows features on or off.”
This will open a new window where you can enable or disable various Windows features.
Step 2: Enable Windows Sandbox
- In the “Windows Features” window, scroll down until you find Windows Sandbox.
- Check the box next to Windows Sandbox.
- Click OK to apply the changes.
Note: You might need an active internet connection to complete this installation as Windows may download additional necessary files.
- After clicking OK, Windows will start enabling the Sandbox feature.
- Once the process is complete, you will be prompted to restart your PC. Restart your computer to finalize the setup.
Step 3: Enable Virtualization Technology (VT) from BIOS
For Windows Sandbox to work, Virtualization Technology (VT) must be enabled in your computer’s BIOS settings. Here’s how you can do it:
- Restart your PC and enter the BIOS setup (usually by pressing F2, F10, DEL, or ESC during startup – your PC might display the key).
- Find the Virtualization Technology or VT-x/AMD-V setting.
- Enable it.
- Save changes and exit the BIOS.
This step is crucial, as Windows Sandbox relies on virtualization features to create an isolated environment.
Step 4: Launch Windows Sandbox
After enabling Sandbox and Virtualization Technology:
- Click on the Start Menu.
- In the search bar, type “Windows Sandbox”.
- Click on the Windows Sandbox app from the search results.
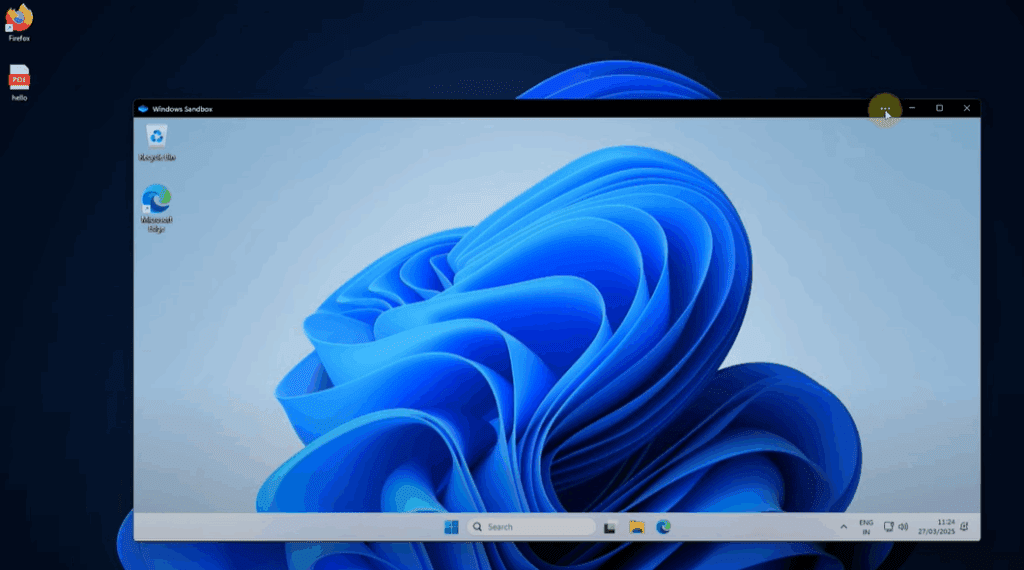
Wait a few moments, and a completely fresh, isolated Windows environment will open up!
Step 5: Understanding the Windows Sandbox Environment
When Windows Sandbox opens:
- You will see a clean Windows desktop.
- No additional apps or files will be present except the basics.
- It’s a completely isolated environment – anything you do here will not affect your main system.
You can test software, open suspicious files, and explore freely without any risk to your actual PC.
Step 6: Transfer Files from Your Main PC to the Sandbox
If you want to move files from your main PC to Windows Sandbox:
- In the Windows Sandbox window, click on the three dots (•••) on the top menu.
- Select “Share Folder”.
- Choose the folder you want to share with the Sandbox.
- Click Select Folder.
Once shared, you’ll see the selected folder inside the Sandbox environment, allowing you to access files from your main system.


Tip: Once you close Windows Sandbox, everything inside it will be deleted automatically. Your main system remains untouched.
Conclusion
Using Windows Sandbox is an excellent way to safely test applications or browse files without risking your main PC. Follow the steps mentioned above to enable and use Sandbox effectively. We hope this article helped you set up and understand Windows Sandbox properly.
For more detailed guides like this, stay tuned to our articles!
Tags: windows sandbox, how to enable windows sandbox, enable sandbox in windows 10, sandbox feature, windows 11 sandbox setup, virtual machine, windows virtual environment, pc security tips, enable virtualization bios
Hashtags: #windows #windows10 #windows11 #sandbox #sandboxsetup #pcsecurity #virtualization #techguide #howto #technology


