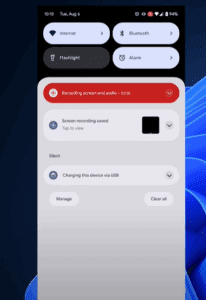
If you love tweaking the UI of your Windows 11 system to better suit your preferences, there’s a fresh feature available in the latest Dev and Beta builds that you’ll love: the ability to customize the location of the on-screen volume and brightness indicators.
Yes, you can now shift that floating volume slider from its default position at the bottom center of the screen to the top corners or center. This small but satisfying personalization option adds a layer of convenience and visual consistency for those who want better control over their desktop experience.

In this article, we’ll walk you through how to enable the hidden setting using ViveTool, where to download it, and how to move the volume/brightness indicators wherever you want on the screen.
🔧 What You’ll Need
To activate this feature, you’ll need:
- A PC running the latest Windows 11 Dev or Beta channel build.
- A small command-line tool called ViveTool, which is used to unlock experimental or hidden features in Windows.
👉 Download ViveTool from GitHub here:
https://github.com/thebookisclosed/ViVe
🛠️ Step-by-Step Guide to Enable the New Volume Slider Location Setting
Let’s break down the steps to unlock and use this feature:
✅ Step 1: Download and Set Up ViveTool
- Go to the official ViveTool GitHub page.
- Download the latest
.zipfile based on your system architecture (Intel/AMD). - Extract the
.ziparchive using File Explorer:- Right-click the ZIP > Extract All.
- Choose a dedicated folder (e.g.,
C:\ViveToolorC:\HiddenFeatures).
- Copy the path of the extracted folder—you’ll need this in the next step.
✅ Step 2: Open Command Prompt as Administrator
- Click on Start > Search for cmd.
- Right-click on Command Prompt > Choose Run as Administrator.
- If prompted by UAC, click Yes.
✅ Step 3: Navigate to ViveTool Directory
In the Command Prompt window, type the following (replace the path with your folder path):
cd C:\HiddenFeatures
Then, enable the new feature using the following command:
vivetool /enable /id:48103152
If successful, you’ll see the message:
“Successfully set feature configuration.”
👤 Credit for the discovery of this feature goes to @PhantomOfEarth on X (Twitter), who tracks hidden Windows features.
🔄 Step 4: Restart Your Computer
Now that the feature is activated, restart your PC to apply the changes.


🎛️ Step 5: Customize the On-Screen Volume & Brightness Indicator Location
After rebooting, follow these steps to customize the position of the flyouts:
- Open Settings.
- Go to System > Notifications.
- Scroll to the bottom and locate: Indicators from keyboard actions
(Position of on-screen indicators: volume, brightness, and other controls will appear in this location.) - Click the dropdown menu and choose from:
- Top Left
- Top Center
- Top Right
- Bottom Center (Default)
Each setting gives you a visual preview when you adjust volume or brightness using your keyboard.
🎯 My personal favorite? Top Center — it’s clean and aligns well with modern UI design!
📌 Important Notes
- This feature is only available in Windows 11 Dev and Beta Insider Builds.
- It won’t appear on Stable or Release Preview builds unless officially released by Microsoft.
- If you don’t see the setting after following all steps, double-check your Windows version and ViveTool setup.
❓ Frequently Asked Questions (FAQ)
Q: What if ViveTool doesn’t work?
Make sure you’re using Command Prompt with Admin privileges and have extracted the files correctly. If needed, redownload the latest version from GitHub.
Q: Will this work on the stable version of Windows 11?
Not yet. This is an experimental feature currently being tested on Dev and Beta builds only.
Q: Can I revert the changes?
Yes! Just run this command in CMD:
vivetool /disable /id:48103152
Then restart your PC.
📝 Final Thoughts
Windows 11 continues to evolve, and Microsoft is clearly listening to feedback from its power users. The ability to customize on-screen indicators might seem minor, but for those who value a personalized UI experience, it’s a small joy that makes a big difference.
So go ahead, unlock this hidden gem, and set your volume and brightness sliders exactly where you want them!
🔖 Tags:
windows 11 tips, volume slider location, windows 11 customization, vive tool tutorial, dev channel windows 11, beta channel features, onscreen indicators windows, windows 11 insider, hidden windows 11 features
📢 Hashtags:
#Windows11 #ViveTool #Customization #VolumeSlider #WindowsTips #HiddenFeatures #DevChannel #TechGuide
🛡️ Disclaimer:
This article describes a feature available only in experimental Dev/Beta builds of Windows 11. Features shown may be removed or changed in the final release. Proceed at your own discretion and always back up your system before modifying system settings.
🎧 Looking to upgrade your workflow with better audio controls? Try a customizable USB media controller:
https://amzn.to/4nxUJyv
If you found this article helpful or have questions about ViveTool or other hidden features, feel free to comment below or share your thoughts!


