Drawing arrows in Adobe InDesign can enhance your designs, helping to point out important elements or guide viewers’ attention. This article will walk you through the simple steps to create arrows using InDesign’s built-in tools.

Why Use Arrows in InDesign?
Arrows are versatile and can be used in various designs, such as:
- Infographics: To show connections or directions.
- Presentations: To highlight key points.
- Layouts: To guide the reader’s eye.
Creating arrows in InDesign is straightforward and can be customized to fit any design style.
Step-by-Step Guide to Creating an Arrow in InDesign
Step 1: Set Up Your Document
- Open Adobe InDesign and create a new document.
- Make sure your workspace is organized by enabling essential panels, such as Stroke.
Step 2: Draw a Line
- Select the Line Tool:
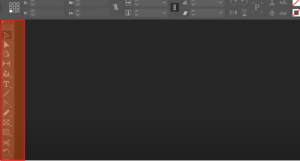
- Locate the Line Tool in the toolbar on the left side of the screen.
- Click on it to activate.
- Adjust Fill and Stroke:
- In the Swatches Panel, remove the Fill by clicking the None icon (a white box with a red slash).
- Set a Stroke Color (e.g., black) for the line.
- Draw the Line:
- Click and hold Shift to draw a straight line across your artboard.
- Release the mouse when the desired length is achieved.
Step 3: Open the Stroke Panel
- If the Stroke Panel isn’t visible:
- Go to the top menu, select Window > Stroke, or press the shortcut Ctrl + F10 (Windows) or Cmd + F10 (Mac).
- The Stroke Panel will appear.
Step 4: Add Arrowheads
- Select the Line:
- Click on the line you just created to highlight it.
- Locate Arrowhead Options:
- In the Stroke Panel, find the Start and End dropdown menus under the “Arrowheads” section.
- Choose Arrowhead Style:
- To add an arrow at the end of the line:
- Open the End dropdown menu.
- Select your preferred arrowhead style (e.g., a triangle).
- To add an arrow at the start of the line:
- Open the Start dropdown menu.
- Choose the desired arrowhead.
- To add an arrow at the end of the line:
- Preview the Changes:
- Once selected, the arrowhead will appear on the respective end of the line.
- Adjust the arrowhead size by increasing the Stroke Weight in the Stroke Panel.
Step 5: Customize the Arrow
- Adjust Direction:
- If needed, reverse the start and end arrowheads by swapping options in the dropdown menus.
- Style Consistency:
- Experiment with stroke colors, sizes, and arrowhead shapes to match your design needs.
Tips for Working with Arrows
- Combine with Other Shapes: Use arrows alongside rectangles, circles, or other shapes to create flowcharts or diagrams.
- Duplicate for Consistency: Use the Duplicate feature (Alt + Drag on Windows or Option + Drag on Mac) to create identical arrows.
- Snap to Grid: Enable Snap to Grid for perfectly aligned arrows.
Conclusion
Creating arrows in Adobe InDesign is a quick and versatile way to add direction and emphasis to your designs. By following the steps above, you can customize arrows to suit any layout, making your designs more dynamic and professional. Start experimenting with different arrowhead styles and stroke weights to discover what works best for your project.
