Windows 11 24H2 has arrived with exciting features and improvements. Whether you are using supported or unsupported hardware, you can install it on your system with the help of a bootable USB drive. This guide will walk you through the steps of downloading and installing Windows 11 24H2, making sure even users with older hardware can get it up and running.
Prerequisites
Before diving into the steps, ensure you have the following:
- A USB drive with at least 8GB of storage.
- A stable internet connection.
- The Rufus tool, used to create the bootable USB drive.
- A backup of any important files if you are performing a clean installation.
Let’s jump into the process!
Step 1: Download Windows 11 24H2 Disk Image
- First, connect your USB drive to your computer.
- Navigate to the official Windows 11 download page.
- Scroll down to the “Download Windows 11 Disk Image (ISO)” section.
- Choose “Windows 11 Multi-Edition ISO” from the drop-down list and click on “Download.”
- Select your preferred language (e.g., English US) and click “Confirm.”
- Choose the 64-bit version and start the download process. The file size has been compressed in this version to about 5.4GB, making it quicker to download.
Step 2: Download Rufus Tool
To make the USB bootable, we’ll use Rufus, a free and user-friendly tool:
- Open a new browser tab and search for “Rufus download.”
- Go to the official Rufus website and download the latest version (e.g., Rufus 4.5.exe).
- Once downloaded, run the tool and grant it the necessary permissions.
Step 3: Create a Bootable USB Drive
With Rufus and the Windows ISO downloaded, follow these steps:
- Open Rufus. Your connected USB drive should be detected automatically. If not, select it from the drop-down list.
- Under the “Boot Selection” option, click “Select” and locate the Windows 11 24H2 ISO file you downloaded.
- Rufus will provide options to customize your installation for unsupported hardware.
- Select the option to bypass TPM 2.0 and Secure Boot if your hardware doesn’t support them.
- If you don’t want to connect to a Microsoft account during installation, select the option to remove that requirement.
- In the “Volume Label” field, you can rename the drive (e.g., “Win11_24H2”).
- Click on “Start” to begin the process. Rufus will warn you that all data on the USB drive will be erased, so ensure there’s nothing important on it.
- Wait for the process to complete, which should take about 5 minutes depending on your system. Once done, the bootable USB drive will be ready.
Step 4: Install Windows 11 24H2
With your bootable USB ready, it’s time to install Windows 11:
- Plug the USB into the system where you wish to install Windows 11.
- Restart your system and enter BIOS/UEFI settings (usually by pressing F9, F12, Esc, or Delete).
- Change the boot order to prioritize the USB drive and save the changes.
- Your system will boot from the USB drive, and you’ll see the Windows installation screen. Select your language and keyboard layout, then click “Next.”
- Choose “Install now” when prompted.
- If you have a product key, enter it, or click “I don’t have a product key” to continue without it.
- Select the version of Windows 11 you want to install (e.g., Windows 11 Pro) and click “Next.”
- Accept the license terms and choose between upgrading your existing version or performing a clean installation. If you want a fresh start, format your drive during the installation process.
Step 5: Finalize Installation
The installation process will begin, and depending on your hardware, it could take from a few minutes to 15 minutes to complete. Once Windows 11 24H2 is installed:
- Follow the on-screen prompts to set up your region, language, and other preferences.
- If you chose to bypass the Microsoft account, you’ll be prompted to create a local account.
- After the setup, you’ll land on the Windows 11 desktop.
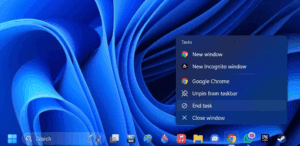
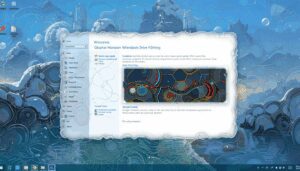
To verify your installation, you can check the version details by typing winver in the search bar. You should see Windows 11 Version 24H2 Build 26100.
Conclusion
By following these steps, you can easily install Windows 11 24H2 on both supported and unsupported hardware using a bootable USB drive. It’s a straightforward process thanks to Rufus, and you can enjoy all the new features of this major update.
If this article helped you, feel free to share it with others. Stay tuned for more guides on Windows 11 and other tech tips!
Hashtags: #Windows11 #24H2 #BootableUSB #UnsupportedHardware #TechGuide #Rufus #PCSetup #WindowsUpdate