If you’ve recently purchased an HP Ink Tank 316 printer and need to install its drivers on your Windows PC, this guide will walk you through the official HP driver download and installation process.
Step 1: Visit HP’s Official Website
- Open Google Chrome, Edge, or Firefox on your PC.
- Go to HP’s Official Support Page.
- In the search bar, type “HP Ink Tank 316 driver” and press Enter.
⚠ Note: Always download drivers from HP’s official website to avoid malware.
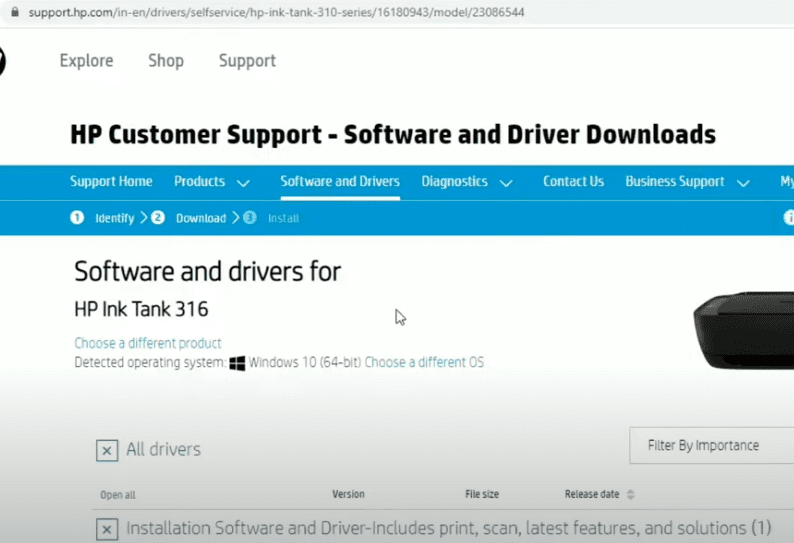
Step 2: Download the Correct Driver
- Click on the first search result (HP Support page for Ink Tank 316).
- Select your operating system (Windows 10/11, macOS, etc.).
- Scroll down and click on “Basic Drivers” or “Full Software Solution” (recommended for full features).
- Click “Download” and wait for the file to save.
📥 Download Link: HP Ink Tank 316 Drivers
Step 3: Install the HP Printer Driver
- Locate the downloaded file (usually in
Downloadsfolder). - Double-click the
.exefile to start installation. - Accept the license agreement and click “Next”.
- Follow on-screen instructions until the “Installation Complete” message appears.
- Connect your printer via USB or Wi-Fi when prompted.
Step 4: Test Your Printer
- Open File Explorer and right-click any document.
- Select “Print” → Choose “HP Ink Tank 316”.
- Click “Print” to check if the printer works.
🖨️ Troubleshooting Tips:
- If the printer isn’t detected, restart your PC.
- Ensure USB/Wi-Fi is properly connected.
- Reinstall drivers if printing issues persist.
Tags:
HP Printer Driver, HP Ink Tank 316 Setup, Printer Installation, HP Software Download
Hashtags:
#HPPrinter #InkTank316 #PrinterDriver #TechGuide #PrintingSolutions
Disclaimer:
- This guide is for Windows users (macOS steps may vary).
- HP’s website may update driver versions—always download the latest.
- Ensure your printer is powered on during installation.
Need help? Drop a comment below! 🚀
Visited 1,386 times, 1 visit(s) today