If you’re looking to set up a local web server environment on your Windows 10 or 11 PC, XAMPP is one of the best solutions out there. Whether you have your own website, web page, or project that you want to test locally, XAMPP makes it extremely easy to run everything without needing an external server.
In this article, we’ll walk you through downloading, installing, and setting up XAMPP step-by-step. By the end of this guide, you’ll be able to host your own webpage on your localhost using the Apache server included in XAMPP.
Step 1: Download XAMPP
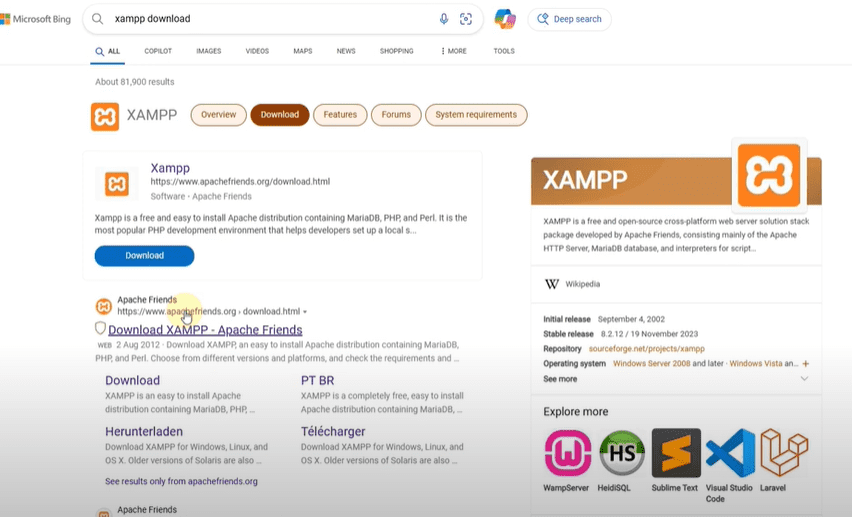
- Open your preferred browser.
- In the search bar, type “XAMPP download“.
- Click on the first link, which should take you to the official XAMPP website: https://www.apachefriends.org.
- Once you’re on the website, you’ll see several versions of XAMPP available.
- Click on the Download button for Windows to start downloading the installer.
If for any reason the download doesn’t start, you’ll find an alternate download link through SourceForge right there on the same page. Use that to download XAMPP.
Step 2: Install XAMPP
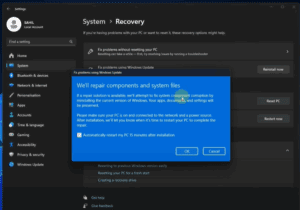
- After downloading the installer, locate the setup file and double-click to open it.
- A warning message might appear; simply click OK to proceed.
- Click Next on the setup wizard to continue.
- The installer will ask you which components you want to install. For most users, the default selection is sufficient.
- Choose the installation location. By default, it is set to
C:\xampp. It’s recommended to leave it as is unless you have a specific reason to change it. - Click Next, and then Next again to start the installation process.
The installation might take a few minutes. Once it’s complete, you will get a message saying that XAMPP has been successfully installed on your system.
Step 3: Launch XAMPP Control Panel
- After installation, open the Start Menu and search for “XAMPP Control Panel“.
- Launch the application.
The XAMPP Control Panel allows you to start or stop different services like Apache, MySQL, FileZilla, Tomcat, etc.
Step 4: Start Apache Server
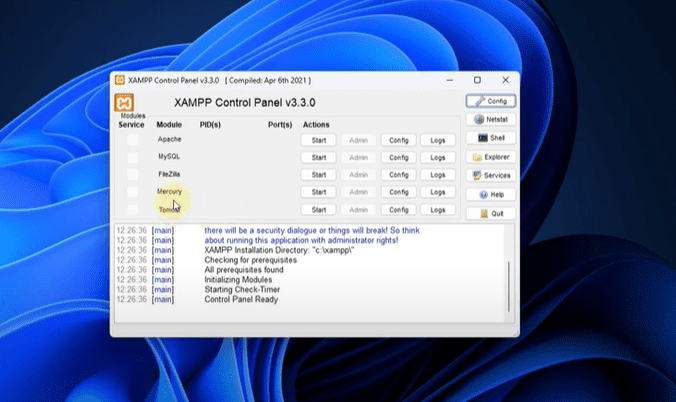
- In the XAMPP Control Panel, find the Apache row.
- Click the Start button next to Apache.
- When it starts successfully, you’ll see a green highlight and a PID number showing that it is running.
Apache is the server that will help you host your website locally.
Step 5: Test Your Local Server
- Open any web browser.
- In the address bar, type localhost and press Enter.
You should now see the XAMPP welcome page. This means your Apache server is running correctly on your machine!
Step 6: Host Your Own Web Page
If you have a custom web page you want to view locally, here’s how you can do it:
- Create a simple HTML page if you don’t already have one. For example, a basic page with the message “Hello Friends, Subscribe Now!“.
- Locate the
htdocsfolder inside your XAMPP installation directory (default isC:\xampp\htdocs). - Copy and paste your HTML file into the
htdocsfolder. - Remember the filename of your webpage. Let’s say your file is named
subscribe.html. - Now, open your browser and type:
localhost/subscribe.html - Press Enter, and you will see your custom webpage displayed!
Congratulations! You’ve successfully set up a local server using XAMPP and hosted your own webpage.
Conclusion
Setting up a local web server with XAMPP on Windows 10 or 11 is a straightforward process. Whether you’re testing a new website or practicing web development, using XAMPP saves you a lot of time and effort. We hope this article helped you easily install XAMPP and host your first webpage locally. If you encounter any doubts or issues, feel free to drop a comment below — we’ll try to assist you as best as possible.
For more tutorials like this, keep visiting our articles!


Tags: xampp, xampp installation, install xampp on windows, localhost server, local web server, apache server setup, how to use xampp, create localhost website, web development, xampp server, xampp tutorial
Hashtags: #xampp #xamppinstallation #installxampp #localhost #localwebserver #apacheserver #webdevelopment #xamppsetup #xamppwindows #xamppguide


