In this guide, we will walk you through the process of downloading, installing, and configuring XAMPP on Windows 10 or 11. By the end of this article, you will have a fully functional local web server using Apache, allowing you to test and run your own webpages on localhost.
Step 1: Download XAMPP
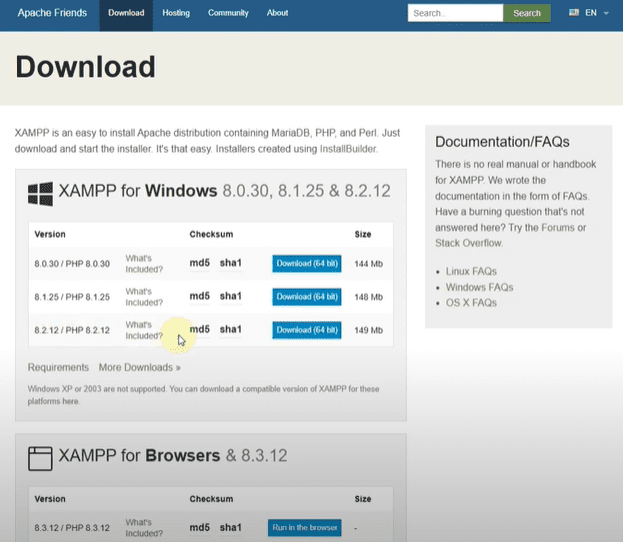
- Open your preferred web browser and go to the official XAMPP website: https://www.apachefriends.org.
- On the homepage, locate the XAMPP for Windows version and click the download link.
- If the download doesn’t start automatically, you can also get it from SourceForge (a trusted open-source platform).
Step 2: Install XAMPP
- Once the download is complete, locate the installer file (usually in the Downloads folder).
- Double-click the installer to launch the setup wizard.
- If prompted by User Account Control (UAC), click Yes to allow the installation.
- Follow the on-screen instructions:
- Click Next on the welcome screen.
- Select the components you want to install (default selection includes Apache, MySQL, PHP, and phpMyAdmin).
- Choose the installation directory (default is
C:\xampp). - Click Next and proceed with the installation.
- Once installed, click Finish to exit the setup wizard.
Step 3: Launch XAMPP Control Panel
- Open the Start Menu and search for XAMPP Control Panel.
- Run the application as Administrator (right-click > Run as administrator).
- The XAMPP Control Panel will display different modules (Apache, MySQL, FileZilla, etc.).
Step 4: Start Apache Server
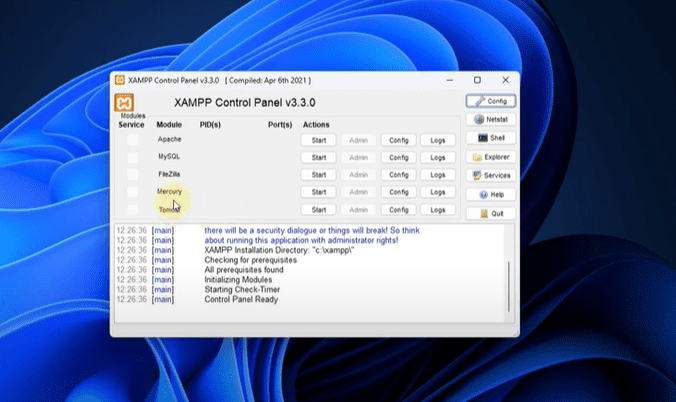
- In the XAMPP Control Panel, locate Apache and click the Start button.
- If successful, the Apache status will turn green, indicating that the server is running.
- (Optional) If you need a database, you can also start MySQL the same way.
Step 5: Test Your Local Server
- Open any web browser (Chrome, Firefox, Edge).
- In the address bar, type:
http://localhost- Press Enter—you should see the XAMPP dashboard, confirming that your local server is working.
Step 6: Host Your Own Webpage on Localhost
If you have a custom HTML/PHP webpage, follow these steps to host it:
- Locate the XAMPP
htdocsfolder:
- Navigate to
C:\xampp\htdocs(or your chosen installation directory). - This is where all your website files should be stored.
- Copy your webpage files:
- If you have an HTML file (e.g.,
index.html), place it inside thehtdocsfolder. - If your project has multiple files, create a subfolder (e.g.,
mywebsite) and place all files inside it.
- Access your webpage:
- Open your browser and enter:
http://localhost/yourfilename.html
(Replaceyourfilename.htmlwith your actual file name.) - If stored in a subfolder:
http://localhost/mywebsite/
Conclusion
You have now successfully:
✔ Installed XAMPP on Windows 10/11.
✔ Configured Apache to run a local web server.
✔ Tested the server using localhost.
✔ Hosted your own custom webpage on XAMPP.
This setup is perfect for web developers, students, and hobbyists who want to test websites before deploying them live.
Tags & Hashtags
#XAMPP #Localhost #WebDevelopment #Apache #Windows10 #Windows11 #WebServer #HTML #PHP #Programming #Coding #BeginnersGuide
Let us know in the comments if you face any issues—happy coding!