If you’re planning to use Kali Linux for penetration testing or cybersecurity practice, setting it up inside a virtual machine is a smart choice. In this detailed guide, you will learn how to easily download and install Kali Linux in VMware Workstation. Follow these simple steps, and you’ll have a fully functional Kali Linux setup without any hassle!
Step 1: Download VMware Workstation
Before we begin, make sure you have VMware Workstation installed on your system. If you haven’t installed it yet, download it from the official VMware website and complete the installation process.
Step 2: Download Kali Linux ISO
Next, you need the Kali Linux ISO file. Visit the official Kali Linux website and navigate to the Download section. Select the latest version of Kali Linux available.
Choose the Installer Images section and make sure you download the 64-bit (x86_64) version for better compatibility and performance.
Step 3: Create a New Virtual Machine
Once both VMware Workstation and the Kali Linux ISO are ready, follow these steps:
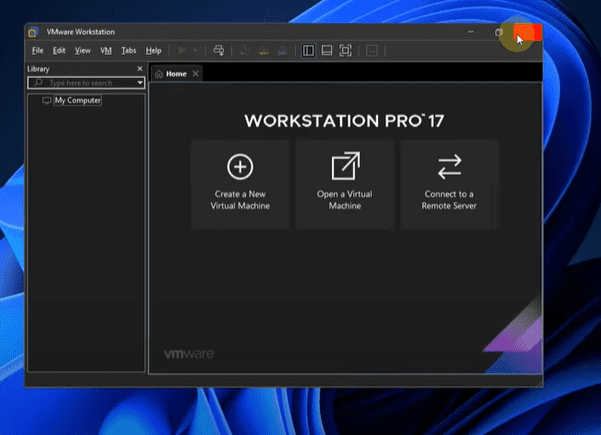
- Open VMware Workstation.
- Click on Create a New Virtual Machine.
- Choose Typical (recommended) and click Next.
- Select Installer disc image file (iso) and browse to the downloaded Kali Linux ISO file.
- Click Next.
Step 4: Set Up the Virtual Machine Details
- Guest Operating System: Choose Linux.
- Version: Select Debian 10.x 64-bit (Kali Linux is based on Debian).
- Click Next.
Now, you’ll be asked to name your virtual machine. You can name it something like “Kali Linux” and choose a location to save the VM files.
Important Tip: Don’t save it in the C drive if you have limited space. Instead, select a drive with more storage capacity. Create a new folder (e.g., “Kali_VM”) and select it.
Step 5: Configure Disk Size
- Set the Maximum disk size to at least 40GB (recommended 60GB or more if you have space).
- Choose Store virtual disk as a single file.
- Click Next.
Step 6: Customize Hardware Settings
Before finishing the setup, click on Customize Hardware:
- Memory (RAM):
Allocate memory according to your system:- 2GB RAM if your system has 4GB total.
- 4GB or 8GB RAM if your system has 8GB or 16GB respectively.
- Processors:
- Number of processors: 1
- Number of cores per processor: Half of your total available cores.
(e.g., If you have 4 cores, allocate 2 cores to Kali Linux).
The more RAM and CPU cores you allocate, the smoother your Kali Linux will run.
Step 7: Start the Installation
- Once everything is set up, click Finish.
- Power on the virtual machine by clicking Power on this virtual machine.
Make sure your PC is connected to the internet before proceeding, as Kali Linux will need internet access during the installation.
Step 8: Install Kali Linux
After booting up:
- Select Graphical Install using your mouse (keyboard might not respond immediately).
- Choose your preferred language, location, and configure your keyboard.
- Set a hostname (you can leave it as “kali”).
- Leave the domain name blank.
- Enter your Full Name and Username (important for login later).
- Set a strong password and confirm it.
Step 9: Partition Disks
When it comes to partitioning:
- Select Guided – use entire disk.
- Select All files in one partition.
- Finish partitioning and write changes to the disk by selecting Yes.
Step 10: Complete the Installation
The installation will now proceed. Just wait patiently as it copies and installs system files.


When prompted:
- Choose to install the GRUB boot loader.
- Select the proper device for GRUB installation (usually the default option).
Once everything is installed:
- Click Continue to reboot the virtual machine.
- The system will restart, and you’ll land on the Kali Linux login screen.
Step 11: Login to Kali Linux
Now, login using the username and password you created earlier.
Congratulations! Your Kali Linux is now ready to use inside VMware Workstation.
If you face any issues during the installation process, feel free to leave a comment below. We’ll try to assist you as soon as possible!
Final Tip
Always ensure that your PC is connected to a stable internet connection during the installation process, especially when the system is detecting network hardware and setting up software components.
Happy Hacking and Learning!
Tags: Kali Linux Installation, VMware Workstation Guide, Install Kali Linux Virtual Machine, Kali Linux for Beginners, VMware Kali Linux Setup
Hashtags: #KaliLinux #VMware #Cybersecurity #PenetrationTesting #LinuxInstallation #EthicalHacking #VirtualMachine #TechTutorial


