Arch Linux is known for being a flexible, minimalist distribution that gives users complete control over their setup. If you’re ready to explore this powerful Linux distro but want to test it first in a safe environment, using VirtualBox is a great choice.
This guide walks you through downloading Arch Linux, verifying the ISO file, setting up your Virtual Machine (VM), and installing Arch with a graphical desktop environment—all within VirtualBox.
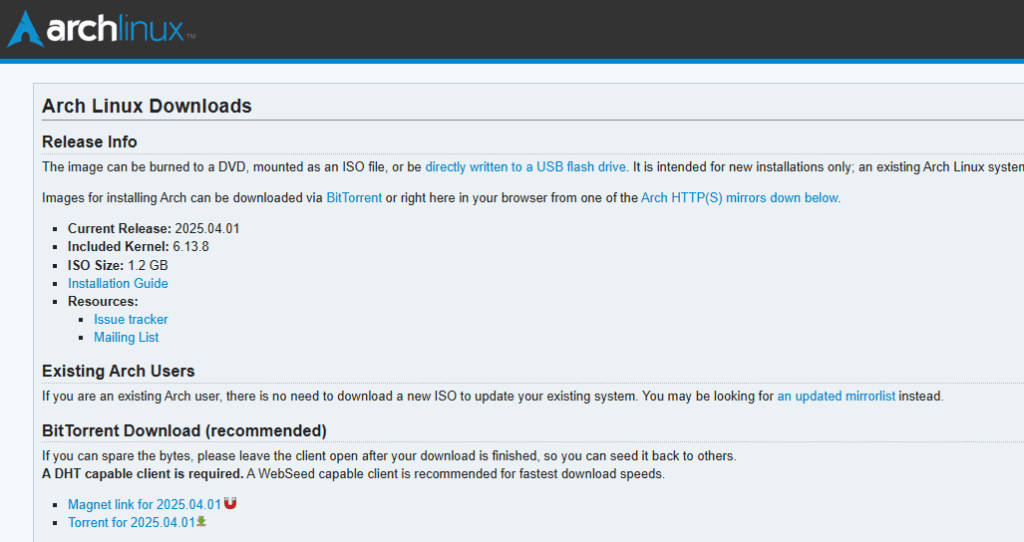
Step 1: Download the Arch Linux ISO File
- Visit the Official Site:
Go to archlinux.org. - Go to Downloads:
On the homepage, click the Downloads link in the top-right corner. - Check the Hash Value:
Scroll down to see the SHA-256 hash of the ISO file. We’ll use this to verify the file’s integrity after downloading. - Download from a Mirror:
Click on the Worldwide geo.mirror link.
This will open a page listing global mirror servers.
Select one to begin downloading the ISO file. It’s about 1 GB in size, so the download should be quick.
Step 2: Verify the ISO File
Verifying the ISO file ensures it wasn’t corrupted or tampered with.
- Open Command Line in the Download Folder:
Navigate to the folder where your ISO file is saved.
In the address bar, typecmdand press Enter to open Command Prompt in that directory. - Use certutil to Verify the Hash:
Run the following command:certutil -hashfile archlinux-version-x86_64.iso SHA256Replacearchlinux-version-x86_64.isowith your actual filename. - Compare Hash Values:
Match the hash output with the one on the Arch Linux download page. If they’re identical, your file is safe to use.
Step 3: Check Virtualization Support
Before proceeding, ensure virtualization is enabled in your system BIOS:
- For MSI Laptops:
Enter BIOS > go to the Advanced tab.
Make sure Virtualization Technology (VT-x) and VT-D are enabled.
Step 4: Set Up the Virtual Machine in VirtualBox
- Open VirtualBox and Create a New VM:
- Click New
- Name your VM (e.g., Arch Linux)
- The type and version should autocomplete (Linux, Arch Linux (64-bit))
- Adjust System Settings:
- Base Memory: Set to a value in the green zone (e.g., 2048–4096 MB)
- Processors: Allocate 4 CPUs if available
- Clipboard: Under General > Advanced, set clipboard to Bidirectional
- Display Settings:
- Increase Video Memory to the maximum
- Attach the ISO File:
- Go to Storage
- Click the CD icon under Controller: IDE
- Choose the Arch Linux ISO you downloaded
- It will appear listed under the controller
- Network Settings:
- Under Network, choose Bridged Adapter
This allows your VM to get an IP address from your router.
- Under Network, choose Bridged Adapter
Step 5: Boot the Arch Linux VM
- Start the Virtual Machine:
- Select your VM and click Start
- Begin Boot Process:
- On the boot menu, select the first option to start Arch Linux
- Improve Readability:
- Go to View in the VirtualBox menu and adjust scaling if the text is too small.
Step 6: Initial System Setup
- Sync Databases:
pacman -Sy - Install Keyring:
pacman -S archlinux-keyring
Step 7: Start the Guided Installation
- Launch Installer:
archinstall - Walk Through the Installation Menu:
- Language: Default is English. Press Enter.
- Keyboard Layout: Choose your layout (e.g., UK)
- Disk Setup:
- Select your disk
- Choose Best Effort
- File System: Select BTRFS
- Enable Compression: Yes
- Bootloader:
- Select GRUB
- Hostname:
- Keep default or set a custom name (e.g., archlinux)
- Set Passwords:
- Create a strong root password
- Create a user account (essential for daily use)
- Desktop Environment:
- Choose Gnome (or your preferred environment)
- Graphics Driver:
- Select VMware/VirtualBox drivers
- Audio System:
- Choose PipeWire
- Network Configuration:
- Use NetworkManager
- Additional Packages (Optional):
- Add useful packages like:
neofetch sudo
- Add useful packages like:
- Time Zone:
- Set to your region (e.g., Europe/London)
Step 8: Install the System
- Navigate to the Install option at the bottom of the menu
- The setup process will now begin. Sit back and relax—it may take a few minutes.
Step 9: Finalize Installation
Once the installation is complete:
- Exit the Installer
- Shutdown the VM:
shutdown now
Step 10: Remove the ISO File from VirtualBox
- Go to Settings > Storage
- Select the ISO under the controller and click Remove from Virtual Drive
Step 11: Boot into Your Installed Arch Linux
- Start the VM again
- Arch Linux should boot up to the login screen
- Enter your username and password
- Welcome to your new Arch Linux desktop!
Step 12: Customize and Install More Software
- Use the pacman package manager to install new applications:
sudo pacman -S firefox gedit vlc - Explore the desktop environment, install themes, and tailor your experience.
Congratulations! You now have a fully functional Arch Linux system running in VirtualBox. This setup is perfect for testing, learning, or even full development work without affecting your main operating system.
Tags:
arch linux, virtualbox, install arch linux, arch linux installation, linux distro, arch setup, linux vm, virtual machine setup, how to verify iso, sha256 hash, btrfs file system, gnome desktop, pacman command, linux tutorial
Hashtags:
#ArchLinux #LinuxInstall #VirtualBox #LinuxTutorial #ArchOnVM #OpenSource #LinuxDesktop #BTRFS #Gnome #Pacman #TechGuide #SystemSetup