If you’re here, chances are Windows 11 hasn’t lived up to your expectations—or maybe you’re just more comfortable with the familiar layout and stability of Windows 10. Whether it’s driver compatibility, legacy software, or personal preference, many users eventually consider going back. The good news? Even after the 10-day rollback period, you can still downgrade. This guide will walk you through each step to clean install Windows 10 safely and correctly.
📝 Important Disclaimer
Disclaimer: This guide involves performing a clean install, which will wipe all data, apps, and settings on your PC. Be sure to back up everything important before proceeding. We are not responsible for any data loss or installation issues.
✅ Step 1: Back Up Your Data and Check Windows Activation
Before we get into the technical steps, let’s take a deep breath and prepare.
Downgrading means all your current files and apps will be erased. So make sure you have a secure backup of:
- Documents
- Photos and Videos
- Software licenses or keys
- Browser bookmarks and passwords (if not synced)
How to Back Up Safely:
- Use an external hard drive or USB drive
- Or back up your files to Google Drive, OneDrive, or any preferred cloud storage
Check Activation Status (Important for License Reuse):
- Click Start → Settings (gear icon)
- Go to System → Activation
- Check the status. It should say Windows is activated with a digital license
📝 Note the edition mentioned (e.g., Windows 11 Pro). You’ll need to match it during the Windows 10 installation later.
🔽 Step 2: Download the Official Windows 10 ISO
We’re going to get the ISO file directly from Microsoft using the Media Creation Tool.
Follow these steps:
- Open your browser and search:
Download Windows 10 or visit:
👉 https://www.microsoft.com/software-download/windows10 - Scroll to Create Windows 10 installation media and click Download tool now
- After downloading, run the MediaCreationTool22H2.exe
- Accept the license terms
- Choose Create installation media (USB flash drive, DVD, or ISO file) for another PC → Click Next
- Uncheck Use the recommended options if the default isn’t correct
- Set:
- Language: English (United States)
- Edition: Windows 10 (match your edition, e.g., Pro)
- Architecture: 64-bit
- Choose ISO file, click Next, and save it to Desktop or another folder
- Wait for the 4–5 GB download to finish, then click Finish
💿 Step 3: Mount the ISO & Launch Setup
Once the ISO file is ready, let’s initiate the installation.
Here’s how:


- Right-click the downloaded ISO file → Select Mount
- This creates a new virtual DVD drive (e.g., Drive E)
- Open the drive → Double-click on setup.exe
The Windows 10 setup will begin preparing your system.
- Choose Download and install updates for drivers
- Accept the license agreement
- When asked What to keep?, everything will be greyed out—this is a clean install
- Confirm the warning and click Next → Then click Install
Your system will now restart and begin installing Windows 10. Sit tight—this process can take 30–60 minutes, depending on your PC’s hardware.
🖥️ Step 4: Complete Windows 10 Installation
Once the system restarts, you’ll enter the Windows 10 setup interface. Here’s what to expect:
- Select your region → English (United States)
- Choose keyboard layout → US or preferred layout
- On the network screen, click I don’t have internet (to skip Microsoft login)
- Select Continue with limited setup
- Choose a username → e.g., Techfan
- (Optional) Set a password → or skip for now
- Turn off all privacy toggles (Location, Ads, Diagnostics, etc.)
- Click Accept and let the setup finalize
After a few minutes, you’ll land on the Windows 10 desktop—clean, familiar, and ready to use.
🔐 Step 5: Verify Activation & Finish Setup
To complete the process, make sure your new Windows 10 install is activated.
- Right-click Start → Select Settings
- Navigate to Update & Security → Activation
- You should see:
Windows is activated with a digital license
This works because your hardware ID was already registered with Microsoft from your Windows 11 license.
If not activated, you may need to:
- Sign in with your Microsoft account
- Manually enter your original Windows 10 or 11 product key
Finally:
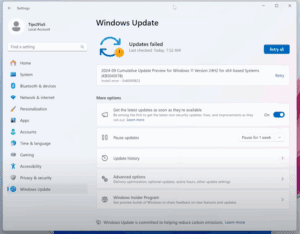
- Go to Windows Update and click Check for updates
- Install all available drivers and security patches
- Restart as needed
🔄 Why Downgrade to Windows 10?
Here are a few common reasons users choose to roll back:
- 🧩 Better compatibility with older software or hardware
- 🖥️ Familiar and stable interface
- 🛠️ Fewer bugs or performance issues on some machines
❓ FAQ: Downgrading Windows 11 to 10
Q: Can I downgrade after the 10-day rollback period?
Yes! This tutorial shows how to clean install Windows 10 anytime.
Q: Will my data be safe?
Not during a clean install. You must back up manually before proceeding.
Q: Is this method legal and safe?
Absolutely. You’re using the official Microsoft ISO and tools.
Q: Will my PC be activated after downgrading?
Yes, if your system was previously activated with a digital license tied to your hardware.
Q: Can I upgrade to Windows 11 again later?
Yes, you can upgrade any time via Windows Update or ISO.
🎉 Conclusion: Welcome Back to Windows 10!
You’ve successfully downgraded from Windows 11 to Windows 10, even after the 10-day window expired. With a clean install, you now have a fresh start—free of bloat, bugs, or incompatible drivers.
If you found this guide helpful, feel free to bookmark it or share it with others facing the same dilemma.
Tags: downgrade Windows 11, install Windows 10, Windows 10 ISO, clean install Windows, digital license, Media Creation Tool, Microsoft OS, Windows activation
Hashtags:
#Windows10 #Windows11 #DowngradeGuide #CleanInstall #TechTutorial #MicrosoftWindows #DigitalLicense #ISOinstall
🔗 Official Microsoft Tools:
👉 Download Windows 10 ISO – Media Creation Tool
👉 More Windows Guides on DTPtips.com
Let us know in the comments: Why did you switch back to Windows 10?


