Introduction
Adobe InDesign offers versatile tools for manipulating shapes and objects. One common task is cutting shapes into separate parts, allowing you to customize your design elements. This article provides a detailed guide on how to cut a shape in Adobe InDesign using the Pathfinder panel.

Step 1: Create Your Shape
- Select the Shape Tool:
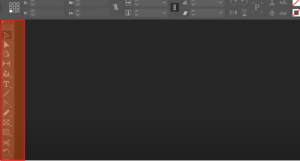
- Navigate to the Toolbar on the left side of the screen and find the Rectangle Tool.
- Right-click on the tool to access other shape options, such as the Polygon Tool.
- Draw the Shape:
- Select the Polygon Tool (or another shape tool of your choice).
- Choose a fill color for your shape and set the stroke as needed. For this example, use a blue fill and remove the stroke.
- Click and drag while holding the Shift key to create a proportionally scaled shape.
Step 2: Add the Cutting Guide
- Choose the Rectangle Tool:
- Return to the Toolbar, right-click on the Polygon Tool, and select the Rectangle Tool (shortcut: M).
- Draw a Cutting Line:
- Set the rectangle fill to a contrasting color, such as white.
- Drag the rectangle across the polygon shape, ensuring it overlaps the area you wish to cut.
- Center the rectangle for precise cuts, if needed.
- Preview the Layout:
- Enable the Preview Mode to visualize how the cut will look.
Step 3: Use the Pathfinder Panel
- Open the Pathfinder Panel:
- Go to Window > Object and Layout > Pathfinder to open the panel.
- Select Both Shapes:
- Click and drag to select both the polygon and rectangle shapes.
- Apply the Subtract Function:
- In the Pathfinder panel, choose the Subtract option. This operation removes the front object (rectangle) from the back object (polygon), effectively cutting the shape.
Step 4: Divide the Shapes
- Release Compound Path:
- With the cut shape still selected, go to Object > Paths > Release Compound Path.
- Use the keyboard shortcut Ctrl + Alt + Shift + 8 (Windows) or Cmd + Option + Shift + 8 (Mac) for quicker access.
- Separate the Shapes:
- Select and move the individual parts of the divided shape to confirm they are now separate objects.
Step 5: Save and Finalize
- Adjust Shapes:
- Modify the colors, sizes, or positions of the individual shapes as needed for your design.
- Save Your Work:
- Save your document to preserve the changes.
Conclusion
Cutting shapes in Adobe InDesign is a straightforward process when using the Pathfinder panel and tools like the Rectangle Tool. This technique allows for greater flexibility and creativity in your designs, making it an essential skill for any InDesign user.
Use these steps to experiment with different shapes and designs, enhancing your layouts with customized elements.
Hashtags: #AdobeInDesign #InDesignTips #GraphicDesign #Pathfinder #ShapeEditing

