Introduction
Cropping an image is a common task in Adobe InDesign, whether you’re focusing on a specific part of an image or resizing it to fit your design layout. In this article, we’ll cover two methods for cropping images: scaling the image within its frame and adjusting the image frame itself. Let’s dive into the details!

Step 1: Insert an Image
- Open a new or existing InDesign document.
- Use the Rectangle Frame Tool (
F) to create an image placeholder. - Insert an image into the frame:
- Drag and drop an image into the placeholder, or
- Use File > Place (
Ctrl + Don Windows,Cmd + Don Mac).
Step 2: Cropping Methods
There are two primary ways to crop an image in InDesign:
Method 1: Scaling the Image
Scaling allows you to focus on a specific part of the image by enlarging it within its frame.
- Select the Image:
- Double-click on the image within the frame. This will highlight the orange bounding box around the image.
- Scale the Image:
- Hover over one of the corner points of the orange box.
- Hold down
Alt+Ctrl(Windows) orOption+Command(Mac). - Click and drag the corner point to scale the image up or down.
- Release the keys to lock the scaling.
This method ensures the image remains within its original frame while allowing you to zoom in on specific areas.
Method 2: Adjusting the Image Frame
Cropping involves resizing the frame itself to display only the desired part of the image.
- Select the Image Frame:
- Click on the edges of the frame to highlight it.
- Crop the Frame:
- Drag the frame’s edges or corners inward to hide unwanted parts of the image.
- Adjust any side of the frame (top, bottom, left, or right) as needed.
- Fine-Tune the Crop:
- If needed, click inside the frame to reposition the image. Drag the image to align it within the cropped area.
Step 3: Adjusting Image Proportions
After cropping, you might notice the image doesn’t fit perfectly within the frame. Here’s how to fix that:
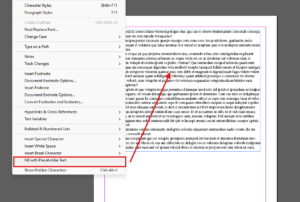
- Fit the Image to the Frame:
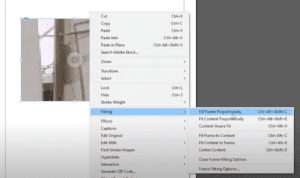
- Right-click on the image and choose Fitting > Fill Frame Proportionally.
- This will resize the image to fit the frame without distortion.
- Resize the Frame:
- If you want to make the frame taller or wider, click on its edges and drag outward.
Additional Tips
- Shortcut for Fitting Images: Use the shortcut
Ctrl + Alt + Shift + C(Windows) orCmd + Option + Shift + C(Mac) to fit the image to its frame proportionally. - Non-Destructive Cropping: InDesign’s cropping is non-destructive, meaning the hidden parts of the image remain intact and can be revealed later by resizing the frame.
Conclusion
Cropping images in Adobe InDesign is a simple yet powerful way to control how images appear in your layout. Whether you scale the image to focus on a specific element or adjust the frame to hide unwanted areas, these techniques ensure your designs look professional and polished.
#AdobeInDesign #InDesignTips #GraphicDesign #ImageCropping #DesignTools #CreativeDesign