Transforming images into creative shapes is a great way to enhance your designs in Adobe InDesign. This guide explains how to use the Pathfinder tool to create various shapes from your images and optimize your layouts effectively.

Step 1: Setting Up the Image
- Open Adobe InDesign and create or open an existing document.
- Use the Rectangle Frame Tool (shortcut
F) to draw a frame where you want to insert your image. - Import your image:
- Go to File > Place or press
Ctrl + D(Windows) orCmd + D(Mac). - Select your image and click Open.
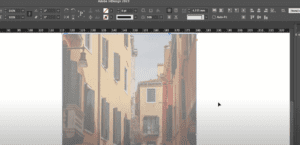
- The image will appear inside the frame.
- Go to File > Place or press
Step 2: Accessing the Pathfinder Tool
The Pathfinder tool is essential for converting images into various shapes. If it’s not already visible in your workspace, follow these steps to open it:
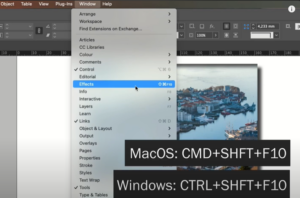
- Go to Window > Object & Layout > Pathfinder.
- The Pathfinder panel will appear, featuring three sections:
- Paths
- Pathfinder
- Convert Shape
For this tutorial, focus on the Convert Shape section.
Step 3: Converting Images into Shapes
- Select the Image:
- Click on the image or drag to select the frame containing the image.
- Choose a Shape:
- In the Convert Shape section of the Pathfinder panel, select a shape:
- Triangle
- Circle
- Rounded Rectangle
- Polygon, etc.
- The image frame will transform into the chosen shape.
- In the Convert Shape section of the Pathfinder panel, select a shape:
Step 4: Adjusting the Shape and Image
- Resize the Shape:
- Use the corner handles to resize the shape manually.
- Alternatively, set specific dimensions in the Control Panel for precise sizing.
- Fit the Image:
- Right-click the image and choose Fitting > Fill Frame Proportionally.
This ensures the image fills the shape evenly without distortion. - Adjust the image position inside the frame as needed.
- Right-click the image and choose Fitting > Fill Frame Proportionally.
Step 5: Restoring the Image to a Rectangle
If you want to revert the image to its original rectangular shape:
- Select the Shape: Click on the shape containing the image.
- Convert Back to Rectangle:
- In the Pathfinder Panel, select the Rectangle option under Convert Shape.
- The image will return to its original rectangular frame.
Pro Tips
- Duplicate the Image Before Conversion:
Make a copy of the image before applying the shape conversion to preserve the original design for future use. - Experiment with Shapes:
Try combining shapes and applying effects for creative layouts. - Maintain Aspect Ratio:
Use the Shift key while resizing the shape to maintain proportional dimensions.
Summary
Using the Pathfinder tool in Adobe InDesign allows you to transform simple images into dynamic shapes like triangles, circles, and polygons. This technique is excellent for creating visually appealing designs while maintaining flexibility.
