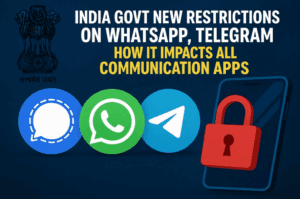
If you’ve ever wondered whether it’s possible to create stunning YouTube thumbnails directly on your smartphone, the answer is a resounding yes—and that too within just a few minutes. This guide walks you through creating eye-catching thumbnails using only your mobile device, without any need for a computer or advanced graphic design knowledge.

We’ll also provide a free resource pack with over 100 essential elements like arrows, icons, and overlays to supercharge your thumbnail design.
📱 Tool You’ll Need: PixelLab App
To start creating your thumbnails, you’ll need to download the PixelLab app from the Google Play Store. It’s a powerful and lightweight mobile design app that allows you to add text, images, effects, shapes, and more.
🔧 Step-by-Step Guide to Create a YouTube Thumbnail
1. Set the Correct Canvas Size
- Open PixelLab.
- Tap on the three dots at the top right and select Image Size.
- Choose preset dimensions: 1280 x 720 pixels (YouTube standard).
- Tap OK.
2. Delete Unwanted Default Elements
- Remove the default text box on the canvas to start fresh.
3. Add a Background
a. Import a Mobile Screen Image:
- Visit Pexels and search for a mobile screen or tech-themed background.
- Download a suitable image and import it into PixelLab via the + icon and Gallery.
b. Add a Gradient:
- Tap the Color option from the bottom menu.
- Select Gradient and either choose a pre-made one or create a custom gradient.
- For a pink and blue effect:
- Tap the + icon to customize.
- Set the first color to pink, second to blue, and apply.
c. Blend the Background:
- Adjust the image’s opacity to around 25% to make it subtle.
- Optionally reduce the brightness of the gradient slightly.
d. Lock the Background:
- Tap the Layers icon and lock the imported image to prevent accidental movement.
4. Import a Subject Image (e.g., Mark Zuckerberg)
- Find a high-resolution image from Wikipedia.
- Use a clean background remover tool like Remove.bg to get a PNG cutout.
- Import the PNG into PixelLab and resize/position it as needed.
- Lock this layer too once positioned correctly.
5. Add Text to the Thumbnail
- Tap the + icon and choose Text.
- Enter your headline, such as “It’s The End”.
- Customize fonts using built-in ones or import from your phone.
- Suggested font: Montserrat.
- Resize and position text elements.
- Lock text layers after adjusting.
6. Add Design Elements
a. Add a Colored Rectangle Behind Text:
- Use Shapes > Rectangle.
- Change its color to red and reduce opacity to 50%.
- Move the rectangle layer below the text and subject image.
b. Add Fire Overlay:
- Search “Fire PNG” on Google and import one.
- Resize and reduce opacity for a dramatic effect.
7. Export Your Thumbnail
- Tap the three-dot menu and choose Export Image.
- Select format: PNG.
- Tap Save to Gallery.
You now have a professional-grade thumbnail made entirely on your phone.
🔄 Bonus: Second Thumbnail Concept Breakdown
Want another thumbnail idea? Here’s how to create a cinematic-style thumbnail inspired by video editing tools:
1. Create a Diagonal Gradient
- Same gradient as before (pink and blue), but switch to diagonal style and swap color positions.
2. Add a Timeline Image
- Import a video editing timeline screenshot to reflect an editing theme.
- Adjust saturation to make it pop.
- Lock the layer.
3. Add a PNG of a Person (e.g., Mark Rober)
- Align horizontally using Relative Position Tool.
- Adjust brightness, contrast, and add shadow/stroke from the Color Filters and Shadow settings.
4. Add Text Elements
- Use impactful words like “Break Down” and “Editing” with different fonts.
- Use styles like italic and contrasting weights.
- Arrange them smartly in the layout and lock the layers.
5. Add Tool Logos with 3D Effects
- Import icons like Adobe Premiere Pro or Final Cut Pro.
- Use 3D Rotate and 3D Shape features to give depth and realism.
- Adjust depth color to match the icon’s palette.
6. Add Action Lines (Optional)
- Import action line PNGs from the free pack.
- Send to back layer and reduce opacity for subtle background drama.
📦 Free Thumbnail Elements Pack
We’ve created a free pack containing over 100+ elements like:
- Arrows
- Icons
- Overlays (e.g., fire, action lines)
- Shapes
Use them to speed up your design workflow. Download the Free Pack (Insert your actual link here)
💡 Final Tips
- Always lock layers once positioned to avoid misalignment.
- Use high-quality subject images to maintain thumbnail clarity.
- Keep text minimal and readable.
- Use contrast to make important elements pop.
With consistent practice, you’ll be creating click-worthy thumbnails that get views and elevate your brand—even as a beginner!
✅ Tags:
thumbnail creation, mobile design, PixelLab tutorial, YouTube thumbnails, graphic design mobile, free thumbnail pack, mobile graphic design, Mark Zuckerberg thumbnail, PixelLab gradient, create thumbnails on phone
✅ Hashtags:
#PixelLab #YouTubeThumbnails #MobileDesign #ThumbnailTutorial #FreeDesignPack #GraphicDesign #ThumbnailOnPhone #CreateOnMobile #YouTubeTips #DesignTools


