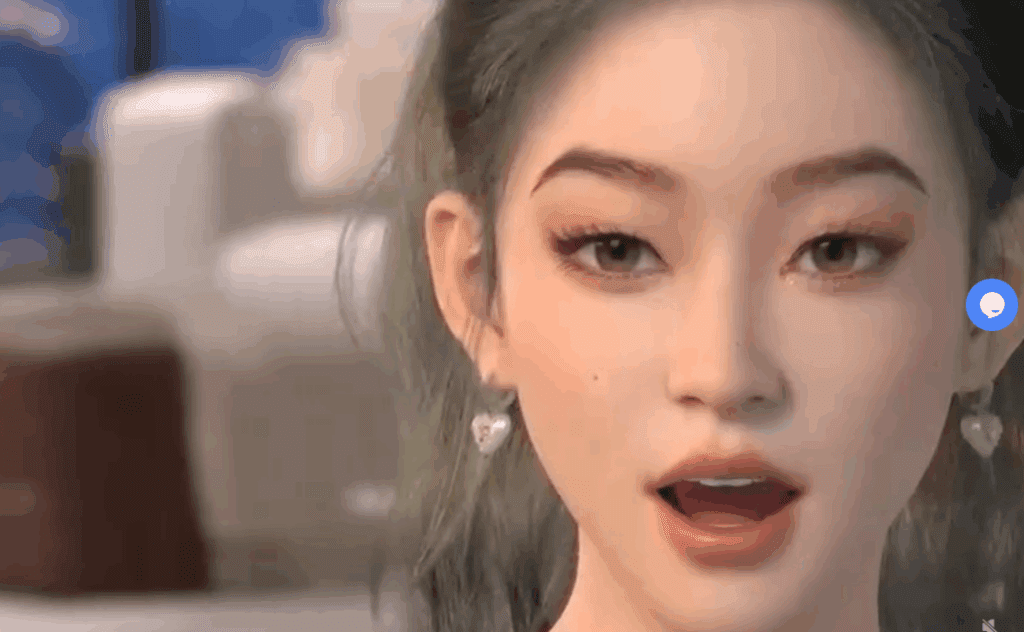
Faceless content has rapidly become one of the most profitable and scalable forms of digital media. With the rise of AI-powered tools, creating videos without ever showing your face has never been easier or more professional. One such revolutionary tool is Rendora AI — an all-in-one platform that lets anyone generate studio-quality 3D avatar videos with realistic voiceovers, customizable avatars, and no need for actors or complex editing.
In this article, we’ll walk you through step-by-step how to use Rendora AI to create your own 3D avatar videos for YouTube, social media, marketing, and more.
🌟 What is Rendora AI?
Rendora AI is a cloud-based 3D avatar video creation tool that allows users to:
- Customize 3D avatars (over 3,000 available)
- Create voiceovers in 20+ languages and multiple voice styles
- Choose from portrait and landscape templates
- Edit video scenes with gestures, actions, pauses, and subtitles
- Export high-quality videos up to 4K resolution
- Generate content with ease – no prior experience needed
And the best part? There’s a free plan available, so you can try it before committing to a premium package.
🛠 Step-by-Step Guide: Creating Your First Avatar Video in Rendora AI
Step 1: Get Started with Rendora
Visit the official site: https://www.rendora.ai/
Sign up for a free account to access the platform. Once inside, you’ll be presented with the dashboard, which includes:
- A selection of 3D avatars
- Video templates (portrait and landscape)
- Voiceover tools
- Script assistance
- Editing and exporting options
Step 2: Choose or Create Your 3D Avatar
You can either select from over 3,000 pre-designed avatars or create your own from scratch.
To customize your avatar:
- Click on Create Customized Avatar
- Choose a base model
- Modify hairstyle, hair color, outfits, glasses, earrings, and even makeup
- Save your avatar and give it a name
🎨 Pro Tip: Use casual outfits and accessories if your goal is influencer-style or informal content.
Step 3: Select Your Studio Background
Rendora lets you pick from multiple studio environments. You can choose between:
- Landscape (ideal for YouTube videos)
- Portrait (perfect for Instagram Reels, YouTube Shorts, TikToks)
Select the background that fits your content’s vibe and audience.
Step 4: Add Voiceovers
Voiceovers are crucial for faceless content. Rendora offers a huge selection of natural-sounding voices in multiple languages.


Here’s how to apply one:
- Go to the Voiceover section
- Filter by language, gender, or voice type (e.g., Friendly, Professional, Narrator)
- Choose a voice – for example, “Isabelle” for a friendly tone
- Click Apply
You can also preview voices before selecting, and customize their speaking style.
Step 5: Add Your Script
Now it’s time to add your message:
- You can type the script manually
- Upload a script file, or
- Use the AI writing assistant for help (including translation in 20+ languages)
Once your script is in place, Rendora will sync it with the avatar’s mouth movement and voiceover.
Step 6: Fine-Tune Actions & Gestures
For added realism:
- Use the Action button to add gestures like hand movements
- Insert pauses for dramatic effect or realism
- Apply different animations at any point of the video
These edits give your avatar a life-like presence and make your video more engaging.
Step 7: Preview and Generate Video
After setting up your avatar, voice, script, and actions:
- Click Generate 3D
- Wait for processing (usually fast)
- Preview your video output
Example: “Hey, I think you should subscribe to Brain Project for the best AI hacks.” – created in seconds!
Step 8: Edit and Export Your Video
In the video editor, you can:
- Edit clips
- Reorder scenes
- Make additional changes to avatars or scripts
When satisfied:
- Click Export
- Name your project
- Choose your resolution (up to 4K supported)
- Add subtitles (optional)
- Remove watermark (with premium)
Once exported, you can download, share, or save the video for later use.
✅ Key Features of Rendora AI
| Feature | Description |
|---|---|
| 3D Avatar Library | 3,000+ customizable avatars |
| Voiceovers | Multilingual, multi-style voice selection |
| Templates | Portrait and landscape for all platforms |
| Studio Environments | Choose or design your video background |
| Script Integration | AI-assisted writing, upload options |
| Video Editor | Scene-based editing, actions, gestures |
| High-Quality Output | Export in HD, Full HD, or 4K |
🤔 FAQs About Rendora AI
Q1: Is Rendora free to use?
Yes, Rendora offers a free plan with access to basic features. Premium plans offer higher quality exports and watermark removal.
Q2: Can I use my own voice?
Currently, Rendora focuses on AI-generated voiceovers. You can upload a voiceover separately in post-production.
Q3: Is it good for YouTube Shorts or TikTok?
Absolutely! With portrait templates, Rendora is perfect for creating viral short-form content.
Q4: Can I monetize content made with Rendora?
Yes. Videos created using your own scripts and avatars can be monetized on YouTube, Instagram, etc., provided you follow platform-specific guidelines.
📌 Final Thoughts
Rendora AI is one of the most powerful tools out there for creating high-quality faceless content. Whether you’re a content creator, digital marketer, or AI enthusiast, this tool offers an efficient, cost-effective, and creative way to produce videos at scale.
If you’re ready to start your faceless content journey, give Rendora AI a try today.
📎 Tags:
AI video maker, avatar video creation, faceless YouTube content, 3D avatar tools, voiceover automation, AI tools for content creators, Rendora review, text to video AI
📢 Hashtags:
#FacelessContent #RendoraAI #3DAvatarVideo #AIContentCreation #TextToVideo #VoiceoverAI #AIYouTubeVideos #VTubing #ContentAutomation
⚠️ Disclaimer:
All AI-generated content should comply with the terms of service of platforms you publish on. Always ensure that any avatars, voices, or scripts do not violate copyright or community guidelines.