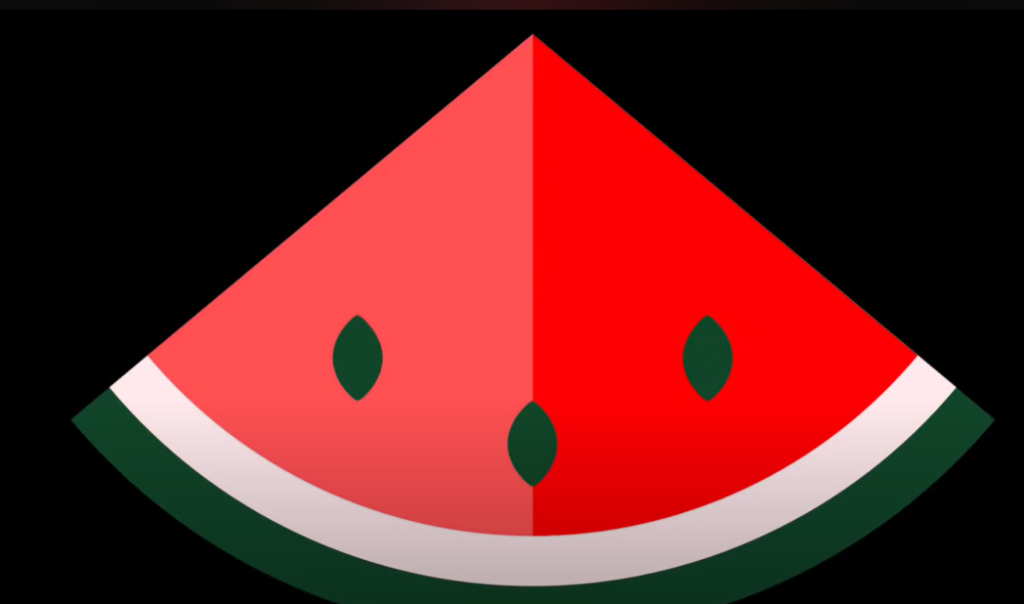
Icons are simple graphics designed to represent an object, concept, or action. In this tutorial, we’ll show you how to create a watermelon icon in CorelDRAW using just two simple shapes: a circle and an ellipse. Let’s dive into the steps!
Step 1: Preparing the Workspace
Before starting, it’s important to streamline your workspace for an efficient workflow:
- Add Document Colors to Palette:
- Go to
Window > Color Palettes > Add Colors from Document. - This step will add all the colors in your file to the palette, making it easier to access swatches for fills and outlines.
- Delete Unnecessary Objects:
- With the pick tool, select any unused objects, such as a group of color swatches, and delete them.
- Enable Alignment Guides:
- Ensure alignment guides are turned on by going to
View > Alignment Guides. - If this option is grayed out, turn off any snapping options to activate the alignment guides.
Step 2: Create the Base of the Watermelon Slice
- Transform the Circle:
- Start by selecting the circle.
- Use the Shape Tool (found below the Pick tool) to click and drag the single node at the top of the circle to the left.
- This transforms the circle into a pie shape.
- Flip the Pie Shape:
- Switch to the Pick Tool and click the Mirror Vertically icon on the property bar to flip the shape, making the curved part appear at the bottom.
Step 3: Duplicating and Scaling
- Create the Watermelon Layers:
- With the pie shape selected, press
Ctrl+D(orCmd+Don Mac) to duplicate it. - Increase the size of the duplicate by setting the scale ratio to 110% on the property bar and lock the scale for both directions.
- Set the fill color of the new pie shape to light pink.
- Duplicate Again for the Rind:
- Press
Ctrl+Dagain to duplicate the light pink pie shape. - This time, scale the new shape to 120% and fill it with dark green.
- Arrange the Layers:
- To adjust the order, right-click on the green object and choose
Order > To Back of Page. - Adjust the light pink object similarly to place it in the middle layer.
- Align and Group:
- Select all three pie shapes using the Pick Tool, then press
Rto align right andTto align top. - Press
Ctrl+G(orCmd+G) to group the shapes together.
Step 4: Completing the Watermelon Slice
- Duplicate and Mirror:
- With the group of shapes still selected, press
Ctrl+Cto copy andCtrl+Vto paste. - Hold
Ctrl(orCmdon Mac) and drag the center-left handle to the right to flip the copied group, creating the other half of the watermelon slice.
- Add Depth:
- Select just the red slice and fill it with a slightly darker red to add depth.
Step 5: Create Watermelon Seeds
- Shape the Seeds:
- Select the dark green ellipse and use the Shape Tool to convert it to curves by clicking the
Convert to Curvesicon on the property bar. - Drag the nodes at the top and bottom to sharpen them, transforming the ellipse into a seed shape.
- Duplicate and Align Seeds:
- Move the seed to the front of the slice and duplicate it as needed to place more seeds symmetrically across the watermelon.
Step 6: Create a Simplified Single-Color Version
- Switch to Page Two:
- If you wish to preserve the colored version of your icon, switch to the second page that contains a copy of the completed design.
- Change All Outlines to Black:
- Select all the objects and right-click the black swatch to set the outline color to black.
- Set the outline width to 4 points for better visibility.
- Remove All Fills:
- Left-click the No Color swatch to remove the fills from all objects, leaving only the outlines.
- Close Any Gaps:
- Use the Virtual Segment Delete Tool from the crop tool group to delete any extra line segments, ensuring that your outlines are clean.
Step 7: Final Adjustments
- Fill the Rind:
- Activate the Smart Fill Tool and set the fill to black.
- Click inside the outer shape to fill the rind area.
- Adjust and Group:
- Use the Pick Tool to adjust the final positioning of all elements.
- Group the objects to complete the simplified version of the watermelon icon.
Conclusion
Now you’ve created your very own watermelon icon in CorelDRAW using simple shapes and tools! Whether you want a full-color version or a black-and-white outline, CorelDRAW gives you the flexibility to create icons that match your vision.
Hashtags: #CorelDRAW #IconDesign #WatermelonIcon #GraphicDesign #SimpleShapes #CorelDRAWTutorial #CreativeTools #VectorGraphics


