Creating vector illustrations in CorelDRAW using simple tools is not only fun but also a fantastic way to explore creativity. In this tutorial, we’ll demonstrate how to create a full illustration using only the Rectangle Tool. This guide walks you through the steps to master the tool, create a background, and make a simple yet effective design.

Steps to Create an Illustration Using the Rectangle Tool
1. Set Up Your Canvas
Before starting, ensure your workspace is ready:
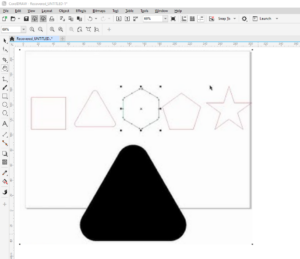
- Create a Perfect Rectangle:
- Select the Rectangle Tool from the toolbar.
- Hold down the Ctrl key while dragging to create a perfect square.
- If you want a rectangle, release the Ctrl key to adjust the proportions freely.
- Fill the Canvas:
- Double-click on the Rectangle Tool while holding Ctrl to create a rectangle that perfectly fits the canvas.
- This saves time and ensures a precise fit, no matter the page orientation.
- Adjust Page Size to Object:
- Select the rectangle.
- Use the Adjust Page to Objects feature from the toolbar. This resizes the page to match your rectangle’s dimensions, eliminating the need for manual adjustments.
2. Create a Background
- Add Color:
- Select your rectangle and apply a background color. For example, use a light blue for the sky.
- Enhance with Gradient or Transparency (Optional):
- Select the Transparency Tool.
- Apply a uniform transparency effect to create a soft, blended background effect.
3. Begin Your Design
- Use the Rectangle Tool:
- Stick to the Rectangle Tool to design all elements, such as buildings, mountains, or even water bodies.
- Adjust the sizes and positions for variety.
- Color the Elements:
- Apply vibrant colors to different rectangles to represent various parts of the design. For example:
- Blue for water
- Green for land
- Brown for structures
- Apply vibrant colors to different rectangles to represent various parts of the design. For example:
- Compose Your Scene:
- Arrange the rectangles creatively to form objects like islands, hills, and more.
- For additional detail, layer smaller rectangles for features like flags or waves.
4. Add Final Touches
- Overlay Transparency:
- To give the illustration a subtle, professional look, add a semi-transparent rectangle over the entire design.
- Select a neutral color, adjust the opacity, and blend it with the base illustration.
- Fine-Tune Your Design:
- Experiment with placement, colors, and transparency to achieve the desired effect.
5. Applications of Your Design
The resulting illustration can serve multiple purposes:
- Use it as a background for flyers or brochures.
- Incorporate it into page layouts as a decorative element.
- Transform it into a watermark by reducing opacity.
Creative Challenge
Try creating your own illustration using the Rectangle Tool! You’re not limited to replicating this tutorial—let your imagination run wild. Share your artwork on your preferred platform or integrate it into your projects.
Core Skills You’ll Learn
- Efficient use of the Rectangle Tool
- Adjusting page sizes to objects
- Applying colors and transparency
- Layering and composing illustrations
With these steps, you’re not just creating a design—you’re mastering a versatile tool in CorelDRAW that’s ideal for both beginners and professionals.
Tags: CorelDRAW, vector illustration, rectangle tool, how to draw with CorelDRAW, graphic design tutorial
Hashtags: #CorelDRAW #GraphicDesign #VectorArt #DesignTutorial #RectangleTool #Illustration


