Introduction
Adobe InDesign is a powerful design tool that allows you to create and manipulate shapes with ease. While it doesn’t have a direct option to create a half circle, you can achieve this in a few simple steps by using the Ellipse Tool and Scissors Tool. This article provides a step-by-step guide to creating a half circle in Adobe InDesign.
Step 1: Create a Full Circle
- Access the Ellipse Tool:
- Go to the Toolbar on the left side of the screen.
- By default, the Rectangle Tool is selected. Right-click on it and choose the Ellipse Tool from the menu.
- Alternatively, you can use the keyboard shortcut L to activate the Ellipse Tool.
- Select a Fill Color:
- Before creating your circle, select a color for it.
- Navigate to the Swatches Panel or use the Fill and Stroke Options in the Toolbar. For example, you might choose a blue fill for this demonstration.
- Draw the Circle:
- Click and drag on the artboard to draw your circle.
- Hold down the Shift key while dragging to ensure the shape is a perfect circle.
Step 2: Split the Circle
- Access the Scissors Tool:
- Go to the Toolbar and select the Scissors Tool.
- You can also use the keyboard shortcut C to activate it.
- Zoom In for Precision:
- Zoom in on your circle to make precise cuts.
- Make Two Cuts:
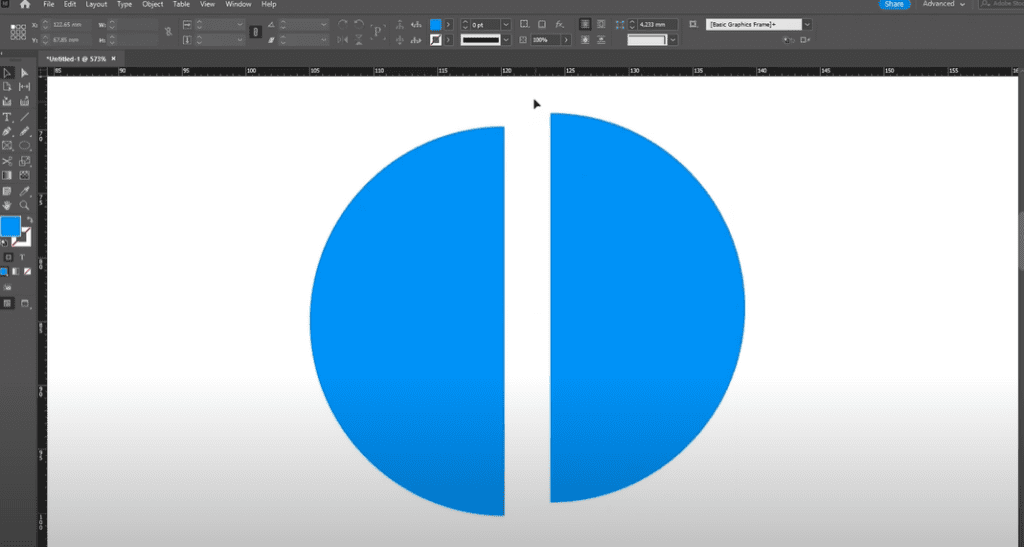
- With the Scissors Tool selected, click on the circle at two opposite points where you want to split it. For example, cut the circle at the top and bottom points.
- You’ll notice the cursor changes to indicate where you’re making the cuts.
Step 3: Remove Half of the Circle
- Select the Split Path:
- Use the Direct Selection Tool (shortcut: A) to select one half of the circle.
- Delete the Unwanted Half:
- Press Delete or Backspace to remove the unwanted portion of the circle.
Step 4: Customize the Half Circle
- Change Color or Stroke:
- You can adjust the fill color, add a stroke, or modify the remaining half circle as desired.
- Resize or Rotate:
- Use the Selection Tool (shortcut: V) to resize or rotate the half circle to fit your design needs.
Conclusion
Creating a half circle in Adobe InDesign is an easy and efficient process using the Ellipse Tool and Scissors Tool. This method allows for precise customization and flexibility, making it ideal for various design projects.
Hashtags: #AdobeInDesign #InDesignTips #GraphicDesign #DesignTutorials #InDesignBasics
Visited 168 times, 1 visit(s) today


