Introduction
Footers play a crucial role in maintaining consistency and professionalism in multi-page documents. They are typically used to display essential information like page numbers, document titles, or dates. This guide will take you through the step-by-step process of creating a footer in Adobe InDesign, ensuring that it appears consistently across all pages.

Step 1: Open Your Document
- Create or Open a Document: Launch Adobe InDesign and open your project or create a new document.
- Access the Pages Panel:
- Open the Pages Panel by navigating to Window > Pages if it’s not already visible.
- Use the shortcut F12 to quickly access it.
- View the Pages: The panel will display the pages in your document, including any parent (formerly master) pages.
Step 2: Decide Where to Place the Footer
Footers can be added to individual pages or applied globally across all pages using parent pages. If you want the footer to appear on every page:
- Use the Parent Page: This ensures uniformity and eliminates the need to manually add the footer to each page.
Step 3: Add Pages (If Needed)
- Insert More Pages:
- Click the Create New Page icon at the bottom of the Pages Panel to add more pages.
- For this example, let’s assume you’ve added five pages.
- Select the Parent Page:
- In the Pages Panel, double-click on the Parent Page to enter its editing mode.
Step 4: Add a Footer
- Activate the Type Tool:
- From the toolbar on the left, select the Type Tool (shortcut: T).
- Create a Text Box:
- Click and drag at the bottom of the page to create a text frame for your footer.
- Enter the desired text, such as “Document Title,” “Page Number,” or any relevant information.
- Style the Footer:
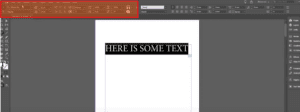
- Use the Control Panel to customize the text. Adjust font size, style, color, and alignment as needed.
- Position the text box at the bottom of the page to align it as a footer.
Step 5: Apply the Footer Across All Pages
- Go Back to the Document Pages:
- Click on any regular page in the Pages Panel to exit the Parent Page view.
- You’ll notice that the footer now appears on all pages automatically.
- Verify Changes:
- Scroll through the document to ensure the footer is consistent across all pages.
Step 6: Edit or Unlock the Footer
If you need to make changes to the footer:
- Return to the Parent Page:
- Double-click on the Parent Page in the Pages Panel.
- Edit the Footer:
- Modify the text, color, or position as needed.
- Reflect Changes:
- Changes made to the Parent Page footer will automatically update across all pages.
Additional Tips
- Locking and Unlocking Elements: Footers applied via Parent Pages are locked on individual pages. To edit them directly, double-click the Parent Page.
- Customizing Specific Pages: If you want a unique footer on specific pages, override the Parent Page by holding Ctrl + Shift (Windows) or Cmd + Shift (Mac) and clicking the footer element.
- Experiment with Layout: Footers can include decorative lines, icons, or other design elements to enhance visual appeal.
Conclusion
Creating a footer in Adobe InDesign is a straightforward process that adds polish and professionalism to your document. By leveraging Parent Pages, you can ensure consistency and save time. With the flexibility to customize and update footers effortlessly, InDesign empowers you to maintain design precision across all pages.
Hashtags: #AdobeInDesign #InDesignTips #GraphicDesign #FooterDesign #DocumentLayout


