Imagine having the power to install all your favorite Windows apps on any computer with just one click. Whether you’re setting up a new laptop, reformatting an old PC, or just want an easy way to install your go-to tools, this guide shows you how to create a small executable file that automates the installation of selected apps.
The best part? You don’t need to write code or install third-party software. All it takes is a website called Winstall and a simple script file you can keep on a USB pen drive.
🔍 What is Winstall?
Winstall is a web-based interface built on top of Microsoft’s Winget (Windows Package Manager). It lets you:
- Search from a massive repository of apps.
- Bundle multiple applications into a single install script.
- Download and install them effortlessly on any Windows 10 or 11 system.
It’s clean, fast, and powerful—ideal for IT professionals, casual users, or anyone setting up multiple PCs.
🛠️ What You Need
- A Windows 10 or 11 PC
- An internet connection
- A USB flash drive (optional but recommended for portability)
📦 How to Create a Custom App Installer File
Step 1: Visit Winstall
- Open your browser and go to https://winstall.app.
- You’ll see a large catalog of over 8,000 Windows applications.
You can browse the featured apps or use the search bar to quickly find what you need.
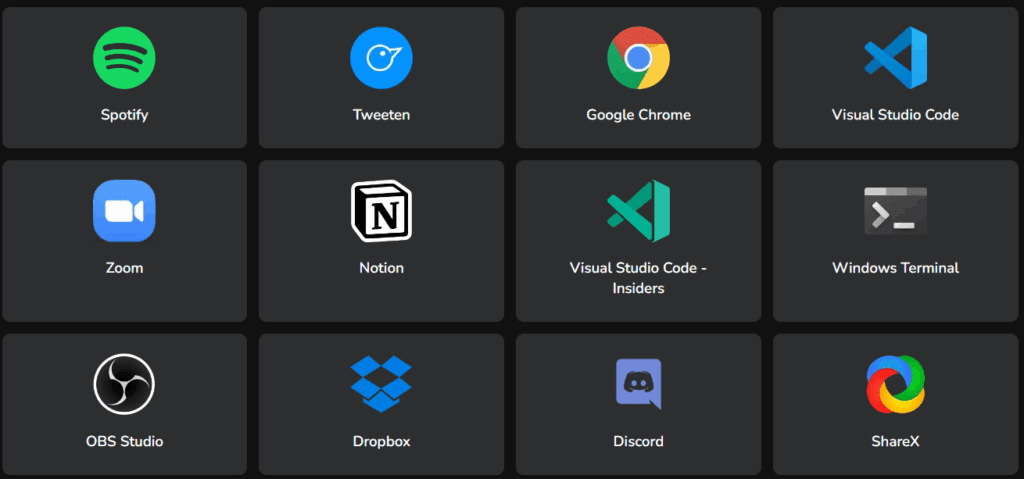
Step 2: Select Your Favorite Applications
For example, let’s say you want to install:
- Spotify
- Firefox
- WPS Office
- CPU-Z
- CrystalDiskInfo
- Zoom
Here’s how:
- Search for each app one by one.
- Click “Select Application” to add it to your bundle.
- Repeat until all desired apps are selected.
Step 3: Generate the Script
Once your list is ready:
- Click the “Generate Script” button.
- Winstall will generate and download a
.batfile (Windows batch script). - Save the file and optionally rename it to something like
MyApps.bat.
🚀 How to Use the Installer on Any PC
To install your selected apps on any Windows computer:
- Transfer the
.batfile to a USB drive (optional). - Insert the USB into the target computer.
- Right-click the
.batfile and choose “Run as Administrator.”
💡 Running as administrator allows the script to install everything seamlessly. If you don’t, Windows will prompt you to approve each app manually.
The apps will automatically download and install in sequence. No need to visit multiple websites or click through installers!


📝 Editing the Script to Add More Apps Later
Want to add more apps later?
- Open the
.batfile with Notepad. - You’ll see a list of Winget commands like:
winget install --id=App.ID - To add a new app:
- Copy one of the existing lines.
- Replace the
App.IDwith the new app’s ID (which you can find on Winstall). - Save the file.
That’s it! You’ve updated your all-in-one installer.
💡 Pro Tips
- Save the batch file to cloud storage for easy access across multiple PCs.
- Update your script periodically to include new versions or apps.
- If you’re reformatting often, this method will save you tons of setup time.
🔖 Tags
Windows automation, install apps in bulk, Winstall, Winget, Windows Package Manager, app installer, setup Windows, Windows productivity, USB tool, system setup script
📢 Hashtags
#WindowsTips #Winstall #Winget #Windows10 #Windows11 #AppInstaller #TechTools #BatchScript #PCSetup #ProductivityHack
⚠️ Disclaimer
This guide is for educational purposes only. Make sure you install only legal and trusted software. While Winget uses official sources for downloads, always verify app authenticity and usage rights when installing on multiple machines.


