Adobe InDesign offers powerful tools to help you design with precision and creativity. One of the essential techniques is creating a clipping mask, which allows you to fit an image into a specific shape. This article will guide you through the process in a detailed and easy-to-follow manner.

What is a Clipping Mask?
A clipping mask in Adobe InDesign is a method to make an image conform to a specific shape, such as a rectangle, circle, or polygon. This technique is commonly used in graphic design to add visual interest or focus on a particular part of an image.
Steps to Create a Clipping Mask
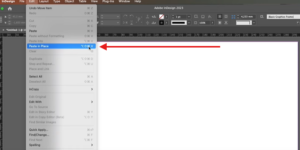
1. Insert Your Image into InDesign
- Open your InDesign document.
- Navigate to File > Place (or use the keyboard shortcut
Ctrl+Don Windows orCmd+Don Mac). - Select the image you want to use and click Open to place it into your document.
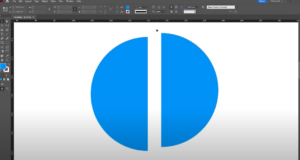
2. Choose or Create a Shape for the Mask
- Go to the toolbar on the left-hand side of the screen.
- Select a shape tool, such as the Rectangle Tool (
M), Ellipse Tool, or Polygon Tool. Right-click on the tool to see all available shape options. - Create your desired shape by clicking and dragging on the canvas. Hold the Shift key while dragging to maintain proportions (e.g., a perfect square or circle).
3. Adjust the Shape
- Once your shape is created, you can reposition it or resize it as needed to align with your image.
- Remove the stroke and fill of the shape:
- Go to the Control Bar at the top.
- Set both the stroke and fill options to “None” to make the shape invisible.
4. Prepare the Image
- Select the image by clicking on it.
- Cut the image using Edit > Cut (
Ctrl+Xon Windows orCmd+Xon Mac).
5. Paste the Image into the Shape
- Select the shape you created earlier.
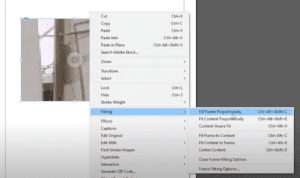
- Go to Edit > Paste Into. This action places the image inside the shape, creating the clipping mask.
6. Adjust the Image Within the Mask
- Double-click on the image inside the shape to select and reposition it.
- You can resize or move the image within the mask to ensure it fits perfectly.
Tips for Customization
- You can use more complex shapes for clipping masks, such as polygons or custom-drawn paths.
- To revert to the original layout, use Edit > Clear Transformations or manually adjust the image and shape.
Conclusion
Creating a clipping mask in Adobe InDesign is a straightforward process that enhances your design capabilities. With just a few steps, you can integrate images into custom shapes and elevate your design projects. Whether you’re working on a brochure, poster, or any other creative project, this technique is a must-have in your skill set.
Tags and Hashtags
Tags: Adobe InDesign, Clipping Mask, Graphic Design, Image Editing, Design Tips
Hashtags: #AdobeInDesign #ClippingMask #DesignTips #GraphicDesign #InDesignTutorial