If you’ve ever tried uploading your music to RouteNote or other music distribution platforms, only to face file rejection errors or endless upload hangs at 90%, the problem likely lies in the audio format. Fortunately, there’s a simple and reliable way to convert your track to the correct format using Adobe Audition.
In this detailed guide, you’ll learn how to properly export your song in a format that meets RouteNote’s requirements using Adobe Audition. We’ll also introduce a free preset to make this process even easier.
🎵 Why Format Matters in Music Distribution
Music distribution platforms like RouteNote, DistroKid, or TuneCore require audio files in specific formats. If your song doesn’t meet these criteria (e.g., wrong sample rate or bit depth), it may be rejected or get stuck during upload.
To avoid this, your audio file must be:
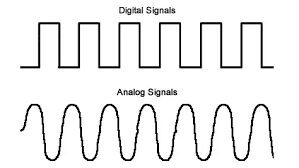
- Lossless (FLAC is ideal)
- 44.1 kHz sample rate
- 16-bit depth
🎧 What Is Adobe Audition?
Adobe Audition is a professional-grade audio editing software from Adobe, widely used for music production, podcast editing, and sound mastering. It’s available through the Adobe Creative Cloud suite and offers extensive format control and exporting options.
💰 Adobe Audition requires a paid subscription (approx. $22/month), but it’s worth it for serious audio creators.
🛠 Step-by-Step Guide: Exporting Music for RouteNote Using Adobe Audition
✅ Step 1: Install Adobe Audition
If you don’t have Adobe Audition yet, download and install it from the official site:
👉 https://www.adobe.com/products/audition.html
📂 Step 2: Create a New Multitrack Session
- Open Adobe Audition.
- Go to File > New > Multitrack Session.
- Give your session a name.
- Keep all other settings at default.
- Click OK.
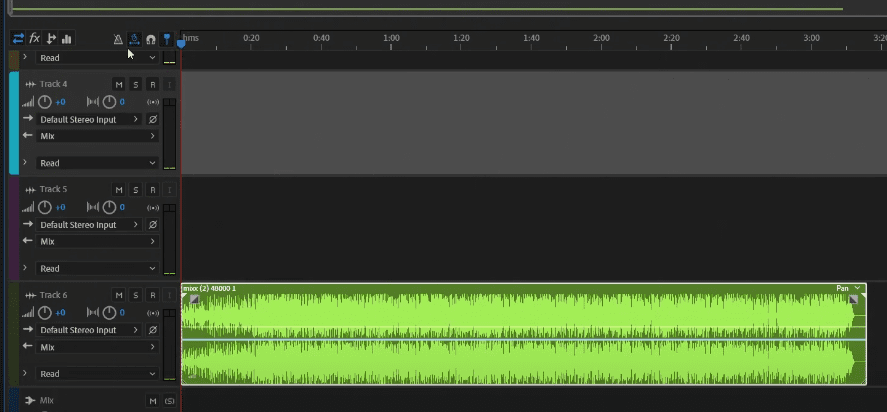
🎵 Step 3: Import Your Music Track
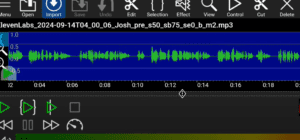
- Locate your song file on your system (MP3, WAV, etc.).
- Drag and drop it into the Track 6 area in the multitrack timeline.
- 🔍 Tip: Use Track 6 because it’s a neutral channel with no pre-applied effects.
- Make sure the track starts at time zero to avoid silence or offset issues.
🎚️ Step 4: Export Audio in FLAC or WAV Format
Once your file is in the timeline:
- Go to File > Export > Export Multitrack > Entire Session.
- Choose the folder where you want to save your exported file.
- Under Format, select FLAC (ideal for distribution).
- Set the following options:
- Sample Rate: 44,100 Hz (44.1 kHz)
- Bit Depth: 16-bit
- Channels: Stereo or Mono (as required)
- Confirm settings under the Format Settings panel. If they don’t match, click Change and adjust accordingly.
- Click OK to export.
✅ You now have a RouteNote-compatible audio file!
📦 Optional: Use a Pre-Made Adobe Audition Preset
To save time and avoid configuration errors, use a pre-made export preset tailored for RouteNote and other platforms. With the preset:
- No need to change export settings manually.
- Enhanced quality with preloaded filters, echo control, and audio clarity.
- Great for voiceovers, jingles, and radio drops (though not needed for basic uploads).
🎁 Download the Adobe Audition Preset:
👉 https://push.fm/pl/hrp1y7v5


After downloading:
- Open the preset session.
- Drag your music file to Track 6.
- Export using the same steps: File > Export > Multitrack > Entire Session.
Everything is pre-set—no stress!
🚨 Troubleshooting Upload Errors
If your track still gets rejected after export:
- Double-check the sample rate (44,100 Hz) and bit depth (16-bit).
- Try exporting in WAV (16-bit PCM) if FLAC still gives issues.
- Use the first two preset export options if you’re unsure.
- Ensure your track has no embedded effects that might interfere.
🔗 Useful Links
- RouteNote Converter Tool:
👉 https://convert.routenote.com/ - Adobe Audition Download:
👉 https://www.adobe.com/products/audition.html - Preset for RouteNote Export:
👉 https://push.fm/pl/hrp1y7v5
⚠️ Disclaimer
This article is intended for educational purposes only. Always ensure your music and audio content follow the submission guidelines and copyright requirements of your chosen music distribution platform.
🔖 Tags
routenote, adobe audition, audio export, flac format, music distribution, how to avoid track rejection, wav to flac, music uploading guide, audio preset, adobe audition tutorial
📢 Hashtags
#RouteNote #AdobeAudition #MusicDistribution #AudioExport #FLACFormat #16bitAudio #TrackRejectionFix #UploadMusic #SoundPreset #AuditionTips
With this guide, you’ll never have to stress about your music getting rejected again. Just follow the steps, export your audio correctly, and get your tracks live on all major platforms with confidence!


