Windows updates are essential for keeping your system secure and up to date, but they can also be intrusive, disruptive, and sometimes even cause bugs—especially when newer versions like Windows 11 24H2 are not yet fully stable. If you’re among the many users who prefer to stay on a particular version (like 23H2) until everything is polished, this guide will walk you through a safe and efficient way to pause or disable updates with just one click.
In this article, we’ll explore a handy tool called Windows Personalization Utility (WPU), which allows you to manage updates, remove telemetry, clean system clutter, and even back up your registry. Whether you’re on Windows 10 or Windows 11 (including Home editions), this method is accessible, doesn’t require deep registry tweaks, and offers reversible actions.
Why Control Windows Updates?
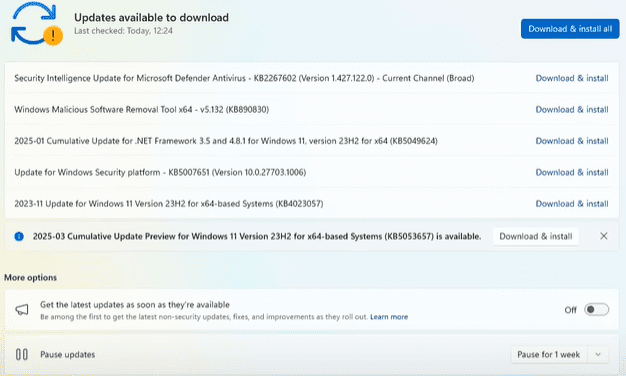
Microsoft enforces updates automatically, which can sometimes:
- Interrupt your workflow,
- Cause compatibility issues with third-party software,
- Or push buggy versions before they’re fully stable.
By controlling updates, you gain the flexibility to:
- Delay the update process until you’re ready,
- Stay on your preferred version (like 23H2),
- Avoid unnecessary risk while Microsoft irons out bugs in newer builds.
Introducing Windows Personalization Utility
Windows Personalization Utility (WPU) is a lightweight, script-based tool that lets you:
- Enable or disable Windows Updates,
- Pause updates for an extended period,
- Remove telemetry and tracking features,
- Clean up old update files,
- Back up your registry with a single command.
You can download the utility directly from its official GitHub releases page.
⚠️ You may receive a warning from your browser when downloading
.bator.regfiles. These files are safe, but you should always scan downloaded files with an antivirus before executing.
What’s Included in the Package?
Once downloaded, you’ll receive:
- WPU Batch File – The main utility you’ll run as administrator.
- Two Registry Files – One to pause Windows updates, and one to resume them.
Here’s a breakdown of what the batch file can do:
- Disable/Enable Windows Updates
- Remove Microsoft Telemetry
- Delete lingering update files
- Back up your registry
- Manage update services
- Uninstall bloatware and install useful tools like PowerShell 7 or Cortana
Step-by-Step: How to Use WPU to Control Updates
Step 1: Download the Utility
Go to the WPU GitHub page and download the latest .zip package. Extract it to a folder.
Step 2: Understand the Files
You’ll find:


WP-Utility.bat— The script to run.pause-updates.reg— To pause updates via registry.resume-updates.reg— To resume updates via registry.
Step 3: Run the Utility
Right-click WP-Utility.bat and choose Run as Administrator.
You’ll see a command-line interface with numbered options:
- Disable Windows Updates
- Enable Windows Updates
- Disable Microsoft Telemetry
- Delete Update Files
- Back Up Registry
- Quit
Step 4: Create a Registry Backup (Recommended)
Before making changes, choose the registry backup option to ensure you can revert in case anything goes wrong.
Step 5: Disable Telemetry (Optional)
If you want to increase your privacy, choose the option to disable Microsoft Telemetry.
Step 6: Pause or Disable Updates
- To Pause Updates Temporarily: Use the
pause-updates.regfile by double-clicking it. This is the preferred method for most users. - To Completely Disable Updates: Use the
WP-Utility.batscript and choose the option to disable updates. This is more aggressive and blocks update services entirely.
✅ Note: You can always re-enable updates using the batch file or the registry file provided.
Step 7: Resume Updates Anytime
Whenever you’re ready to update again:
- Run the
resume-updates.regfile, - Or use the WPU batch tool and select “Enable Windows Updates.”
Windows Update will begin checking for updates as usual.
Which Method Should You Use?
| Method | Best For | Reversibility | Skill Level |
|---|---|---|---|
| Registry Files | Home users who want to pause updates | ✅ Easy to revert | Beginner |
| WPU Batch Script | Advanced users who want full control | ✅ Easy to revert | Intermediate |
Personal Recommendation: Use the registry files if you simply want to pause updates and resume them later. It’s less aggressive and keeps update functionality intact.
Important Notes
- Staying on Windows 11 23H2 is perfectly fine. Microsoft will support this version with security and feature updates until November 2025.
- If you’re experiencing issues with 24H2 or prefer to avoid it for now, use these methods to keep your current setup.
- Always create a system restore point or backup before making system-level changes.
Final Thoughts
Taking control of your Windows update schedule doesn’t have to be complicated. With the Windows Personalization Utility, you can manage updates, remove telemetry, and make your Windows experience more predictable and stable — especially for users of Windows Home editions who don’t have access to Group Policy Editor.
Whether you’re pausing updates temporarily or disabling them until further notice, this article gives you all the tools and guidance you need to do it safely and effectively.
Disclaimer:
Modifying Windows system settings or the registry can have unintended effects if done incorrectly. While the tools and methods mentioned in this article are considered safe, proceed at your own risk. Always back up your system before making changes.
Tags: windows updates, disable windows updates, pause windows updates, windows 11 updates, windows 10 updates, windows personalization utility, windows registry, stop forced updates, microsoft telemetry, registry editor, windows update control
Hashtags:
#windows #windows11 #windows10 #updates #techguide #microsoft #registry #computertips #disableupdates #pauseupdates


