Over time, your Windows PC accumulates cache and junk files that slow down performance. Clearing these unnecessary files helps free up storage, improve speed, and enhance system efficiency. In this guide, we will walk you through a step-by-step process to clear cache and junk files from your computer safely and effectively.
Why Should You Clear Cache and Junk Files?
- Improves system performance: Removes unnecessary files that consume system resources.
- Frees up storage space: Clears up valuable disk space.
- Fixes common system errors: Eliminates corrupted cache files that may cause glitches.
- Enhances speed: Speeds up boot time and overall performance.
Now, let’s get started with the step-by-step guide.
Step 1: Open the Run Dialog Box
- Press Windows + R on your keyboard.
- This will open the Run dialog box.
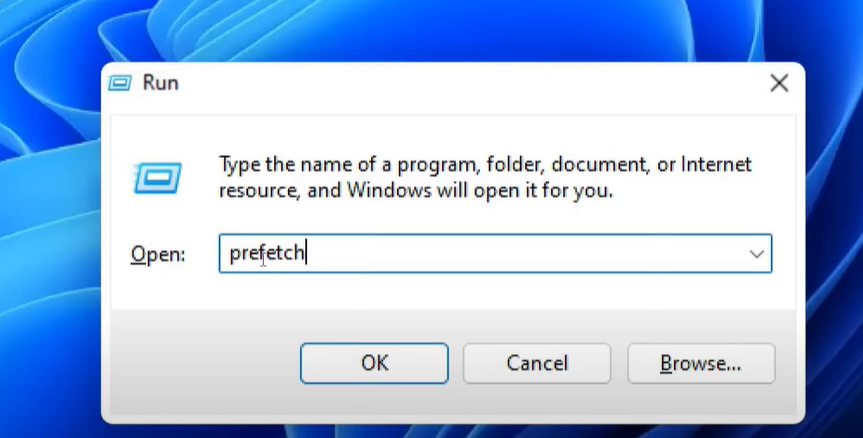
Step 2: Delete Prefetch Files
- In the Run dialog box, type prefetch and press Enter.
- A permission window will appear; click Continue.
- Select all files by pressing Ctrl + A.
- Press Shift + Delete to permanently remove these files.
- Click Yes to confirm deletion.
Prefetch files are used to speed up application loading but can accumulate over time, affecting performance.
Step 3: Delete Temporary Files
- Press Windows + R to open the Run dialog box again.
- Type temp and press Enter.
- A new window will open showing temporary files.
- Select all files by pressing Ctrl + A.
- Press Shift + Delete to permanently remove them.
- Click Yes to confirm deletion.
Temporary files are created by the system and applications but are no longer needed once their process is completed.
Step 4: Delete More Temporary Files
- Press Windows + R again.
- Type %temp% and press Enter.
- Another temporary folder will open with more junk files.
- Select all files by pressing Ctrl + A.
- Press Shift + Delete to remove them.
- Click Yes to confirm deletion.
Some files might not be deleted because they are in use. If prompted, check Do this for all current items and click Skip.
Step 5: Run Disk Cleanup
- Press Windows + R again.
- Type cleanmgr and press Enter.
- The Disk Cleanup tool will open.
- Select the C: drive (or the drive where Windows is installed) and click OK.
- The tool will analyze your system and display a list of unnecessary files.
- Check all available boxes, including:
- Temporary files
- Recycle Bin
- Thumbnails
- Delivery Optimization Files
- Temporary Internet Files
- Click OK, then select Delete Files to confirm.
Disk Cleanup is a built-in Windows tool that removes system-generated junk files safely.
Conclusion
Following these steps will help you keep your Windows PC clean, optimize its performance, and free up valuable storage space. Regularly clearing cache and junk files ensures smooth operation and faster response times.
By following this guide, you can maintain a cleaner, faster, and more efficient computer. Happy computing!
Tags
Windows PC, cache cleanup, junk files, temporary files, prefetch files, disk cleanup, system optimization, computer speed, free up storage, improve performance
Hashtags
#WindowsPC #CacheCleanup #JunkFiles #TemporaryFiles #PrefetchFiles #DiskCleanup #SystemOptimization #ComputerSpeed #FreeUpStorage #ImprovePerformance