If you’ve recently purchased a new PC or reinstalled Windows 11 version 24H2, you might notice that BitLocker encryption is automatically enabled on your system drive. This feature helps protect your data by encrypting the entire drive. However, not everyone wants or needs BitLocker enabled—especially casual users or those setting up test environments.
In this article, you’ll learn how to check if BitLocker is enabled, how to turn it off, and where to find the recovery key stored in your Microsoft account.

🔐 What Is BitLocker?
BitLocker is a built-in encryption tool in Windows that secures your data by encrypting your entire drive. If your PC supports it, BitLocker may be automatically enabled during the installation or setup of Windows 11, particularly with version 24H2.
While it’s a valuable security feature, it can also introduce complications, such as requiring a recovery key if the system’s security configuration changes. If you’re not interested in using this feature, you can turn it off safely—if you have access to the recovery key.
📌 More Info: BitLocker Encryption – Microsoft Support
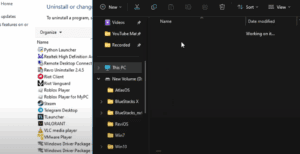
🔍 Step 1: Check BitLocker Status
To find out whether BitLocker is enabled:
- Click on the Start menu and search for BitLocker.
- Open the Manage BitLocker option in the Control Panel.
- Look for your system drive (usually C:). If it shows as “BitLocker On,” then encryption is active.
If it’s already on and you wish to disable it, you’ll need to access your BitLocker Recovery Key before proceeding.
🔑 Step 2: Retrieve Your BitLocker Recovery Key
Your BitLocker recovery key is stored securely in your Microsoft account if you signed into your PC with a Microsoft login during setup. Here’s how to access it:
- Visit https://account.microsoft.com/devices and log in to your Microsoft account.
- Click on “View details” under the device that has BitLocker enabled.
- Scroll down to the “BitLocker data protection” section.
- Click on “Manage recovery keys.”
- A new page will display the:
- Device name
- Key ID
- Recovery key (a long numeric code)
💡 Important: Make a note of the Key ID and Recovery Key, as you’ll need both to manage or disable BitLocker.
🧯 Step 3: Turn Off BitLocker Encryption
Now that you have your recovery key:
- Go back to the Manage BitLocker page in Control Panel.
- Click on “Turn off BitLocker” for the drive you want to decrypt.
- The system may ask you to confirm your recovery key.
- Once confirmed, the drive will begin decrypting, which may take some time depending on your data size.
After BitLocker is turned off, it’s safe to delete the existing key. If you ever re-enable BitLocker, a new recovery key will be generated.


💡 Why This Matters
Many users are unaware that BitLocker might be enabled by default on modern Windows 11 PCs. While it adds a layer of protection, it’s essential to know how to manage it, especially when performing system upgrades, hardware changes, or troubleshooting.
Leaving BitLocker on is generally safe and recommended for security-conscious users. However, if you prefer simplicity or plan to dual-boot or test operating systems, disabling it can prevent potential headaches.
🔗 Resources
📌 Tags
BitLocker encryption, Windows 11 24H2, disable BitLocker, recovery key, Microsoft account, drive encryption, system security, manage BitLocker, data protection, Windows setup
🏷 Hashtags
#Windows11 #BitLocker #Encryption #MicrosoftAccount #RecoveryKey #WindowsSecurity #PCSetup #WindowsTips #DataProtection
⚠️ Disclaimer
This article is intended for informational purposes only. Disabling encryption can pose a security risk if your device is lost or stolen. Always ensure you have proper backups and understand the implications before turning off BitLocker.


