In today’s digital world, protecting your PC from unauthorized USB devices is crucial to prevent data theft, malware infections, and unauthorized access. Whether you’re securing a work computer, shared device, or personal laptop, this guide will show you two effective methods to block all USB storage devices on Windows 10 and 11.
Why Block USB Devices?
✔ Prevent data theft – Stop unauthorized users from copying sensitive files.
✔ Block malware infections – Malicious USB drives can install viruses.
✔ Comply with security policies – Ideal for workplaces and shared PCs.
⚠ Note: These methods do not affect USB keyboards/mice—only storage devices.
Method 1: Disable USB via PowerShell (Quick & Easy)
This method instantly blocks USB storage devices using a single PowerShell command.
Step 1: Open PowerShell as Admin
- Press
Win + X→ Select Windows PowerShell (Admin). - Click Yes if prompted by UAC.
Step 2: Run the Block USB Command
Paste the following command and press Enter:
Set-ItemProperty -Path "HKLM:\SYSTEM\CurrentControlSet\Services\USBSTOR" -Name "Start" -Value 4
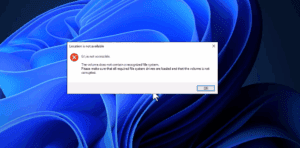
✅ Effect: USB storage devices will no longer work after a restart.
To Re-Enable USB Devices
Run this command instead:
Set-ItemProperty -Path "HKLM:\SYSTEM\CurrentControlSet\Services\USBSTOR" -Name "Start" -Value 3Method 2: Disable USB via Registry Editor (Manual Method)
If PowerShell doesn’t work, you can manually edit the Registry.
Step 1: Open Registry Editor
- Press
Win + R, typeregedit, and press Enter. - Click Yes if prompted by UAC.
Step 2: Navigate to USBSTOR Key
Go to:
HKEY_LOCAL_MACHINE\SYSTEM\CurrentControlSet\Services\USBSTORStep 3: Modify the “Start” Value
- Double-click
Start. - Change the value from
3to4(to disable USB). - Click OK.
✅ Effect: USB storage will be blocked after a restart.
To Re-Enable USB Devices
Change the value back from 4 to 3.


Which Method Should You Use?
| PowerShell | Registry Editor |
|---|---|
| ✔ Faster & scriptable | ✔ Works if PowerShell fails |
| ✔ Easy to undo | ✔ Manual control |
| Best for quick changes | Best for advanced users |
Additional Security Tips
🔒 For Workplaces: Use Group Policy (gpedit.msc) to enforce USB restrictions.
🔒 For Home Users: Enable BitLocker to encrypt drives and prevent data theft.
🔒 Alternative Tools:
- USB Block (Third-party software)
- McAfee Device Control (Enterprise solution)
Final Thoughts
Blocking USB storage is a simple yet powerful security measure for Windows PCs. Whether you use PowerShell or Registry Editor, both methods effectively prevent unauthorized data transfers and malware risks.
Tags:
USB Block, Windows Security, Disable USB, Data Protection, Windows 10/11
Hashtags:
#WindowsSecurity #DataProtection #USBSafety #TechTips #CyberSecurity
Have you blocked USB devices before? Share your experience below! 🔐