When working in Adobe InDesign, there are instances where you may need to arrange multiple elements side by side, such as calendars or design components. By default, the pasteboard (workspace area around the document) has limited space, making it challenging to position multiple copies side by side. This article provides a step-by-step guide to increasing the pasteboard margins, enabling you to efficiently organize your elements.
Why Adjust the Pasteboard Margins?
The default pasteboard space in InDesign is relatively small, and arranging multiple objects, like calendars, side by side can be cumbersome. By increasing the horizontal and vertical margins of the pasteboard, you get more room to work outside the document boundaries.
Step-by-Step Guide to Adjust Pasteboard Margins
Step 1: Open Preferences
- Launch Adobe InDesign and open your project.
- Go to the top menu bar and click on Edit (Windows) or InDesign (Mac).
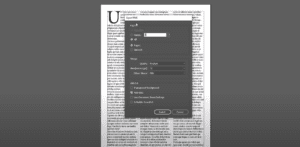
- Select Preferences from the dropdown and click on Guides & Pasteboard.
Step 2: Adjust the Pasteboard Margins
- In the Guides & Pasteboard preferences panel, locate the Pasteboard Options section.
- Modify the Horizontal Margins to your desired value. For example:
- Set the margin to 55 inches if you want sufficient space for side-by-side placement.
- You can adjust this value based on your specific requirements.
- Click OK to save your changes.
Step 3: Test the Adjusted Pasteboard
- After changing the margins, go back to your project.
- Try duplicating and arranging your elements side by side.
- You’ll notice that the extended pasteboard now allows you to place multiple copies without issues.
Step 4: Print Output Reminder
While the pasteboard provides extra space for arranging elements, remember that it does not affect the printable area of your document. Always ensure that critical content remains within the document boundaries.
Benefits of Adjusting Pasteboard Margins
- Provides additional workspace for better organization.
- Enhances flexibility when working with multiple design components.
- Reduces clutter and improves overall efficiency.
Conclusion
Adjusting the pasteboard margins in Adobe InDesign is a simple yet effective way to enhance your workflow, especially when dealing with complex designs or multiple elements. This trick is perfect for designers who want to maintain organization and optimize their workspace. Try it out and share your experience in the comments below!
List of previous videos uploaded:
- What are Indesign Tools, Panels, Rulers, Design and Paste Board Area
https://www.youtube.com/watch?v=6OGa8nqPe-Q - Create New Page, Set Margin and Bleed Size, Increase Paste Board Area
https://www.youtube.com/watch?v=AnfP6dlx_Fg - Create/Edit Master Pages, Add Page Numbers, Add delete move pages
https://www.youtube.com/watch?v=wsbiTbimWsQ - Creating Facing Pages using Allow document pages/spreads to Shuffle
https://www.youtube.com/watch?v=a7WCg5n6Lng - Save Document Preset, Primary Text Frame, Placeholder Text and Text Flow
https://www.youtube.com/watch?v=sAo7aO4Vnnw - How to use Text Formatting, Leading, Baseline Text Shift, Left and Right Indents
https://www.youtube.com/watch?v=zV1ytwSn9Zo - How to Create / Edit Paragraph Styles
https://www.youtube.com/watch?v=BKMc4BTixgk - How to Create / Modify / Apply Character Styles
https://www.youtube.com/watch?v=kAO2Gh9Yu-Q - How to use Tabs, Tabs with Decimals and Paragraph Rules
https://www.youtube.com/watch?v=CkGkZTavKv0 - How to use Paragraph Borders and Paragraph Shading
https://www.youtube.com/watch?v=wXkDx6tUoOY - How to use Keep Options Hyphenation and Justification in Paragraph Text
https://www.youtube.com/watch?v=ARScBZmoveI - Drop Caps and Nested Styles, Span Columns and Split Columns
https://www.youtube.com/watch?v=CFXW1CZxU0k - Bullets and Numbering, Underline Options Strikethrough options in a Paragraph
https://www.youtube.com/watch?v=6Qvpr7DliBM - Secret Tips – Hidden / Non Printing Characters : How to use
https://www.youtube.com/watch?v=vcqxxsWJiJk
