Introduction
Line spacing, also known as leading, refers to the vertical space between lines of text in Adobe InDesign. Adjusting line spacing is essential for creating visually appealing and readable layouts. This article explains step-by-step how to adjust line spacing effectively in InDesign.

Step 1: Understanding Line Spacing (Leading)
Leading is the vertical space between lines of text in a text box. For example, in a paragraph with three lines, leading is the space between the first and second lines, as well as the second and third lines. Adjusting leading allows you to control how text is spaced vertically, which can improve the overall appearance of your design.
Step 2: Create a Text Box
- Open an InDesign Document
- Create or open a document in Adobe InDesign.
- Add Text
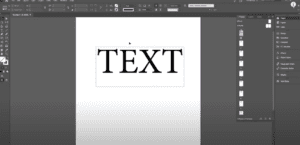
- Use the Type Tool (
T) to draw a text box. - Add text to the box, ensuring you have at least two or three lines for demonstration.
- Use the Type Tool (
Step 3: Access the Leading Options
There are two main ways to adjust leading in InDesign:
- Using the Control Panel
- The leading adjustment option is located in the top toolbar when the text box is selected.
- Using the Character Panel
- Navigate to Window > Type & Tables > Character to open the Character panel.
- Alternatively, use the keyboard shortcut
Ctrl + T(Windows) orCmd + T(Mac) to open this panel.
Step 4: Adjust Line Spacing
- Select the Text
- Use the Type Tool (
T) to select the text you want to adjust. - To select all the text in a text box, press
Ctrl + A(Windows) orCmd + A(Mac).
- Use the Type Tool (
- Modify the Leading Value
- In the Control Panel or Character Panel, locate the Leading field (marked as “Leading” or represented by an icon showing two stacked lines with an arrow).
- Adjust the value:
- Increase Leading: Use the up arrow or enter a higher value to increase the space between lines.
- Decrease Leading: Use the down arrow or enter a smaller value to reduce the space.
- Preview the Changes
- Observe the changes in real time as you adjust the values.
Step 5: Adjust Leading for Specific Lines
If you only want to adjust the spacing for specific lines of text:
- Select the specific lines using the Type Tool.
- Adjust the leading value as described above.
This technique ensures that only the selected lines are affected, leaving the rest of the text untouched.
Additional Tips
- Set Automatic Leading:
- InDesign provides an automatic leading option, which is typically set to a percentage of the font size (e.g., 120%). You can adjust this in the Paragraph Styles panel for consistent text formatting.
- Fine-Tuning:
- Use fractional values (e.g., 12.5 pt) for precise adjustments.
- Consistency:
- When working on large projects, use consistent leading values to maintain a cohesive design.
Conclusion
Adjusting line spacing (leading) in Adobe InDesign is a straightforward yet impactful way to refine your text layout. Whether you’re working on a single text box or a complex multi-page design, mastering this feature enhances readability and visual appeal. Follow these steps to control leading effectively and elevate your InDesign projects.
#AdobeInDesign #GraphicDesign #InDesignTips #LeadingAdjustment #LineSpacing #TextLayout #TypographyDesign


