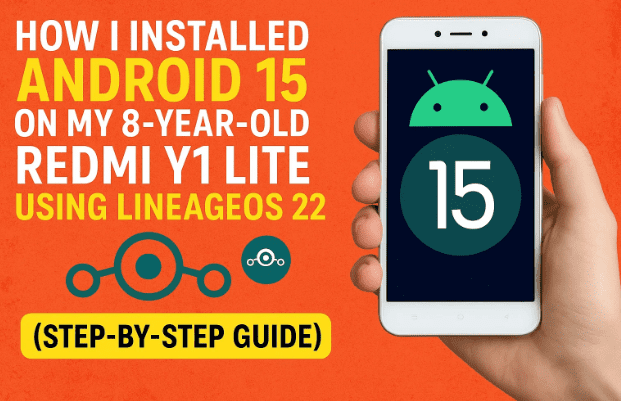
Have you ever looked at your old Android phone lying in a drawer and wondered if it could still be useful? That’s exactly what I thought about my old Xiaomi Redmi Y1 Lite — a 2017 phone that originally came with Android 7 (Nougat) and stopped getting updates back in 2019. With just 2GB of RAM and 16GB of storage, it seemed useless in today’s app-heavy world.
But instead of tossing it away, I decided to revive it with the latest Android 15, thanks to the incredible open-source community behind LineageOS. And guess what? It worked — the phone now runs smoothly, supports Play Store, and even handles most modern apps gracefully.
In this detailed tutorial, I’ll guide you through every step I followed to breathe new life into an old Android phone — from setting up your computer, unlocking the bootloader, flashing LineageOS, and installing Google Apps.
Let’s begin this exciting journey!
1. What Is LineageOS and Why Use It?
Before jumping into the steps, let’s first understand what LineageOS is and why it’s perfect for old devices.
LineageOS is a community-driven, open-source version of Android that extends the lifespan of devices long abandoned by manufacturers. Developers regularly update it with the latest Android versions, security patches, and performance optimizations.
In short, it lets you:
- Get newer Android versions like Android 15.
- Restore Play Store compatibility for modern apps.
- Improve battery life and security.
- Enjoy a bloatware-free experience.
So if your old phone is gathering dust, LineageOS might be the best way to turn it into a functional backup, media player, or even a secondary daily driver.
2. Preparing Your PC for Installation
Now that you know what we’re about to do, let’s prepare your computer. This step ensures your PC can properly communicate with your phone during the flashing process.
Step 1: Install ADB and Fastboot Tools
ADB (Android Debug Bridge) and Fastboot are official command-line tools provided by Google that allow you to send commands, install custom recoveries, and flash ROMs.
Here’s how to install them:


- Visit the official Android Developers Platform Tools page.
- Download the ZIP file for your operating system (Windows, Mac, or Linux).
- Extract it somewhere simple, like
C:\platform-tools.
Now, let’s make these tools accessible from anywhere in Command Prompt.
Step 2: Add Platform Tools to System Path
- Copy the path to your extracted folder (
C:\platform-tools). - In Windows search, type “env” and open Edit the system environment variables.
- Under System Variables, click Path > Edit > New and paste the path you copied.
- Click OK to save your changes.
To confirm it’s working, open Command Prompt and type:
adb version
If a version number appears, your setup is successful.
3. Install USB Drivers
Before moving further, your PC must recognize your phone in Fastboot Mode.
- Go to the Google USB Driver page.
- Download the ZIP file and extract it.
- Right-click on
android_winusb.inf→ select Install.
This will install the necessary drivers so your computer can detect your device during the flashing process.
4. Download LineageOS and Recovery Files
Now that your PC is ready, it’s time to grab the actual ROM.
- Visit the official LineageOS website.
- Click on Devices and search for your phone model (in my case, Redmi Y1 Lite).
- Open the builds page and download the latest version available — currently LineageOS 22.2 (based on Android 15).
- Download both the ROM and the Recovery Image.
Before we proceed with installation, make sure you also bookmark your device’s official installation guide from the LineageOS site. It will contain specific notes unique to your phone model.
5. Enable Developer Options and USB Debugging
Now, let’s prepare the phone itself.
- Open Settings > About Phone.
- Tap Build Number 7 times to unlock Developer Options.
- Go back to Settings > Additional Settings > Developer Options.
- Turn on USB Debugging.
You’ll see a small popup asking for confirmation — allow it.
6. Remove Google Accounts and Security Locks
Before flashing, make sure your device doesn’t have any Google accounts or screen locks. This prevents Factory Reset Protection (FRP) from re-locking your device after the reset.
- Go to Settings > Accounts > Google and remove all accounts.
- Remove any PINs, passwords, or fingerprints.
This ensures a clean and smooth installation.
7. Unlock the Bootloader
Here comes one of the most crucial steps — unlocking the bootloader.
Manufacturers lock the bootloader to prevent unauthorized system modifications. Unlocking it allows you to install a custom recovery and flash a new OS.
However, every brand (Xiaomi, Samsung, Motorola, etc.) has its own method.
- For Xiaomi phones: Use the official Mi Unlock Tool.
- For other brands: Follow your manufacturer’s unlocking guide on their support website.
⚠️ Warning: Unlocking the bootloader will erase all your data and may void your warranty. Back up everything important before proceeding.
Once unlocked, you can continue with the next step.
8. Flashing the LineageOS Recovery
Now that the phone’s bootloader is open, it’s time to install the LineageOS Recovery, which replaces the stock recovery.
- Connect your phone to your PC using a USB cable.
- Open Command Prompt and type:
adb devicesOn your phone, allow USB debugging when prompted.
If your device ID appears in the list, the connection is working. - Next, reboot into Fastboot Mode:
adb reboot bootloaderOr manually, press Volume Down + Power while the device is off. - Confirm detection:
fastboot devices - Flash the recovery:
fastboot flash recovery lineage_recovery.img(Replace the filename with the exact recovery image name.) - Once done, boot directly into recovery:
fastboot reboot recovery
You should now see the LineageOS Recovery screen.
9. Installing the LineageOS ROM
Now we move to the main part — installing Android 15 via LineageOS.
Use the phone’s Volume and Power buttons to navigate.
- In Recovery, choose Factory Reset > Format Data/Factory Reset.
This will wipe your phone and prepare it for installation. - Go back to the main menu → Apply Update > Apply from ADB.
- On your PC, open Command Prompt and navigate to the folder containing your ROM file.
Then enter:adb sideload lineageos_22.2.zip - Wait for the process to complete — this may take 5–10 minutes.
10. Installing Google Apps (GApps)
Once the ROM is installed, you’ll likely want access to the Play Store, Gmail, and other Google apps.
To do this, we’ll install GApps, a separate package compatible with LineageOS.
- Visit OpenGApps Project or NikGApps.
- Download the version for Android 15 (ARM64).
- Place the ZIP file in the same folder as your ROM.
Back on your phone:
- Choose Apply Update > Apply from ADB again.
- Run this command:
adb sideload gapps.zip
During installation, you might see a “signature verification” warning — that’s normal. Select Yes to continue.
After completion, select Reboot System Now.
11. First Boot and Setup
Now comes the moment of truth.
Your phone will take a bit longer than usual to boot — around 5 to 10 minutes — as it configures the new system. Once the setup screen appears:
- Connect to Wi-Fi.
- Log into your Google account.
- Complete initial setup.
Go to Settings > About Phone, and you’ll see something amazing:
Android Version: 15 (LineageOS 22)
Your 8-year-old device is now running the latest Android build, complete with Google Play and modern features!
12. Post-Installation Tips
So far, we’ve done a great job setting everything up. But to keep your phone stable and optimized, follow these final tips:
- Update LineageOS regularly:
Go to Settings > System > Updater to check for OTA updates. - Avoid installing heavy apps:
Old devices have limited RAM, so prefer lightweight apps like Google Go, Lite, or FOSS alternatives. - Disable animations:
In Developer Options, set window and transition animation scale to 0.5x for smoother performance. - Use a lightweight launcher:
Try Niagara Launcher or Smart Launcher 6 for a faster UI experience.
13. Frequently Asked Questions (FAQ)
Q1: Will installing LineageOS void my warranty?
Yes, unlocking the bootloader typically voids manufacturer warranties, especially for newer devices.
Q2: Is LineageOS safe to use?
Yes. It’s open-source and widely trusted by developers. Just ensure you download from the official LineageOS website.
Q3: Can I go back to the stock ROM?
Absolutely. You can flash the original firmware using your brand’s official recovery tools (like Mi Flash for Xiaomi).
Q4: Will my phone’s performance improve?
In most cases, yes — you’ll see smoother operation, better battery life, and improved app compatibility.
Q5: Can I receive future Android updates on LineageOS?
Yes. Community developers regularly release new builds, often long after manufacturers stop support.
14. Final Thoughts
Upgrading an old phone to the latest Android version isn’t just a tech experiment — it’s a small act of sustainability. Instead of letting older hardware go to waste, you can give it a second life, extend its usefulness, and enjoy the latest features without spending a dime.
Thanks to LineageOS, even an aging Redmi Y1 Lite from 2017 can run Android 15 with functional Play Store access and better performance than it had in its original state.
So, if you’ve got an old Android lying around, don’t discard it — revive it.
Disclaimer:
Unlocking bootloaders and flashing custom ROMs can void warranties and, if done incorrectly, may brick your device. Proceed carefully and back up all important data before starting. This article is for educational purposes only.
#Android15 #LineageOS #CustomROM #Xiaomi #RedmiY1Lite #GApps #ADB #Fastboot #dtptips