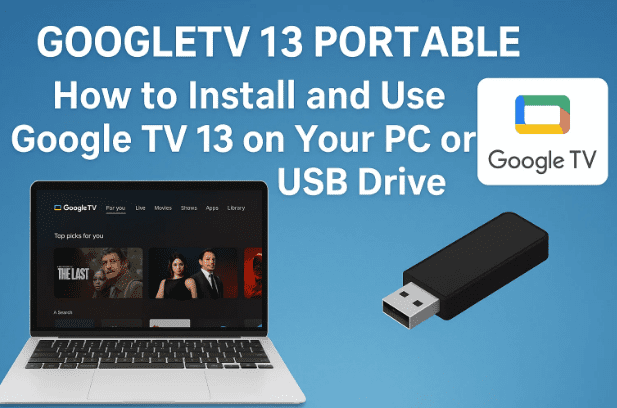
If you’ve ever wanted to transform your computer into a smart streaming device, or simply test the latest Google TV 13 without risking your Windows installation, you’re in luck. The latest improved version of Google TV 13 comes with enhancements in sound, HDMI support, streaming apps, gaming compatibility, and even the ability to use your phone as a remote control.
In this guide, I’ll walk you through everything step by step: from the requirements to installation on a USB drive using Rufus, to configuring Wi-Fi, apps, and remote functionality. By the end, you’ll have a fully working Google TV 13 portable setup that you can boot on most PCs.
1️⃣ What’s New in Google TV 13?
The improved Google TV 13 build introduces several important updates:
- Sound Enhancements → Better volume scaling, with tools like Viper4Android for customization.
- HDMI Support → Fixed issues where older PCs would fail to detect HDMI output.
- App Compatibility → Many streaming apps and APKs run smoothly, avoiding freezes at boot.
- Gaming Support → Lightweight games and streaming services (like Stadia alternatives) work.
- External APKs → Ability to sideload apps beyond the Play Store.
- Phone as Remote → Use your smartphone as a TV-style remote.
This makes it far more versatile compared to older builds, especially for media enthusiasts who want a TV-like experience on a PC.
2️⃣ Requirements Before You Begin
Before installing, let’s cover the basics so you don’t run into “It didn’t work” issues later.
You’ll need:
- A USB drive (32GB or more) or external HDD/SSD.
- A SATA-to-USB adapter if using an internal HDD/SSD externally.
- Rufus (latest version).
- The Google TV 13 ISO file (provided by community builds).
- A Windows PC (Windows 10 or 11) to prepare the USB.
💡 Tip: While mechanical hard drives (HDDs) work, performance will be slow. SSDs or USB 3.0 drives are highly recommended for smooth playback.
3️⃣ Choosing the Right Storage Device
You have four main options:
- Internal HDD/SSD → Works, but risky if not careful with partitions.
- External HDD/SSD → Best balance of performance and safety.
- USB Flash Drive (≥32GB) → Portable and easy to carry, but slower.
- External Enclosures → Useful for converting spare drives into portable ones.
⚠️ Important: This method installs Google TV in portable mode—it won’t overwrite your Windows installation, so your main OS remains safe.
4️⃣ Downloading and Preparing Rufus
Rufus is the tool we’ll use to create a bootable USB. It’s lightweight, free, and doesn’t require installation.
Steps:
- Visit the official Rufus site.
- Download the latest version (choose 64-bit or 32-bit depending on your Windows).
- To check system type:
- Press Windows + S → Type System Information.
- Look for System Type:
- X64 = 64-bit
- X86 or X32 = 32-bit
So far, so good! Let’s now grab the Google TV 13 files.


5️⃣ Getting the Google TV 13 Files
You’ll need two files:
- Google TV 13 Enhanced ISO
- Storage/Almacenamiento File (data storage support)
Typically, these files are shared via Mediafire or community drives. Download both and place them on your Desktop for easier access.
Once done, extract the archive using WinRAR or 7-Zip. You should see two main folders:
Google TV 13(system image)Almacenamiento(storage configuration files)
6️⃣ Creating a Bootable USB with Rufus
Now comes the critical step: making your USB bootable with Google TV 13.
Steps:
- Open Rufus as Administrator.
- Insert your USB (≥32GB).
- Under Device, select your USB.
- Under Boot Selection, drag in the Google TV 13 ISO.
- Set Persistent Partition Size to maximum (for saving data).
- Press Alt + E to enable dual BIOS mode (works on old and new PCs).
- Under Advanced Drive Properties, check Add fixes for old BIOS.
- Change Volume Label → type
BOOT. - Click Start → confirm erasing data.
Once Rufus finishes, your USB will be bootable. But we’re not done yet—we still need to manage partitions.
7️⃣ Managing Partitions for Google TV 13
After Rufus creates the USB, only a small partition (≈2.7GB) is visible. The rest is hidden. To fix this:
- Right-click Start Menu → Disk Management.
- Locate your USB (check size, e.g., 64GB).
- You’ll see a small BOOT partition and a large unallocated one.
- Right-click the unallocated space → New Simple Volume.
- Assign a letter → format as NTFS → label it
GTB 13.
Now you’ll have:
- Partition 1: BOOT
- Partition 2: GTB 13 (main storage)
8️⃣ Copying System and Storage Files
This step ensures your data persists between reboots.
- From BOOT partition, cut the
Systemfile (≈2.3GB). - Paste it into
GTB 13. - Open the Almacenamiento folder.
- Choose storage file based on your USB size:
- 16GB USB → use
8GBfile - 32GB USB → use
16GBfile - 64GB USB → use
32GBfile
- 16GB USB → use
- Extract the chosen file into
GTB 13. - You should now see a Data folder—this is your persistent storage.
This process can take 30–45 minutes, so be patient.
9️⃣ Booting Into Google TV 13
Now that your USB is ready, it’s time to boot.
Steps:
- Reboot your PC.
- Enter Boot Menu (keys vary by brand: F8, F9, F10, F12).
- Select your USB.
- You’ll see boot options for Google TV 13 (Kernel 6.1, etc.).
- Pick one and press Enter.
Congratulations—you’re inside Google TV 13!
🔟 Initial Setup (Language, Wi-Fi, Play Store)
On first boot:
- Choose your Language.
- Skip phone setup if prompted.
- Configure Wi-Fi or skip initially to test performance.
- Choose a device name (e.g., “Living Room TV”).
- Access Settings → Wi-Fi to connect later.
- Log into Google Play Store with your Google account.
Now you can install apps directly or sideload APKs.
11️⃣ Installing Apps and APKs
Google TV 13 supports:
- Google Play Store → Official apps.
- Alternative APK stores (like Aptoide).
💡 Example: Netflix may not appear in Play Store, but you can sideload via Aptoide.
You can also install sound enhancers like Viper4Android for better audio.
12️⃣ Common Issues and Fixes
Even though this build is stable, you may encounter problems. Here’s how to solve them:
- Black Screen After Logo → Press Windows key to return to menu.
- HDMI Not Detected → Update drivers or use HDMI-VGA adapters. For older PCs, check community scripts.
- No Wi-Fi Option → Use USB tethering from your phone.
- Storage Not Saving → Ensure the Data folder was extracted properly.
13️⃣ Using Your Phone as a Remote Control
One of the coolest features: using your phone as a remote.
Steps:
- Install DroidMote Server on Google TV.
- Enable it under Settings → Accessibility.
- Install DroidMote Client on your Android phone.
- Connect both devices to the same Wi-Fi.
- Select your Google TV device in the app.
Now your phone’s arrows, home, and back buttons work like a smart TV remote!
14️⃣ Frequently Asked Questions (FAQ)
❓ Can I install Google TV 13 directly on my PC hard drive?
It’s possible but not recommended—risk of overwriting Windows. USB portable mode is safer.
❓ Will this work on old PCs?
Yes, thanks to dual BIOS boot mode. Even legacy systems can boot.
❓ Does Netflix work?
Not directly from Play Store, but you can sideload via Aptoide.
❓ How much space do I need?
At least 32GB USB. For smoother use, 64GB+ is recommended.
🔚 Final Thoughts
Running Google TV 13 on a USB drive is a fantastic way to test Android TV features without touching your Windows installation. With the right steps—Rufus setup, partition management, file copying—you can enjoy streaming apps, HDMI support, gaming, and even remote control via your smartphone.
Sure, free community builds may have small bugs, but overall, this setup works smoothly and reliably on most PCs. If you’ve ever dreamed of turning an old laptop or desktop into a smart streaming box, this is the way to do it.
⚠️ Disclaimer: This guide is for educational purposes only. Google TV 13 community builds are experimental. Always back up your data before modifying drives or boot partitions.
Tags: google tv 13 installation, bootable usb google tv, android tv pc, rufus tutorial, run android tv on pc, google tv usb setup, streaming apps pc, hdmi fix google tv
Hashtags: #GoogleTV #AndroidTV #BootableUSB #Rufus #TechTutorial