If you’ve been relying on BlueStacks or similar emulators to run Android apps on your PC, it’s time to reconsider. Google has officially released its own Android emulator for Windows, and it runs on stock Android 14. Optimized, lightweight, and directly from the creators of Android, this emulator promises to deliver a smoother, faster experience—especially compared to the resource-heavy alternatives.

Let’s explore what makes Google’s new emulator a compelling alternative and how to get started with it.
Why Move Away from BlueStacks?
While BlueStacks has been the go-to Android emulator for years, it has its limitations—especially in terms of RAM usage and performance lag. Many users have reported that BlueStacks consumes a significant chunk of system resources, which can slow down your PC and disrupt gameplay or app testing.
Google’s new emulator changes the game by offering:
- Stock Android 14
- Better resource management
- Faster installation and setup
- Compatibility with most apps (via sideloading)
Introducing Google Play Games Emulator for Windows
While many are already familiar with Google Play Games for PC—a platform tailored for Android gaming on Windows—it’s limited to games only. But the new Google Play Games Emulator expands capabilities beyond gaming.
Though primarily designed for developers, the emulator is available for everyone and offers:
- Full Android 14 environment
- The ability to install custom APK files
- Adjustable settings like refresh rate, aspect ratio, and performance tuning
- Built-in Play Store with games
- Minimal CPU and RAM usage
How to Download and Install Google’s Android Emulator
Step 1: Download the Emulator
You can download the emulator directly from the official Google Play Games website. Choose the Stable version or explore the Beta version for new features.
Step 2: Install the Emulator
Once downloaded, run the small installer file (just a few MBs) and follow the on-screen instructions. The setup is quick and straightforward.
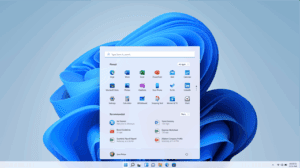
Step 3: Explore the Interface
After installation, the interface may appear minimal at first. Swiping up reveals essential apps such as:
- Settings
- Google Play Store
- Google Play Games
A Leap Ahead: Android 14 on PC
This is where the emulator truly shines. Unlike BlueStacks (which only offers Android 11), Google’s emulator runs the latest Android 14. This upgrade ensures better app compatibility, improved performance, and future-proofed support for upcoming apps and features.
One difference to note: the emulator lacks the traditional navigation bar. Instead, use keyboard shortcuts:


- Ctrl + B = Back
- Ctrl + H = Home
Installing Custom APKs: AOW Tools Setup
While the built-in Play Store offers many games, you’ll need to sideload APK files to install apps or games not listed there.
Step 1: Install AOW Tools
- Search for AOW Tools in the Microsoft Store.
- It may say “Trial version”—but don’t worry, it’s free as mentioned in the app description.
- Click “Free Trial” to install.
Step 2: Configure the Device Connection
- Open AOW Tools and go to the Device section. If no devices are listed:
- Go to the Help menu and copy the setup code.
- Open Command Prompt as Administrator.
- Paste the copied code and press Enter.
- It should confirm with “OK.”
Return to AOW Tools and your emulator should now appear as an online device.
Step 3: Sideload APKs
- Download APK files of your choice.
- Drag and drop the APK into the AOW Tools window.
- The installation will start automatically.
- Once done, open the emulator and your app will be ready to use.
Note: Some online multiplayer games like Free Fire may not work through this method, as they require installation via the Play Store to link with your Google account.
Performance & Resource Usage
Let’s talk numbers. Testing with Asphalt Unite, the gameplay was smooth and visually impressive. But what stood out was the resource efficiency:
- CPU Usage: Only 4–6%
- RAM Usage: Around 1 GB
That’s remarkably low compared to traditional emulators—especially BlueStacks—making this Google emulator ideal for low and mid-range PCs.
Customization Settings
Although the emulator has a clean interface, some powerful customization options are tucked away.
Access Advanced Settings:
- Right-click the emulator icon from the System Tray.
- Here, you can:
- Boost FPS up to 144Hz
- Switch between GPU types
- Adjust mouse input modes
- Select aspect ratios
- Enable developer options
Final Thoughts
Google’s new Android emulator for Windows is a game-changer in every sense. With Android 14, better optimization, and lower resource usage, it easily outperforms many third-party alternatives. While sideloading APKs may require a bit of setup, the performance payoff is worth it.
If you’re a developer, mobile gamer, or just want to explore Android on your PC, this is the emulator to try in 2025.
Tags:
android emulator, google android emulator, google play games emulator, install android 14 on pc, android emulator for windows, sideload apk on pc, best android emulator 2025, aow tools, how to install apk on google emulator, android gaming on pc, emulator vs bluestacks, android development tools
Hashtags:
#androidemulator #googleemulator #android14 #playgamesonpc #androidonwindows #apkinstallation #emulatorguide #aowtools #googleplaygames #techguide


