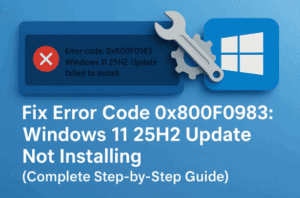
If you’re unable to install Windows 11 updates KB5066835 or KB5066128 and seeing the error code 0x800F0991, you’re not alone. Many users encounter this installation issue after downloading the cumulative update or .NET Framework patch. The good news is, you can fix this problem easily by following a few systematic troubleshooting steps.
In this detailed guide, we’ll go through every method step-by-step, explaining what each does, why it’s necessary, and how to perform it safely. By the end, you’ll have your system updated and running smoothly again.
1. Understanding the Problem
Before we dive into fixes, let’s understand what this update error means.
The error 0x800F0991 is a Windows Update installation failure, which typically occurs due to:
- Corrupted Windows update cache files.
- Broken system components or missing dependencies.
- Inactive update-related services.
- Network interruptions during update installation.
- Compatibility mismatch between your Windows version and update type (e.g., 24H2 vs. 25H2).
This means we need to repair system files, reset update services, and possibly install the update manually if automatic methods fail.
Let’s begin with the core repair process.
2. Run System Repair Commands
The first step is to use Command Prompt to run three important scans that repair corrupted system files and components.
Step-by-step:
- Type cmd in the Windows search bar.
- Right-click Command Prompt → select Run as Administrator.
- When prompted, click Yes to allow.
Now, run the following commands one at a time, waiting for each to finish before proceeding to the next.
Command 1 – System File Checker (SFC)
sfc /scannow
This command scans for missing or damaged Windows files and automatically repairs them. The scan may take 10–15 minutes.
Command 2 – Deployment Image Servicing and Management (DISM)
Once SFC is complete, run:
DISM /Online /Cleanup-Image /CheckHealth
DISM /Online /Cleanup-Image /ScanHealth
DISM /Online /Cleanup-Image /RestoreHealth
These three DISM commands check the integrity of your system image and restore corrupted Windows components using Microsoft’s online source.
Command 3 – Component Store Repair
If the previous two scans complete successfully, restart your PC, open Command Prompt again as administrator, and run:


chkdsk C: /f /r
This will check and repair disk errors. When prompted to schedule it, type Y, restart the computer, and allow it to run.
After the scan completes and your system restarts, try installing the update again. If it still fails, let’s move to the next solution.
3. Pause and Resume Windows Update
Sometimes, the update process itself gets stuck in a loop. Restarting the update cycle can help refresh it.
Steps:
- Open Settings → Windows Update.
- If you see a Retry button, click it once.
- If that doesn’t work, click Pause updates for 1 week, then click Resume updates after a few seconds.
- Windows will restart the update service and attempt to reinstall KB5066835 or KB5066128 again.
If the error persists, continue to the next section.
4. Restart Key Windows Update Services
Windows updates depend on background services. If these services are disabled or not running properly, the update will fail.
Here’s how to restart them:
- Type services.msc in the Windows search bar and hit Enter.
- In the Services window, find these three entries:
- App Readiness
- Windows Update
- Background Intelligent Transfer Service (BITS)
Let’s configure them one by one.
Configure App Readiness
- Double-click App Readiness.
- Set Startup type to Automatic.
- Click Apply, then Start if available.
- Click OK, then right-click again and choose Restart.
Configure Windows Update
- Double-click Windows Update.
- Set Startup type to Automatic.
- Click Apply, then Start, and OK.
- Finally, right-click it again → Restart.
Configure BITS
- Double-click Background Intelligent Transfer Service.
- Set Startup type to Automatic.
- Click Apply, then Start.
- Click OK, and right-click again → Restart.
Once done, close the Services window and try updating again.
If the update still fails, we’ll install it manually using the Microsoft Update Catalog.
5. Manually Install the Update from Microsoft Update Catalog
If the automatic installation doesn’t work, you can download and install the update manually.
Step-by-step:
- Go to the official Microsoft Update Catalog.
- In the search bar, type:
KB5066835(or KB5066128 if that’s the one failing). - Press Enter.
- Find the update that matches your Windows version and system type.
To verify your system type:
- Press Windows + R, type
winver, and hit Enter.- Check your version (e.g., 24H2, 25H2).
- Open Settings → System → About → look under System type to confirm if it’s 64-bit.
Now, choose the matching download link (for example, “Windows 11 Version 25H2 x64-based Systems”).
5. Click Download, open the .msu file once it finishes, and follow the on-screen instructions.
After installation completes, restart your PC and confirm if the update is installed successfully.
6. Use the “Fix Problems Using Windows Update” Repair Tool
Windows 11 includes a recovery option that can reinstall your system files while keeping your apps and data intact.
This can fix deep-rooted Windows Update component corruption.
Steps:
- Open Settings → Windows Update → Advanced Options → Recovery.
- Under Fix problems using Windows Update, click Reinstall now.
- Wait for Windows to repair itself. This process can take 30–60 minutes depending on your PC’s speed.
- Once done, restart the computer.
After the repair, open Windows Update again and try installing KB5066835 or KB5066128.
7. Use Media Creation Tool for Reinstallation
If none of the above solutions work, using the Media Creation Tool is your best bet. It reinstalls the core Windows system while keeping your files and apps.
Here’s how:
- Visit the official Microsoft Windows 11 download page.
- Scroll down and click Download Now under “Create Windows 11 Installation Media.”
- Run the downloaded
.exefile. - Accept the license agreement.
- Choose Create installation media for another PC, then click Next.
- Select your edition and architecture (Windows 11, 64-bit).
- Choose ISO File and click Next to save it on your desktop.
- Wait for the download to finish and click Finish.
After the ISO file is saved:
- Double-click it to mount it as a virtual drive.
- Inside, find and run setup.exe.
- Click Yes → Next → Accept.
- When prompted, make sure Keep personal files and apps is checked.
- Click Install.
Windows will reinstall itself while keeping your data safe. After the setup completes, go back to Windows Update and install the pending updates — they should now succeed without errors.
8. Additional Tips
Here are a few more tips to ensure your updates install smoothly in the future:
- Always maintain at least 10–15 GB of free disk space before major updates.
- Disable third-party antivirus temporarily during update installations.
- Ensure your PC’s date and time are correct — incorrect system time can cause update verification failures.
- Connect to a stable internet connection; avoid mobile hotspots for large updates.
9. Frequently Asked Questions
Q1. What causes error 0x800F0991 during Windows Update?
It’s usually due to corrupted update files, inactive update services, or damaged system components that prevent installation.
Q2. Will using the Media Creation Tool delete my files?
No, as long as you choose the option Keep personal files and apps, your data remains untouched.
Q3. Can I safely skip these updates?
It’s not recommended — these cumulative and .NET updates include security fixes. Use manual installation or repair methods instead of skipping them.
Q4. Is using the Update Catalog safe?
Yes. The Microsoft Update Catalog is the official source for downloading standalone Windows updates.
Q5. Should I run DISM and SFC often?
Running them occasionally (once a month) helps maintain system integrity, especially after repeated update errors.
Final Thoughts
Windows update errors like 0x800F0991 can be frustrating, but with patience and the right steps, they’re completely fixable.
Start by repairing system components with SFC and DISM, then restart update services. If automatic installation fails, use the Microsoft Update Catalog or Media Creation Tool for a manual fix.
Once done, your Windows 11 system will be fully updated, stable, and ready for future patches without interruptions.
Disclaimer:
Always back up important files before performing system-level repairs or reinstallations. The Media Creation Tool and repair reinstall are safe, but backups add an extra layer of protection against unexpected issues.
#Windows11 #KB5066835 #KB5066128 #WindowsUpdate #Error0x800F0991 #MicrosoftFix #SystemRepair #WindowsTroubleshooting


